Sprouting beans was one of those “real food” things I put off for a while.
Just seemed like a lot of work to me, and I didn’t use beans often enough anyway.
Until I had kids. And a budget.
And although the frugal aspect of using beans in our diet was a big push to learning how to cook with them, what actually drove me to having sprouted beans in our weekly meal plan was learning how nutritious beans are once they are sprouted, and how much easier they digest in sprouted form.
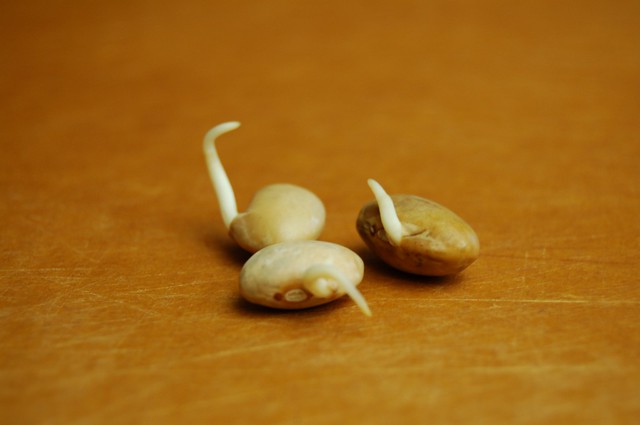
In a nutshell, sprouting neutralizes phytic acid found in the bean that binds to vital minerals like magnesium and iron. Neutralizing the phytic acid makes the minerals available to the body to absorb. Sprouting beans also breaks down the complex sugars that make you experience intestinal gas, so you will notice how much easier you digest sprouted beans!
And after a couple sprouting attempts it became apparent that sprouting really wasn’t that hard or time consuming.
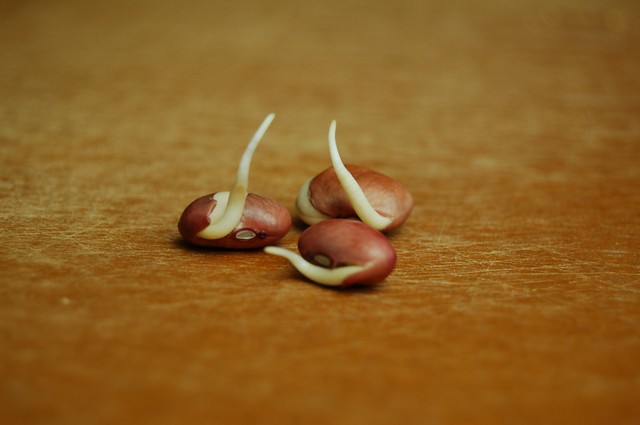
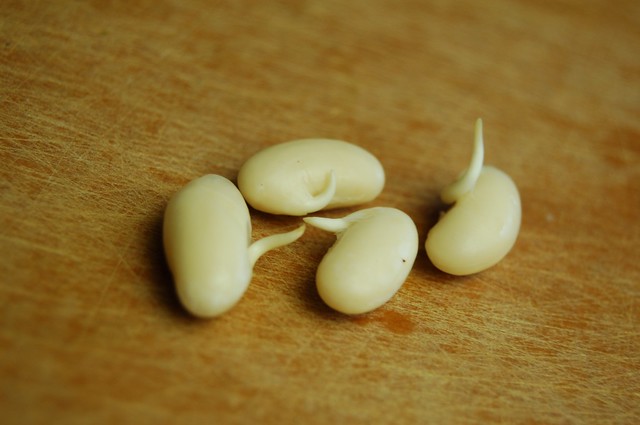
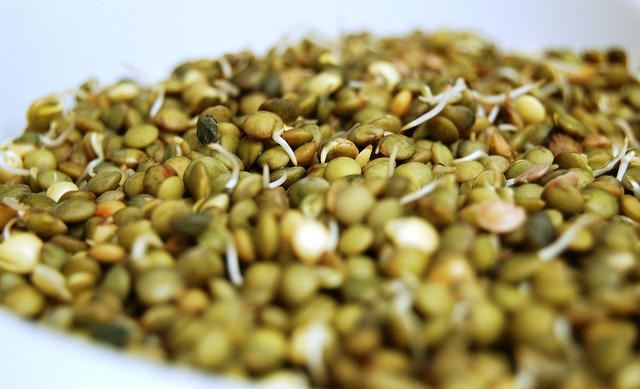
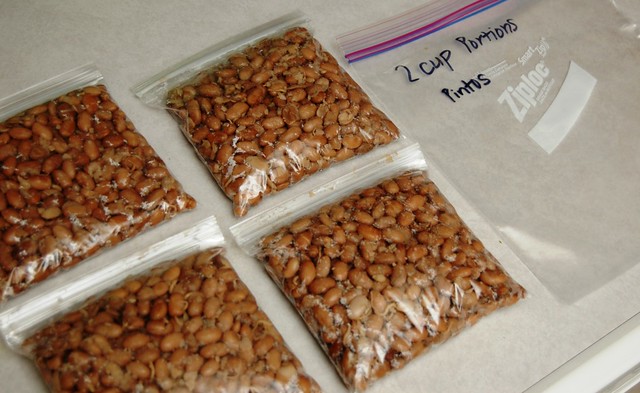
My goal in sprouting beans is to do large quantities at the same time so I don’t have to do it very often. I keep sprouted, cooked beans laying flat in freezer bags on a shelf in the deep freezer. They make very simple pull out add-ins to a stir fry, or a quick pulse in the blender for bean dip at lunch.
So here are the basic instructions. I will be posting some great soups and dips along the way, and in the meantime you can use your beans to add nourishment to your salads, stir fry, and lunch wraps!

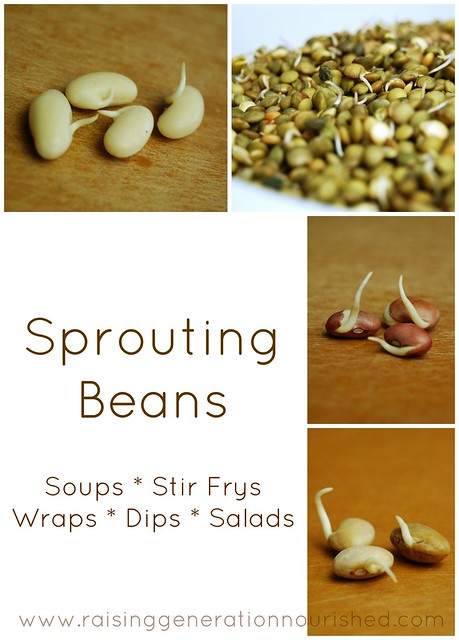
Sprouting Beans For Soups, Stir Frys, Wraps, Dips, and Salads
Ingredients
- Dry bean of choice I usually get just over a pound at a time
Instructions
- Put your dry beans in a large bowl and fill with water to cover the beans a good 3 inches.
- Put the bowl under the light in your oven 12 hours.
- Strain out the water, rinse the beans, and put them back in the big bowl under the light in your oven (without water this time!). The warm light does help move along the sprouting process I have found. If you don’t have a light in your oven just keep the bowl somewhere very warm in your kitchen.
- Keep the bowl under the light until the beans sprout. Rinse the beans 3 times per day while you are waiting for them to sprout. Most beans take just 24 hours-ish. Others (like garbanzos) take a good 2 days.
- Once the beans have sprouted, put them in a large stock pot and fill with water to cover by a couple inches.
- Bring it to a boil and reduce to simmer with a lid on until the beans are bite tender. Some beans take a good hour or so, others just under an hour.
Tips:
- Do a couple different beans at the same time to batch up. As long as you have the oven light on you might as well fill that oven up! Store cooked beans in 1-3 cup portions based on what you plan to use them for. Lay them flat in sandwich bags, and then store them in a larger freezer bag together.
- 1 ½ cups of cooked beans equals 1 can of beans! Put them into any recipe you have!
- I do opt for organic beans. Our local health food store carries bulk beans in just about every variety and it is a small store – I would imagine you can get bulk (cheap) organic beans just about anywhere. I usually get just over 1 lb bags.
- I start my kids trying tastes of beans after they turn 1. Grains and legumes are just easier to digest after the age of 1. And sprouting the beans definitely will help the digestion process along. Beans offer a great source of B12, iron, fiber, protein, etc. And my girls loved them in any form! Bean dips like hummus or any sort of bean soup are big hits!
So tell me about what you love using beans in! Let me know if you try sprouting for the first time!


Do you use glass, metal, or plastic bowls to sprout your beans?
Hi Amanda! I have ceramic bowls but I have never read that the type of bowl affects sprouting. I know that metal affects fermenting but sprouting is different. Hope that helps!
Is this way better for you than soaking in apple cider vinegar water? Thanks!
Hi Jamie! Actually for beans you don’t need any acid during the soaking. Just plain water for the soak, and then rinse with plain water and back into the bowl without the water for the sprouting. So no ACV needed! Hope that helps!
I sprouted beans this week to freezer for easy meals. I thought of you!
Haha! Awesome 🙂
Help Renee! I tried sprouting some pinto beans and something happened! First of all I soaked them in water for the 12 hours from 6pm to 6 am the next morning. Then I drained and rinsed them. I put them back into the bowl without water in the oven with the light on. I rinsed them 3 times throughout the day with clean water, and put them back into the oven. I left them in the oven over night because they had not sprouted yet. I rinsed them before going to bed, but I did not get up during the night to rinse them. This morning they smelled sour and were slimmy when I rinsed them. In fact the whole house stunk! They had not sprouted yet either. SO…what did I do wrong? All my organic beans I ruined. 🙁
Hi Jamie! Boy you sure did everything right! I do the same method – I have had a few times in the past where I got a foul smell over time and those are just old/bad beans. When I go pick out beans at our store I choose from way in the back (where they put the newest beans – they put the oldest beans in the front!) and I don’t have that problem. Unfortunately I would toss the beans you have because that foul smell means they are old and possibly even molding. I’m sorry! That really stinks! Pintos are really simle sprouters so you shouldn’t have to go longer than 36 hours. I hope this helps!
Oh I’m so bummed. I did all this with organic navy beans and while some sprouted they seriously made the house stink. I don’t live in a place where even organic beans are something I can readily find so I have to order. A tiny part of me is hoping my beans are ok but I just don’t have a lot of experience with beans. 🙁
Hi Liz! Beans are tough because if you purchased old beans, they probably were bad before you even got started, and I have smelled that before! It’s awful! Fresh beans will have a smell – but it shouln’t smell sour or really off.