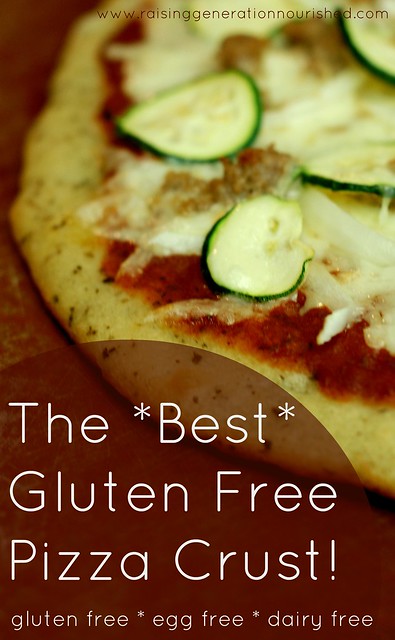
The *best*?!
I know it is a bold statement –but I have to admit, I love making pizza so much that I have gone through just about every imaginable way of making crust that fits a gluten free lifestyle.
Let’s be honest. Gluten is SO good. Right?! Fluffy, flavorful, and, well…gluten-y!
But I am convinced now, more than ever, that the majority of people would be better off gluten free – especially the type of wheat most people are buying in the stores right now. It just isn’t worth the inflammation and digestive punch that it makes over time.

The *Best* Gluten Free Pizza Crust!
Ingredients
- ½ cup warm water warm to touch – not hot or it will kill the yeast
- 2 tsp gluten free active dry yeast
- 1 TB organic pure cane sugar
- ½ cup white rice flour
- ½ cup tapioca flour
- ¼ cup brown rice flour
- ½ tsp aluminum free baking powder
- 1 TB dry basil or Italian seasoning
- ½ tsp garlic powder
- ½ tsp salt
- 2 TB olive oil
Instructions
- In a small bowl, mix warm water, yeast, and sugar, and let it sit for 10 minutes or until frothy.
- In a medium bowl whisk the flours, baking powder, and seasonings until combined.
- Add the olive oil and frothy yeast mixture to the dry ingredients and stir well to combine. You are looking for a wet batter – just a little thicker than pancake batter. If it feels too thick/stiff/dry add another few tablespoons of room temp/warm water.
- Cover bowl with towel and let rise for an hour.
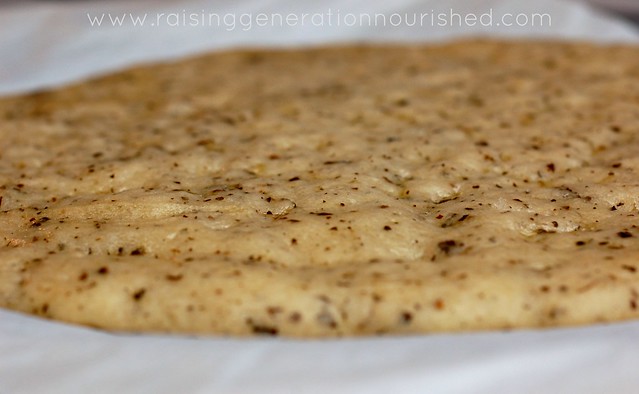
- Slide the batter onto parchment lined pizza pan or baking sheet, coat your hands with some olive oil, and spread out the batter into a circle or square of your choosing.
- Cover the pan lightly with aluminum foil, and let the crust rise for 10-15 minutes in a warm spot. I set mine up on top of the stove while the oven is pre-heating.
- Bake still covered at 375 degrees for 10 minutes.
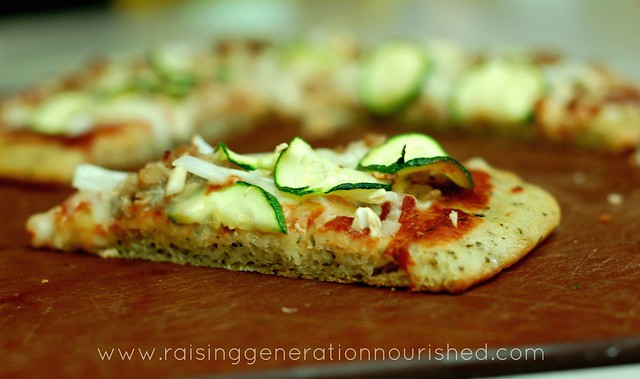
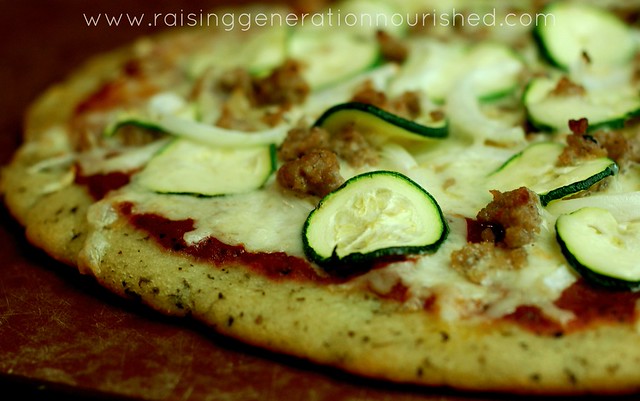
- Take the crust out of the oven, put your toppings on, and then bake for another 10-15 minutes.
Product links in this section are from affiliate partners. There is no extra cost to you, and it helps maintain the site and provide free content to you! Know that I would never recommend a product that I wouldn’t use or feed my family!
Tips:
- It isn’t as fussy as it looks. If you don’t have time to wait for the hour rise on a busy weekday, you can make up the crust on the weekend, cook it off the first 10 minutes, and then freeze it up. During the week you only have to take it out to thaw add your toppings to bake!
- THIS
 is the yeast I use.
 - I get my tapioca flour ,white rice flour, and brown rice flour on Amazon for the best price.
- THIS is the aluminum free baking powder I use.
Let me know if you give this a try on your next pizza night!


This looks absolutely amazing!! Can’t wait to make this. Thanks for such a great recipe.
Thanks Kristin! I hope you love it as much as we do!
Quick question: Do you think I could use honey or agave instead of the sugar in this recipe?
Jennifer honey should work – the yeast just needs something to wake it up and feed on. I do not recommend agave. I hope that helps!
You know I can’t wait to try this, right??
Yeah! Let me know how the boys like it 🙂
That does look pretty tasty! 🙂
Thanks Raia!
I made this tonight and I had to comment! It was absolutely fantastic and easy to make! Thank you for the wonderful recipe!! 🙂
Oh yay! Thanks for letting me know! (now i wish i had some pizza 😉 )
This was delicious! My crust looked just like yours. I’ll be making this again!!
Hi Stephanie! Perfect! Thank you for coming back to let me know!
I haven’t worked with all these different gluten free flours much at all, so I was scared to try this crust! I’m so used to wheat flour! I made this last night and the entire family loved it! I doubled and made 2 pizzas so we had variety and leftovers for lunch. It was great last night and great for lunch today!
Hello! Just curious if you would be willing to share your old version of crust with the the egg in it? I’d love to try it 🙂 thank you!
Hi Alicia! I don’t even remember it anymore – I did it so many different ways. I actually have been doing a different crust in the last few months that I like even better (easier! quicker!) and I just have to test it one more time to be sure it is behaving the same each time and I will post it 🙂
Hi there! Looking for a gf crust for my family and this looks great. Is this enough for 4 people? (2 adults and 2 older kiddos?) Or would you double it? Thx!
Hi Kelly! I usually spread this between 2 pizza pans or a large jellyroll pan and it feeds my family of 5 – 2 adults and 3 small children, well. I think you would be good with just one recipe 🙂 We usually have side salads to if that helps 🙂
Thank you! Just got the ingredients. I’ll make some shishito peppers on the side. 🙂
Sounds great!
Do you think the crust can be frozen after it is baked? Thanks!
Hi Jamie! I have a friend that does this! She par-bakes it – as in she stops after the first baking time (before putting the toppings on and baking again), cools it, and freezes.
Hi Renee Made your pizza dough and I love it , can I just freeze the dough, thaw out overnight in the frig , and let rise at room temperature . Thank you
So glad you enjoyed it Claudette! I have never tried freezing the dough before but I think it would be worth trying!
Hello Rene, can i make this crust with just gluten free flour?
Hi Jill! I have swapped the flours for the Namaste GF Flour blend with success 🙂
A giant thank you! This recipe is amazing and quite possibly the easiest gf bread I’ve yet to make. I’ve made it as written (minus the Italian seasoning) nearly a dozen times. I parbake it a bit and then use for pizza in my wood fired stove, but I’ve used it more often, baked in a square pan, buttered at the end and eaten just as garlic breadsticks. On various occasions, I’ve halved the yeast, increased the water so it’s pourable, used instant yeast, reduced the sugar…despite all of my random modifications, it has never failed to turn out and leave me with delicious and quick bread — all without xanthan gum. Thanks so much!
That is awesome Heather! Thank you for sharing! I bet it is amazing in the wood fire stove!