
When people make the jump to more of a “real food” way of eating, I think baking is on of those things that some get intimidated by.
Some because many of us just plain didn’t grow up cooking in the kitchen, short of mixing up a boxed cake mix. And some because we maybe don’t think we can have the same kind of baked goods we are used to still taste good in a real food way!
I can promise you one thing for sure. Whether you have kitchen know-how or not, you can do this. I had practically zero kitchen experience. My husband cooked a majority of our meals when we were first married, let alone bake a biscuit. I am completely self taught and I really think with some guidance anyone can do it.
My goal in this post is to meet everyone where they are. If you are new to real food or a seasoned real foodie, I hope this can be a resource for you to hang onto for reference.
And since many people come to real food after finding out about food intolerances or health issues, I have included many allergen notes.
For people with food allergies or sensitivities, this time of year starts getting tricky. Some will compromise thinking, “Oh it’s only one cookie.”, but in reality for those with gut conditions or who are trying to heal, that one cookie can mean that the months of avoiding that certain trigger have gone down the drain. It can take months for the gut to re-coup from that “one cookie” – even if you don’t necessarily feel the effects.
Coming from someone that spent a year exclusively off grain, egg, dairy, and nut…the holidays can be a major bummer. BUT – sticking to your guns and not giving in is SO worth it. You will be rewarded with a gut that will heal.
So over the years I have gotten a handful of tips and tricks under my belt that have made real food and allergen free baking much easier – and enjoyable. Here is some of my best advice!
- CRISCO: While butter or coconut oil
 works, things like pastured lard or palm shortening mimic Crisco the best. I buy coconut oil at Costco. I get leaf lard from our pasturing pig farmer and render it myself for lard. And I get the palm shortening on Amazon.
 - VEGETABLE OIL: Use melted butter or coconut oil, avocado oil, or olive oil. Olive oil has a low smoke point though so use it sparingly in heated recipes. I get all 3 of these liquid oils at Costco.
- MARGARINE: Use softened butter or coconut oil. Pastured lard or palm shortening works too.
- LOW FAT MILK/SOUR CREAM/YOGURT/CHEESE: Use full fat (always!) milk, sour cream, yogurt, or cheese. Always raw when you can. If you are dairy free use full fat coconut milk
or coconut yogurt. - WHITE SUGAR OR CORN SYRUP: coconut sugar, sucanat, organic pure cane sugar all work. If your recipe needs a certain color though the sucanat will give a brown color so keep that in mind. If you need to be refined sugar free try pure maple syrup, raw honey, or blackstrap molasses. If you need to make it powdered sugar, you can either buy organic pure cane sugar in powdered sugar form, or you can make your own. Just use a high powered blender or coffee grinder and blend your pure cane sugar really fine with some tapioca flour. I get all of these sugars at Costco. I purchase raw honey and pure maple syrup here locally.
- CANDY/CHOCOLATE CHIPS/SPRINKLES/FOOD DYES: Food dyes in particular are extremely linked to behavior issues in children, so it is important to steer clear of them. For most “candy” or chocolate chip swapping I like using these allergen friendly chocolate chips and chocolate chunks. I like these naturally dyed sprinkles too and use them for Christmas cookie decorating. They last forever since we only use them around the holidays and maybe a birthday. And then as far as dyes go, I have not had the greatest of luck with the liquid dyes you find in the store or online – I think they make the frosting or batter runny because you have to use a lot. I prefer powdered dye and you can either make your own by dehydrating fruits or veggies in the color you want (ie beets for red, squash for orange, spinach for green) and then grind up, or you can sometimes find powdered dye in your health food stores.
FLOUR TIPS:
If you are one of the blessed ones that don’t have gut issues going on and can handle digesting wheat, I encourage you to use wheat from traditional species like Einkorn![]() for your baking needs. It is exactly the type of wheat your ancestors would have eaten – not a crazy hybrid that your body won’t know what to do with like the all purpose flours you will find at the store.
for your baking needs. It is exactly the type of wheat your ancestors would have eaten – not a crazy hybrid that your body won’t know what to do with like the all purpose flours you will find at the store.
I will be honest in saying I do not have a lot of experience baking with wheat since we are a gluten free home. I have a myriad of reasons why, and while I am not against wheat in the least, I am opposed to the growing and manufacturing process of the wheat on most store shelves today. If you are new to using einkorn for your baking I found this article VERY informative on how to get started! I also thought this article was very informative about the different types of ancient wheats to use versus the modern hybrids.
If you in any way have health issues that have roots in gut health (could be anything from autoimmune issues to bowel disturbances, to reccurent illness…), then I can’t encourage you enough to give gluten free a try 🙂 I know it sounds impossible to some, but it really can be done – and you will feel so much better!
IF YOU ARE GLUTEN FREE, I have found the best way to mimic the all purpose flour we are so used to baking with is to blend at least 3 gluten free flours. It will help with the taste AND texture immensely. My favorite blend is a 1:1:1 ratio of white rice flour![]() , tapioca flour
, tapioca flour![]() , and either brown rice flour
, and either brown rice flour![]() or sorghum flour
or sorghum flour![]() . So if your recipe calls for 3 cups of all purpose flour you can sub 1 cup of each of those gluten free flours and you should be good!
. So if your recipe calls for 3 cups of all purpose flour you can sub 1 cup of each of those gluten free flours and you should be good!
IF YOU NEED TO BE GRAIN FREE, a blend of blanched almond flour![]() , coconut flour
, coconut flour![]() , and tapioca flour
, and tapioca flour![]() is a good idea. Coconut flour is very absorbent, so if you use an equal swap you will have to make up for it with more liquid somewhere, or half your amount used. If your recipe calls for 3 cups of all purpose flour start out with 1 cup almond flour, 1 ½ cups tapioca flour, and ½ cup coconut flour and see how your batter feels.
is a good idea. Coconut flour is very absorbent, so if you use an equal swap you will have to make up for it with more liquid somewhere, or half your amount used. If your recipe calls for 3 cups of all purpose flour start out with 1 cup almond flour, 1 ½ cups tapioca flour, and ½ cup coconut flour and see how your batter feels.
IF YOU NEED TO BE GRAIN & NUT FREE sub more tapioca or potato flour and coconut flour for that almond flour. The texture will be different/denser – but it does work and you will have something you can have! I purchase my grain free flours on Amazon – and the brands I linked are important because some brands will clump and don’t measure well – these work great.
BINDER TIPS:
Eggs are the most common binder in most recipes, but with egg allergies on the rise many cannot even have them in baked goods anymore.
¼ cup of fruit or squash puree makes a good “egg” to bind – banana, applesauce, squash, and even sweet potato make for good binders. It can also help add some non sugar sweet to your recipe if that is what you are going for.
I have recently been using gelatin eggs and have really liked the bind they give. There is zero flavor so it works well when you don’t want to flavor of the fruit to what you are baking.
While flax eggs do work, some find flax to be hard on digestion so it isn’t always an option for some.
RISE TIPS:
Eggs give fantastic rise to baked goods. If you are completely grain free and can handle eggs, adding more egg will give you a better rise. And since the coconut flour is so absorbent, adding an extra egg helps with the moisture.
If you are egg free, there are a couple tricks you can use that really work! The acid in apple cider vinegar or lemon juice reacting with baking soda and baking powder makes great rise! Generally a tablespoon or 2 of the acid is all you need in a recipe. You can take a TB or so of the liquid out of the recipe to compensate for the extra moisture – the taste of the ACV completely bakes out. I do find you will taste a hint of lemon so if you don’t want that then use the ACV. Check out the rise on these cupcakes without any eggs! It works well!
A note on xanthan gum…the jury is still out for me on whether xanthan gum is safe or not. It really helps gluten free baked goods rise and gives a great gluten-y texture though! For my day to day baked goods like muffins and biscuits we’ll be having week in and week out, I choose to skip the xanthan. For items like birthday cakes and pies that we have once or twice a year, I use it.
MOISTURE TIPS:
Gluten and grain free flours tend to give a drier finish if you aren’t careful. Making sure there is plenty of fat in the recipe is key. Sometimes taking out some of the water or milk and subbing for sour cream, butter, or coconut oil![]() is all you need. My grain free friends need to be careful with the coconut flour as that can really make things dry up. Get a good amount of fats in there – especially if you can’t have egg in the recipe. Applesauce and banana seem to really help with moisture in that case too.
is all you need. My grain free friends need to be careful with the coconut flour as that can really make things dry up. Get a good amount of fats in there – especially if you can’t have egg in the recipe. Applesauce and banana seem to really help with moisture in that case too.
EQUIPMENT TIPS:
There are some must have kitchen items I wanted to share with you. I definitely am a minimalist on kitchen equipment, and am certainly not made of money, but I do have some favorites that have made allergen friendly baking much easier.
- SILICONE BAKING CUPS: I have mentioned these on every muffin or cupcake post of mine because they are SO helpful. And not just for clean up. And they do clean up SO easy. For some reason my baked goods rise SO much better in them. I have taken the same batter and baked off half in the muffin cups and half in a buttered tin and the rise is completely different. You’ll get a beautiful dome everytime in the muffin cups. They also save on waste if you are a paper cup user. And, to be honest, it saves me on butter. It takes more butter than I want to use for greasing to get all those little cups!
- SILPAT AND JELLY ROLL PANS: Silpat will make your clean up life so much easier. I bake everything from simple dinner biscuits to large roasted squashes on them on an almost weekly basis, and I can get these tasks done start to finish, into the oven, and clean up done fast because clean up is so easy. Get some nice big jelly roll pans and a silpat for each one. Then you can make large batches of granola bars, biscuits, pizza dough, etc much easier.
- GLASS LOAF PAN: I feel like glass loaf pans bake more evenly and for some reason give great rise compared to the other loaf pans I have. We make a lot of quick breads on the weekend because we don’t keep pricey GF breads around the house – banana bread and apple bread are our favorites!
- FOOD PROCESSOR: While I would just love to have a KitchenAid someday (!), my food processor does so many things. The size I have is perfect for blending entire batters for breads like banana bread – dump it all in, blend and pour into the loaf pan. And it makes great pie crust because it pulses the lard or butter in perfectly.
- DEHYDRATOR: Dehydrated fruit makes great muffin, granola, and cookie additions, It doesn’t get any easier than just getting them out on your tray and drying them out! I also use my dehydrator for making candied nuts for gifts, or drying out salted nuts for baked goods. The dehydrator I have is in the middle of the road in price and it works fantastic.
Ok! So shoot me some questions I might not have covered and tell me your favorite real food baking tips!
This post was shared at Fat Tuesday, Real Food Wednesday, & Allergy Free Wednesday!


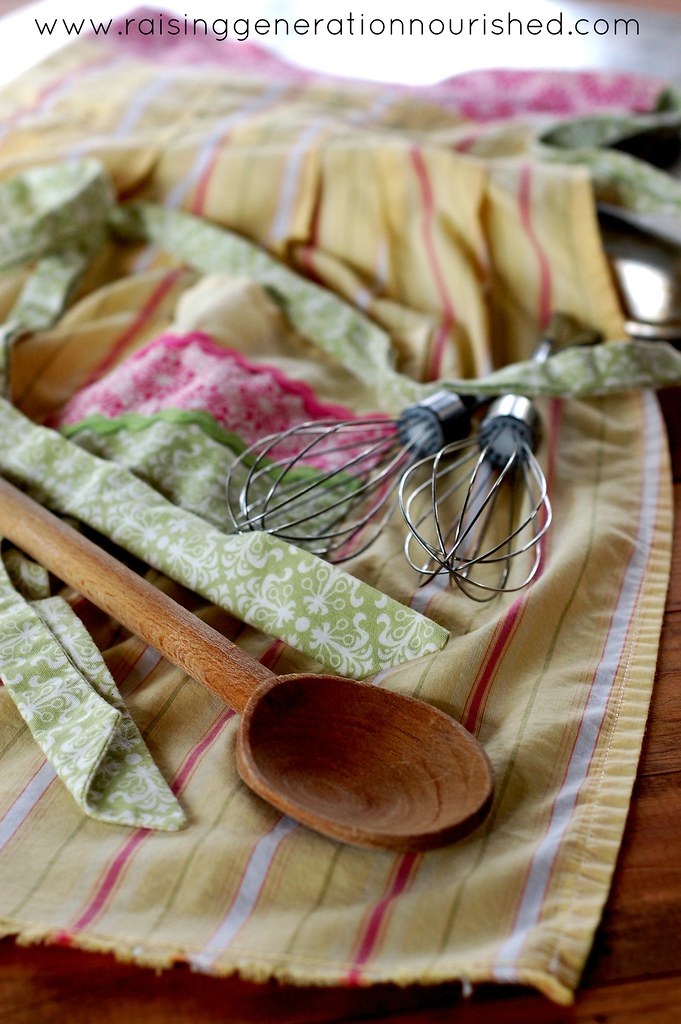
Great post Renee! Really helpful info, thanks so much for sharing all of your tips. LOVE the apron too!
Thank you Emily! And yes <3 That is my favorite one!
Thanks. I needed this. I have been going back and forth about going Gluten Free. I love to bake! But I have felt overwhelmed trying to learn how to make the transition and stay in our budget.
Great – I hope you find some helpful tips to get started!
REALLY helpful information. Thanks for sharing and I love the link for the gelatin egg, which I pinned. I’m so looking forward to sharing my baking cookbook in January on similar topics, although it’s lovely that we each have our own spin on what has helped our family. I appreciate your work! 🙂
What a great summary! We use Einkorn, grind it at home, and we love it in all things sourdough or not. Will definitely try your gluten free flour-mimic! do you know what to do with teff flour? – I have a bag and its taking space 🙂 would love some tried and tested uses for teff.
Hi Masha! Use it instead of the brown rice flour – it acts like a whole grain/brown flour. From what I remember it has a bit of a taste like sorghum so just be sure you mix it with some of the white flours/starches!
Thanks for the info on silicone baking cups. I’ve never used them and will have to give them a try!! 🙂
What a great list of tips! Thanks for sharing all that you have learned over the years!
THIS! I wish I had had this information years ago. So useful. Thanks for putting all this in one place.