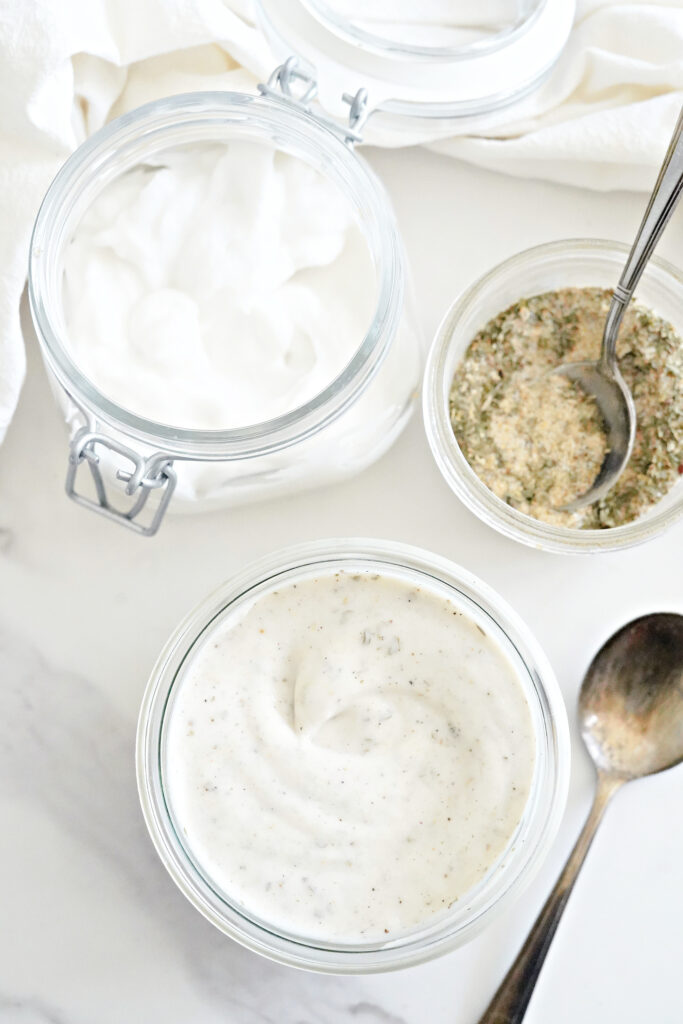
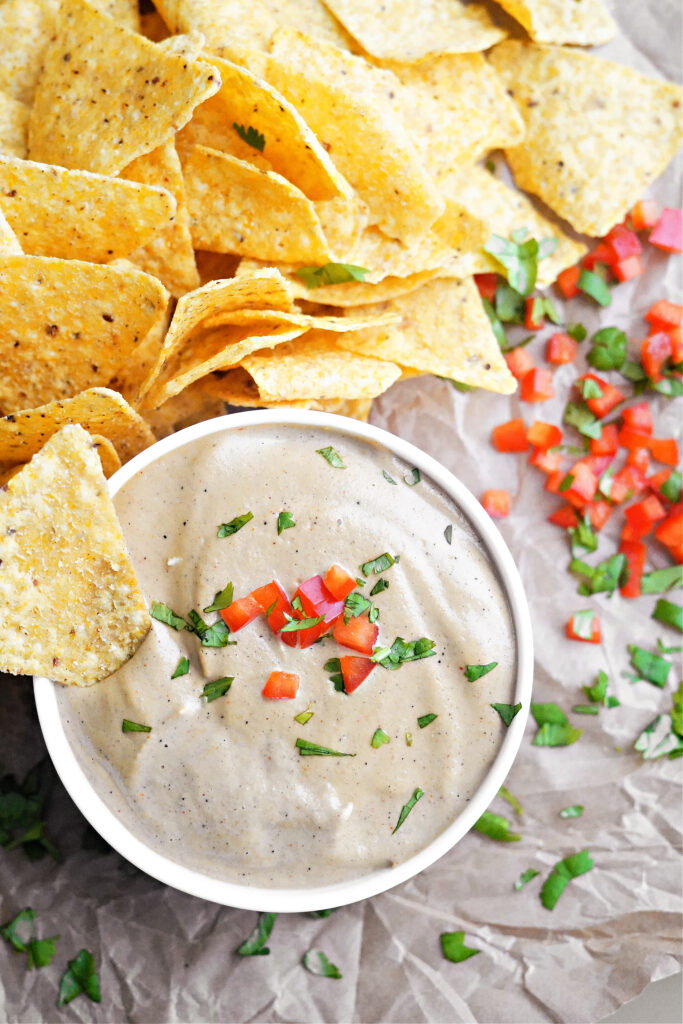
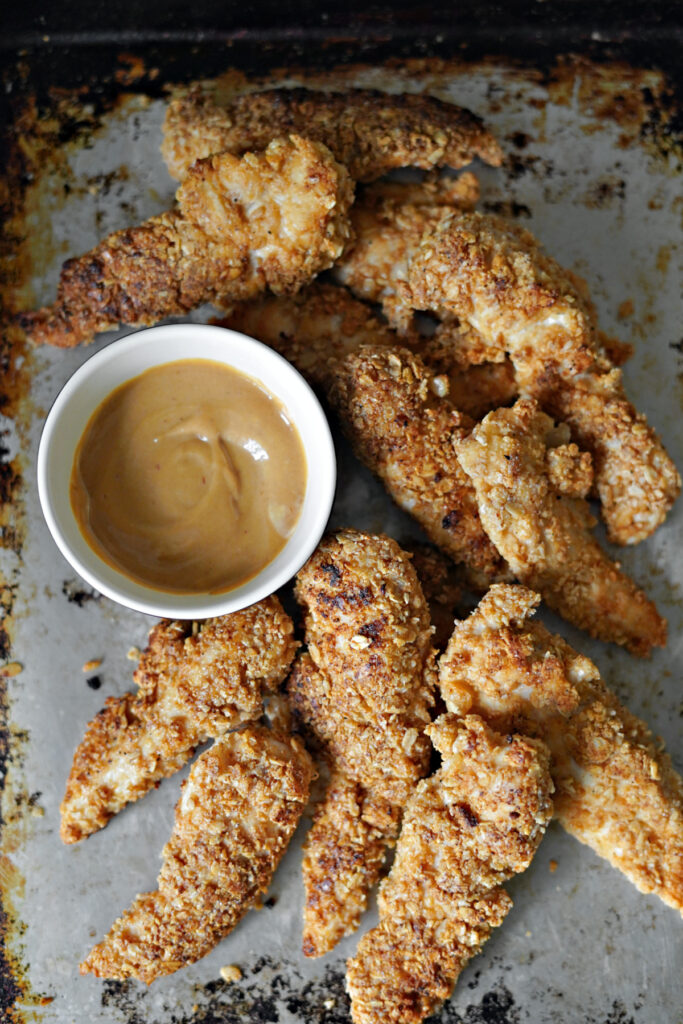
Browsing Category

Condiments

Condiments Dinner Ideas Healthy Kids and Teens Real Food 101 Real Food Tips

“Anytime” Fry Sauce! :: Gluten Free & Dairy Free

August 9, 2022

Say “yes!” to this fry sauce anytime! This healthier ingredient, restaurant style sauce is perfect for fry dipping, salad dressing, burger topping, and more!

"Anytime" Fry Sauce! :: Gluten Free & Dairy Free

Product links in this post are affiliate links. It does not cost you anything, and helps maintain the free information on this site, as well as answer the questions of “what brand do you use?” Please know I never personally recommend any product I wouldn’t use on my own family.

Summer staples!

I know that my “long-time” readers know how much our family adores summer. We live for our Lake Michigan beach right next door, the powdery sand, crystal fresh water, and near perfect summer temps! We also love walking through our little beach town to window shop, and one of the things the girls notice more as they get older are some of the yummy looking foods on the plates of people dining outdoors! We went for a rare-for-us out to dinner at one of these spots for the 4th of July this summer, and the girls were introduced to the concept of “fry sauce.” They were obsessed, and I just had to figure out how to make it at home…with ingredients that I felt comfortable with them having more than just one time!

"Anytime" Fry Sauce! :: Gluten Free & Dairy Free

So what’s so wrong with restaurant style or store by fry sauce?

Well, nothing really, if you are only going to have it for a special treat one time. But if you are wanting to replicate this fun dip for a homemade burger & fry night at home on your menu plan on a regular basis, making it with ingredients that don’t inflame might want to be on your radar. The last thing any of us need, including kids, is more inflammation. Most store bought and restaurant style sauces, dips, and dressings are made mostly with inflammatory, rancid oils like canola, sunflower, or soy. These oils have a great shelf life, and are cheap for companies to save money, but they wreck havoc on our bodies, causing fiery inflammation and free radicals to roam.

"Anytime" Fry Sauce! :: Gluten Free & Dairy Free

But I just don’t have time for one. more. homemade. thing….

I so get it, dear momma. I really do. Which is why I wanted this fry sauce to be made in under 5 minutes. You’re already making the steak or burgers, and the fries, so this quick dipping sauce can be made while the burgers are grilling in just a few minutes. Or even the day before. It is a big serving too, so you can stash it away in the fridge for weeks and pull it out when you need it. It even works double time for you because it can be a salad dressing, or burger topper too!

"Anytime" Fry Sauce! :: Gluten Free & Dairy Free

The “Anytime” Fry Sauce prep ::

Everything into a small mixing bowl, and stir to combine! That’s it! Truly! This can even be a prep item for the kids to make while you are fixing the rest of dinner.

"Anytime" Fry Sauce! :: Gluten Free & Dairy Free

Mayo options and other swaps

Primal Kitchen Mayo (we get this from Costco), or Sir Kensington’s Avocado Oil Mayo are healthier choices here using good fats versus rancid, inflammatory fats. If you prefer to make your own, you can try my traditional mayo recipe in my cookbook, The Little Lunchbox Cookbook, or my Egg Free/Dairy Free Paleo Mayo, or my Egg Free Dairy Based Mayo. Also, if you prefer to skip the ketchup in the recipe, try a tablespoon or 2 of tomato paste mixed with some honey for a more natural sugar option. 

"Anytime" Fry Sauce! :: Gluten Free & Dairy Free

The possibilities are endless!

Why do we call this “anytime” fry sauce? Well not only am I happy to let the kids have this fry sauce “anytime,” it actually can be used for so many other things “anytime” too! It is so versatile! Of course use it for your french fry dipping, but my girls love it on a salad, on top of a burger, or using for veggie dip!

"Anytime" Fry Sauce! :: Gluten Free & Dairy Free

Tell me about those FRIES!

These sheet pan french fries are a staple recipe in my home, and I think you are going to love them! Easy peasy method, and a special trick used to ensure the crispy fry factor (without the extra time of pre-soaking the fries!). Making your own fries also allows you to control the oil used. Just like with store bought or restaurant dipping sauces, french fries from restaurants or the freezer at the store are typically cooked in junky oils. I don’t know about you, but I like to have fries more than just once! When you make them with healthier oil, you can serve them more often without the inflammation spike.

"Anytime" Fry Sauce! :: Gluten Free & Dairy Free

“Anytime” Fry Sauce! :: Gluten Free & Dairy Free

Ingredients

  • 1 cup healthy mayo of choice See "Notes" section for recommendations!
  • 1 tbsp garlic powder
  • 1 tbsp smoked paprika
  • 2 tsp onion powder
  • 1/4 cup ketchup See "Notes" section for alternatives if needed
  • 1-2 tbsp mustard

Instructions

  • Whisk all ingredients in a small mixing bowl. If you want it thinner, I like to splash in pickle juice. This dip/dressing keeps in the refrigerator as long as your mayo has a good "best by" date.

Notes

More real food recipes you might like ::

Condiments Dinner Ideas Lunch Ideas Nourishing Staples Real Food 101 Real Food Tips school lunches

Dairy Free Caesar Dressing

April 20, 2021

Free from common allergens, this delicious dairy free Caesar dressing is also gluten free, soy free, nut free, egg free, and fish free!

Dairy Free Caesar Dressing
Product links in this post are affiliate links. It does not cost you anything, and helps maintain the free information on this site, as well as answer the questions of “what brand do you use?” Please know I never personally recommend any product I wouldn’t use on my own family.

Spring teases, and a need for some dairy free staples

I *think* we’ll see the last of our cold weather snow flurries this week, and we can finally say we are on our way to some consistent spring like temps here in Michigan! We spent a cool but pleasant weekend hiking and even playing at the beach, and while I watched my crew race up and down the shoreline, I was thinking about just how far I’ve come in a health related sort of way.

Dairy Free Caesar Dressing

A marathon, not a sprint

As I watched my kids sprint across the sand, I thought about how I had to change my thought process toward getting healthy so long ago. More of a “sprinter” in all things life, I have had to grow and change my method to more of a marathoner’s mindset. And you know what? Sprinters and marathoner’s are both great athletes. But when it comes to healing decades of growing up in a conventional, standard American health sort of environment, sprinting is only going to lead to more injury. It takes time to heal decades. I’ve had a recent set back toward the end of winter, and while I’m on my way, I have had to learn the hard way that while I’d like to sprint myself back into feeling my normal, a marathon mindset is really where it’s at.

Dairy Free Caesar Dressing

Peeling back the layers

I have had more than one natural minded practitioner remind me that most healing journeys are like peeling onions. There are layers and layers of them, and before you can get to the center root of the onion, you have to get through the surface layers first. A chiropractor friend reminded me of this last week, and I’m hoping someone here needs to hear it too. There are layers of natural elements, like diet, mineral balance, and hydration. And there are also layers of lifestyle, such as sleep, stress, and activity levels. I’ve been working on the later, with over-exercising and not paying enough attention to stress…a very tough admission for this “Type A!” One layer I DO know how to help with, however is food. And if you need to have inflammatory foods out of your diet for a period of time for healing, I’ve got you covered, dear momma. I have been there, done that, and I have some recipe tricks up my sleeve that I hope will help you!

Dairy Free Caesar Dressing

Our favorite Caesar, done without dairy

One of the first recipes I posted to this blog was a recipe for Caesar dressing. It was *the* dressing helped me successfully get my husband off store bought dressings years ago, and has been a staple around here for a while. But the dressing has dairy and egg, which can be inflammatory for those that are healing. Over the years when I have had seasons like I am in right now where I need to strictly be dairy free, I have played around with other ways to make it without the cheese, sour cream, and eggs, and I’m finally getting it here on the blog! This Caesar dressing is a handful of years in the the trial and error making, and I can proudly say it is free from dairy, gluten, soy, nuts, and egg…and it still passes my Caesar dressing critic husband’s taste test!

Dairy Free Caesar Dressing

Dairy Free Caesar Dressing Method

It really doesn’t get any easier than a 5 minute prep, and I’m pretty sure that whether you are on a healing journey or not, less work is music to your ears! I don’t even use measuring cups. Simply use the marks on the side of a pint mason jar and measure to the 1/2 cup mark for the olive oil. Then spoon in your coconut yogurt until the line hits the 3/4 cup mark. The rest is all measuring spoon, and goes so fast. Finally, you’ll use a simple immersion blender to emulsify the dressing into the dreamiest creamy texture!

Dairy Free Caesar Dressing

Important Notes!

Please take the time to read through the Notes section in the recipe card! I have been making this dairy free version of Caesar for a while, and I took the time to write down some of my thoughts on swaps and switches, as well as how to tailor this dressing to fit your unique taste palate!

Dairy Free Caesar Dressing

Dairy Free Caesar Dressing

Ingredients

Instructions

  • In a pint mason jar, measure the olive oil to the ½ cup mark, then add the 1/4 cup of coconut yogurt to fill until the ¾ cup mark on the mason jar (you could use measuring cups too, but this is my favorite way, and is less to clean up!).
  • Add the rest of the ingredients and use an immersion blender to emulsify until creamy and combined. Blend with the immersion blender for about 30 seconds to a minute.
  • Store the Caesar dressing in the refrigerator for 1 week.

Notes

  • If you are egg free, leave the yolk out and add an extra couple tablespoons of coconut yogurt for the creaminess.
  • If you don’t have an immersion blender, you could add all of the ingredients EXCEPT the olive oil to a food processor or blender. Then, while the blender is running, you can drizzle the olive oil into the blender so that it can slowly emulsify the dressing until creamy.
  • Add an extra tablespoon of lemon juice if you like your dressing tangier. The recipe as written is very kid friendly, but I love extra tang, so when I make it for myself I use 2 tbsp – about a full lemon.
  • Add an extra tablespoon of nutritional yeast flakes if you want the dressing to taste cheesier.
  • If you don’t have coconut aminos, you can leave this out, but it does add a depth of flavor that I just love – traditional sardines would add this too if you have those.
  • If you want to use a neutral/flavorless oil, avocado oil works well and is safe, healthy oil. The olive oil flavor gets pretty covered up by all of the other ingredients, but I know some kids might be sensitive to that taste, and avocado oil is flavorless. Really good olive oil is known for it’s anti-inflammatory properties, so I always ready for the olive oil when I can, and my kids really like the taste of it.
  • I get the big, 32oz tubs of plain, unsweetened coconut yogurt from our local grocer for a very budget friendly price. Many regular grocers are carrying this now, just take a look!
Dairy Free Caesar Dressing

More real food salad dressing recipes you might like!

Batch Up Meals Condiments Dinner Ideas Healthy Kids and Teens Lunch Ideas Nourishing Staples Real Food 101 Real Food Tips school lunches

Summer Broccoli Salad

August 2, 2020

This light and fresh broccoli salad is perfect for hot summer days!

Summer Broccoli Salad

Product links in this post are affiliate links. It does not cost you anything, and helps maintain the free information on this site, as well as answer the questions of “what brand do you use?” Please know I never personally recommend any product I wouldn’t use on my own family.

Summer 2020…

It sure wasn’t what we thought it was going to be, eh? (See there’s that northern accent coming out in me!) While summer 2020 wasn’t what many of us dreamed it would be, we *did* decide to make the best of what we could actually do, and as it turns out, it was a pretty amazing summer! Hiking, waterfalls, cold and rocky Lake Superior shorelines, and hot powdery sand beaches along Lake Michigan…the outdoors wasn’t canceled and we were totally here for it!

Summer Broccoli Salad

A new summer staple!

I know we are inching our way toward the start of another school year, but there is still plenty of warm weather ahead, and I thought I’d share a new salad obsession of mine! I’ve perfected it this summer and I can’t wait to share it with you!

Summer Broccoli Salad

The busy momma kind of food prep…

My gracious has the last few months been a bit…extra…on us mommas! I made this salad up on a particularly busy week. I wanted to be able to pull a veggie side out of the fridge for myself without any prepping, and this salad has become a staple for me this summer! A shake up in the jar dressing and just 4 veggies to chop, this summer broccoli salad is something everyone has time for.

Summer Broccoli Salad

But will the kids eat it?!

Bonus! This broccoli has been a big hit with the kids as well! The super fun colors, and kid friendly dressing makes this broccoli salad easy on young taste buds. I can see packing this broccoli salad in school lunchboxes as veggie side this fall! I would recommend chopping the salad pieces quite small if you plan on your kids eating it. If the pieces of veggie are too big, it will make it harder to manage for kids. So as much as I love a big strip of onion in my salad, diced will work better for littles. And that extra chop of the broccoli and cabbage will make it easier for kids to eat.

Summer Broccoli Salad

The Method :: The Salad

Just chop and toss – it really is that simple! You can add or subtract veg based on your preferences. I have added sunflower seeds before, and even a hard boiled egg to my bowl.

Summer Broccoli Salad

The Method :: The Honey Mustard Dressing

I use a small 8 ounce jelly jar to measure and shake up my dressing. It is so fast and at this point in the summer I have it memorized because the ingredients are so simple! The dressing is sweet and tangy – perfect for everyone on the family. And instead of the heavier creamy broccoli salad dressings we are all used to (nothing wrong with those!), this light and crisp dressing is perfect for hot summer days.

Summer Broccoli Salad

Storage and serving

The broccoli salad is ready to eat as soon as it is tossed, and it keeps so well for about 5 days. This makes a great prep day item so that you can ensure that you have some veggie side to go with your lunch or dinner every day. I love that this salad doesn’t get soggy even with the dressing on it! If you prefer, you could just add the dressing when you are ready to eat it. The dressing will keep in the fridge for weeks.

Summer Broccoli Salad

Summer Broccoli Salad

Ingredients

FOR THE BROCCOLI SALAD

  • 4-5 cups of chopped broccoli florets
  • ¼ head of cabbage sliced into strips
  • 1 large carrot shredded
  • ¼ red onion sliced into strips (or diced if you like smaller pieces)
  • ½ cup manchego cheese Or whatever cheese you have on hand. You can leave this out if you are dairy free!

FOR THE HONEY MUSTARD VINEGARETTE

  • 3-4 tbsp raw honey
  • 3 tbsp olive oil
  • 3 tbsp Dijon mustard
  • 1 – 2 tbsp apple cider vinegar I liked more bite of vinegar, but my younger girls ate this happier with 1 tbsp
  • ½ tsp garlic powder
  • ¼ tsp sea salt to taste
  • Pepper to taste

Instructions

  • Put all of the broccoli salad ingredients in a medium mixing bowl.
  • Put all of the dressing ingredients into a jar with a lid and shake vigorously to combine. You could use an immersion blender if you wish. Pour the dressing over the salad and toss. Start with ½ of the dressing and add more to your liking. It really depends on how much dressing you like on your salad. I use the whole jar most of the time. Any leftovers taste great on any salad you make and will keep in the fridge for weeks.
  • This broccoli salad will keep in the fridge for about 5 days. Make some on the weekend and use it as your weekday lunch veggie each day!

More real food recipes you might like ::

Condiments Dinner Ideas Healthy Kids and Teens Real Food 101 Real Food Tips

Fresh Mango Marinade and Sauce :: Perfect For Fish, Chicken, Veggies and More!

May 16, 2019

This kid friendly, week night easy mango marinade and sauce is perfect for fish, chicken, veggies and more!

Fresh Mango Marinade and Sauce :: Perfect For Fish, Chicken, Veggies and More!

Product links in this post are affiliate links. It does not cost you anything, and helps maintain the free information on this site, as well as answer the questions of “what brand do you use?” Please know I never personally recommend any product I wouldn’t use on my own family.

Frog hunts, sunshine, and fresh, fast dinners!

That pretty much sums up the last few weekends in our house, enjoying some steadier spring temperatures, and the scheduling fun that comes with the month of May and three kids in school! What is it about May?! All the trips! All the concerts! All the after school fun! And you know what? My girls love it ALL. May is so fun. But just because we are busy doesn’t mean I can set meal planning on coast…in fact just the opposite.

Fresh Mango Marinade and Sauce :: Perfect For Fish, Chicken, Veggies and More!

Brain fuel for busy kids

When things get busy, it can be easy to pull out easier meals, and we absolutely do healthier hot dog dinners, and grilled burgers in the warm months of the year when we want to be outside versus in the kitchen all day. But with just a few minutes of prep, you can have just as quick of a dinner, that tastes just as fun for the kids, and packs some big time brain fuel for growing kids. While this mango marinade and sauce will work for chicken, and tastes amazing with mineral rich veggies that we all need too, I like to use it with wild caught fatty fish – brain fuel!

Fresh Mango Marinade and Sauce :: Perfect For Fish, Chicken, Veggies and More!

Two minutes to fresh mango marinade!

If you have a blender, you can make this marinade in 2 minutes flat! Just dump it all in and puree! It’s so fast, that you can prep it in the morning before everyone heads out the door for the busy day, or do it before you go to bed the night before. It only needs about 30 minutes to marinade your fish, but up to a day is even better. Then all you have to do when you get home is a quick pan sear of your fish or chicken!

Fresh Mango Marinade and Sauce :: Perfect For Fish, Chicken, Veggies and More!

Double up!

Because this mango marinade also makes an amazing sauce for your sides of veggies, rice, or as a dip for your fish or chicken! If mangos are on sale or in season near you, double up for a meal, and then freeze some for another time as well.

Fresh Mango Marinade and Sauce :: Perfect For Fish, Chicken, Veggies and More!
Print Recipe
5 from 36 votes

Mango Marinade & Sauce

Ingredients

Instructions

  • Everything into a food processor or blender, and blend until smooth.

Ok, I’ve got my marinade! Now how do I make dinner???

Simply pour the mango marinade over the top of your favorite wild caught fish or chicken, and let the meat marinade for at least 30 minutes or up to a day. You can marinade veggies in this for kabobs too. See the recipe below for very basic dinner – change things up based on what you have in house and what is in season near you.

Fresh Mango Marinade and Sauce :: Perfect For Fish, Chicken, Veggies and More!

Quick sides?

Because whats a quick dinner idea if the side dishes are fussy and long to prep? Here are some great side dish ideas for your mango fish!

Fresh Mango Marinade and Sauce :: Perfect For Fish, Chicken, Veggies and More!
Print Recipe
5 from 36 votes

Mango White Fish with Roasted Veggies

Ingredients

  • 1 recipe of the above Mango Marinade you can double the sauce recipe if you want extra for mixing into the veggies or rice, or for dipping the fish
  • 1 lb wild caught white fish such as Mahi Mahi or Cod
  • 3 tbsp ghee butter, or olive oil to cook the fish in (I like to use ghee)
  • 1 lb brussel sprouts halved or quartered depending on the size (broccoli and asparagus will work here too – use what is in season)
  • 1 lb carrots cut on the bias
  • 3 tbsp butter for the veggies
  • Sea salt and pepper for the veggies to taste

Instructions

  • Marinate your fish anywhere from 30 minutes to a day in advance. Pour 1 recipe of the mango marinade over the fish in a bowl or freezer bag. I like to cut the fish into the size portions that my girls eat. Seal the bowl or bag and set the fish in the refrigerator to marinade until you are ready to cook it.
  • When the fish is done marinating, pre-heat the oven to 400 degrees and toss the veggies on a sheet pan with the butter, sea salt, and pepper. Roast the veggies at 400 degrees for 15 – 20 minutes depending on how big the veggies are cut.
  • To cook the fish, heat up a large skillet and the cooking fat over medium high heat. When the pan is very hot, add the fish directly from the marinade. Don’t scrape off the marinade – in fact I dip it in and scoop some of it out onto the fish while it cooks. Cook the fish 2-3 minutes on each side. Cook time will depend on the size and thickness of your fish. If your fish is larger/thicker than what is pictured here, you will need more like 5 minutes each side.
  • Plate your cooked fish over long grain white rice, or with a side of sweet potato or baked potato, and the roasted veggies. You can toss the roasted veggies and/or the rice with another batch of mango sauce.
Fresh Mango Marinade and Sauce :: Perfect For Fish, Chicken, Veggies and More!

More real food recipes you might like ::

Condiments Dinner Ideas Feeding Babies Healthy Kids and Teens Nourishing Staples Real Food 101 Real Food Tips

Wild Caught Salmon Meatballs with Simple Pesto

April 28, 2019

Turn wild caught fish into your kids’ favorite dinner with salmon meatballs and simple pesto for dipping!

Quick dinners and warm weather herbs

We are all about extra beach time during the warm months of the year. We are just at the tip of beach season in Michigan, and on those gorgeous spring days that feel like summer is knocking at our door, I swap our favorite slow roasted dinners for fresh spring and summer meals.

Salmon…meatballs?!

I’m telling you…make anything into a meatball and kids will be all over it. Needing to get more greens in? Try a meatball! Need to add some nourishing liver to your diet? Yup – those same kale stuffed meatballs have liver too! My girls truly adore wild caught salmon – as evidenced by so many salmon recipes on the blog, but if you have kids tentative about fish, I invite you to give this a try! Salmon is a summer staple because it is so quick to fix, and these meatballs are no exception.

Simple ingredients & no fuss!

I learned a couple years back that the *best* salmon burger is made by hand chopping the meat instead of pulverizing or blending it, and NOT using eggs for any binding. The salmon is first chopped into bits about the size of ground beef, and mixed with some simple seasoning. A splash of olive oil to add some fatty moisture and some tapioca for a soft texture and to hold in some of the moisture and that’s it. It will take you no longer than the time it takes the oven to pre-heat to roll up the salmon meatballs and then dinner is done in 15 minutes!

Dips for all the days!

Because if there is anything I know about kids, it’s that they *big puffy heart* love to…dip! So if they are going to dip these delicious, nourishing salmon meatballs, let’s give them something equally as mouthwatering and bump the nutrition past the same ‘ol ketchup stand-by. Something like pesto! I would totally even serve the meatballs on toothpicks for dipping in the pesto – what fun for the kids!

{And as a side-note, if those kiddos of yours will only eat the salmon meatballs with a side of ketchup, by all means roll with that – I would rather them get that brain nourishing fatty fish into their growing bodies than none at all. If you do the polite bite thing in your house, I would definitely give that a go with the pesto first (don’t even put the ketchup out as an option), but pick your battles, momma!}

But back to the dreamy pesto…

I truly can’t think of anything we use our garden herbs for more in the summertime than pesto. It makes such a great, nourishing, budget friendly lunch with a side of bread or crackers and veggie sticks. And big time bonus…my older girls can make it without mom’s help! *All the moms in the house cheer!* Basil itself is loaded with antioxidants and anti-inflammatory properties, but the kids don’t necessarily care about those details – make them a part of *planting* and tending to that garden basil, or picking the basil out at the farmer’s market this summer, and ownership will take over as the star of the show. Basil is one of the first seeds my oldest has asked for to plant the last couple of spring seasons, and it is solely for the purpose of her beloved pesto! Using pesto as a side dish dip or scoop-able dressing is also a great way to get olive oil into the kids’ diets. A proven brain booster, this power-packed mono-unsaturated fat is super tasty and mild – perfect for kids.

Time saving tips

  • The pesto can be make super quick while the salmon meatballs are baking in the oven.
  • The oven temp is perfect for cooking other veggie sides along with the salmon meatballs, so make your oven do double time. The timing of the meatballs cooking is the perfect timing for spring asparagus, or summer zucchini or broccoli.
  • Or, skip the oven baked veggies, and just make some quick side salads such as Paleo Coleslaw, Olive Garden Copycat Salads, or kid favorite Ranch dressing drenched salads (use this Paleo version, or this classic version using dairy!)
  • The salmon meatball mixture can be made up the night before and sit in the fridge until everyone is home from work and school – that way all you have to do is roll them up and bake them off.
  • The salmon meatball mixture freezes well! Roll up the salmon meatballs and freeze them on a sheet tray. Then pop the uncooked frozen salmon meatballs into a freezer bag.
Print Recipe
5 from 12 votes

Wild Caught Salmon Meatballs with Simple Pesto

Ingredients

FOR THE SALMON MEATBALLS ::

  • 3-4 wild caught salmon fillets skinned (about 1 – 1 ¼ lbs of salmon)
  • 2 tbsp tapioca starch
  • 1 tbsp olive oil
  • 1 tbsp dried parsley if you have fresh parsley, use 2 tbsp chopped fresh parsley
  • 1 tsp dried dill if you have fresh dill, use 2 tsp chopped leaves of the fresh dill
  • 1 tsp garlic powder
  • 1 tsp onion powder
  • 1 tsp sea salt
  • ¼ tsp black pepper

FOR THE PESTO ::

  • 2 cups packed fresh basil leaves
  • Heaping 1/3 cup walnuts If you have access to pine nuts use 1/3 cup of that. Pine nuts would be the more traditional way of making pesto – I don’t have access to quality pine nuts, so I usually use organic walnuts
  • ½ cup raw cheese or goat cheese shredded
  • ¼ tsp sea salt start here and you can always add more to taste depending on the saltiness of the cheese you are using.
  • Pinch of pepper to taste
  • 1-3 cloves of garlic (If you are a garlic fanatic do the 3 – you won’t regret it! It does add a slight spicy bite since raw garlic has some heat to it – it is my favorite way to eat pesto. If you have kids eating the pesto, use 1 clove of garlic. Two of my girls love the garlic packed version, while my youngest still feels like it is a bit spicy for her and will gobble it down with just 1 clove. If you are new to pesto, start out with 1 clove – you can always add more if you want more garlic flavor.)
  • ½ cup olive oil

Instructions

FOR THE SALMON MEATBALLS ::

  • Pre-heat the oven to 350 degrees, and line a baking sheet with Silpat or parchment paper
  • Skin and cube up your salmon. Then run a chopping knife through the cubed salmon until the bits are small but not to a puree. The texture should resemble that of ground beef.
  • Combine the chopped salmon and the rest of the salmon meatball ingredients in a small mixing bowl. Roll the meatball mixture into balls and place them onto the Silpat lined baking sheet.
  • Bake the salmon meatballs at 350 degrees for 10-15 minutes, depending on the size of your meatballs. 

FOR THE PESTO ::

  • Put the basil leaves and walnuts into your food processor and pulse a few times to combine.
  • Add the cheese, salt, pepper, and garlic, and pulse several times to chop through until everything is very small and combined well.
  • With the food processor running, use the oil drip top on your food processor to slowly add in the olive oil. This will allow the oil to emulsify, thickening the pesto, and keeping everything sticking together so the oil doesn’t separate. If you prefer the oil to be more separate from the herbs (I like it this way too!) you can just do a quick blend through or even just stir in the oil.

More real food recipes you might like ::

Condiments Dinner Ideas Healthy Kids and Teens Nourishing Staples Real Food 101 Real Food Tips

Probiotic Rich Fermented Red Onions & 10 Minute Sheet Pan Fish Tacos!

April 10, 2019

Sheet pan fish tacos topped with tangy, probiotic rich fermented red onions are a match made in heaven!

Product links in this post are affiliate links. It does not cost you anything, and helps maintain the free information on this site, as well as answer the questions of “what brand do you use?” Please know I never personally recommend any product I wouldn’t use on my own family.

Beach days, rock hunting, & fish tacos…

We made it. Our feet were grounded on the Lake Michigan shoreline all weekend, and we couldn’t be more full of joy! While we spend most of our spring and summer days with our feet in the soft, powdery sand of our hometown shoreline, we do love to beach hop to some special places along Lake Michigan with a more rocky landscape so that my rock hunters can find special treasures! My oldest has become quite the geologist in the last few years, with such a love for collecting different rocks and fossils. And my oldest also couldn’t think of a better way to re-fuel after our first spring beach day than fish tacos!

The obsession began a few summers ago…

We were enjoying a rare to us night out at a restaurant after a long, hot beach day, and my oldest, who was about 6 at the time, ordered fish tacos. They were just about the biggest hit you could ever dream of for her, and she still talks about them to this day. They had the avocado crema, mango salsa, and those pretty little pickled red onions sprinkled on top – the works! She was obsessed, and I just knew I had to duplicate them for our menu rotation after that!

The real deal “pickled” red onions

Quick little refrigerate pickled red onions are great, and truly is nothing wrong with them, but what if there was a way to make them the “real deal” way? Instead of pickling them in vinegar for the sour punch, letting nature do it’s work with a little sea salt and water, and allowing the natural, good bacteria in the vegetable ferment the onions to tangy perfection – the way your ancestors would have preserved and “pickled” onions! And let me tell you…the tangy, sweet, salty, crunchy red onions make *the* best fish taco topping!

A quick fermentation 101

It’s as simple as making a little salt water brine to suspend your onions, a clean, air tight space to allow the science to happen, and a little time. When you add the salt water brine to vegetables, the good bacteria in the vegetables starts eating away at the natural sugars in the veggie. The lactic acid left behind from this veggie sugar metabolizing gives the vegetable a tart, tangy taste, and is also just so amazingly good for our bodies! It is a great way to keep beneficial bacteria in our gut flora (probiotics), and it balances stomach acid.

Ok, so what do I need to get started fermenting my onions?

While you can definitely get your ferments going today with just glass jar and a plastic lid (metal lids will corrode over time so plastic is recommended), as you get going you may want to take a look at fermenting tools that make the process even easier and stress free.

Vegetable ferments do best in an anaerobic environment (that is, “no oxygen” using an air tight seal). Plastic lids work fine, though some air does get through, and as the gasses build up in the ferment you need to “release” them by opening the lid here and there. The air that gets through also makes it easier for stray airborne microbes and molds to get in which can make the whole jar go bad.

There are a couple of sealing options you can choose from, and I really have found these to give the best fermenting results. The one that I use is the first recommendation, the Pickle Pipe.

  • The Pickle Pipes & Pebbles :: I am convinced a busy, “every day” mom invented this fermenting tool! Talk about zero fuss, *easy to clean,* and affordable! The Pickle Pipe creates a seal with a simple (easy to wash!) silicone disk, and the metal ring your jar comes with. The “pipe” part of the silicone disk has a special opening that only pressures open when the gasses build up in the jar and need to be released. So basically…set it and forget it! You don’t have to check for pressure everyday at all. I also am in love with their Pickle Pebbles which weight down the ferment at the top so you don’t have to worry about molding or the tips of the veggies going bad from being out of the brine. Invaluable! I have never had a ferment go bad or mold using my Pickle Pipes and Pebbles.
  • Fido Jar :: Fido jars create an incredible anaerobic sealed environment and are super easy to clean and take care of. No crazy parts to clean, and they are beautiful lined up in the kitchen to ferment! You will need to “burp” these every day or so to let the gasses out but they work very well! They are pricier than mason jars (especially if you already have a lot of mason jars at home, and can just get some Pickle Pipes to top them off), but they will last forever and, again, they are beautiful!
  • Traditional Fermentation Crock :: I have to be honest…I love these! I really do! They are on my foodie dream list and when I can afford a really beautiful new fermenting crock I really, really want one for my kitchen! They are gorgeous, easy to clean and work fantastic. They come with a weight to keep the veggies down to prevent molding and they create a perfect anaerobic environment.
  • Air-Lock Lids :: These are a really great, inexpensive option – especially if you already have a lot of mason jars at home. I think the Pickle Pipes are easier to clean and use, but if you have some of these lying around don’t let them go to waste – they work great!

Do the kids like them?

Well, 2 out of my 3 give these little onions 2 thumbs up. My youngest is still warming up to them, but onions are strong in the first place, and probably aren’t a great fermented food to start out with for really little guys. My suggestion for littles and fermented foods is to start out with fermented carrots and sauerkraut. Sour pickles and fermented asparagus are fantastic options that are kid friendly too. I also loved this recipe for Ranch Dressing made with Kefir (a style of fermented milk) to dip your veggies in! The littles will love it, and you can feel good about what their gut being nourished. All in all, be inspired to give even the smallest of children in the house a try of fermented foods. My girls were eating small shreds of sauerkraut and shredded fermented carrots by the age of 9 months old, and developing that taste palate is priceless.

Fermented onions first, then onto the tacos!

So grab a mason jar and get some fermented red onions going! Then plan a fish taco night into your menu plan this month and just wait until you see how fun fish taco night is! Here is the recipe for the fermented onions, and the tacos will follow.

Print Recipe
5 from 32 votes

Probiotic Rich Fermented Red Onions :: The Perfect Topping for Fish Tacos, Salads, Wraps, and More!

Ingredients

  • 1 pint warm water
  • 2 tsp sea salt
  • 1 large red onion sliced
  • 1 tsp sugar optional

Instructions

  • Dissolve the sea salt in the warm water.
  • Put the sliced red onions and sugar into a mason jar, packing them in tightly.
  • Pour the salt water brine over the onions leaving a half inch to inch of headspace at the top.
  • Add your fermenting weight over the onions in the brine to be sure the onions stay submerged. If you do not have a weight, just be sure the onions are completely submerged in the brine or you will get molding.
  • Put your fermenting lid on the jar (I use pickle pipes) and leave in a warm space in your kitchen on the counter or in a cupboard for 1-3 weeks. You can taste the onions along the way to get your preference of tartness. If your house is warmer, it will ferment faster, and if your house is cooler, it will take longer. Everyone has a different taste for fermented foods. Your fermented onions should smell oniony and taste pleasantly tangy/sour. The longer you ferment the more beneficial bacteria will be present. I ferment my onions around 3-4 weeks if it is winter time and cooler in my house, and it takes more like 2 weeks in the very warm summer months.

But getting back to those fish tacos!

A couple months back, I had dinner with some friends at a local restaurant. It was all about conversations that didn’t revolve around slime, school work, or Hatchimals; glasses of wine, and great food – it is such a necessity of mom life to do this! One of my friends and I ordered the fish tacos, and, after we quite literally devoured them, I had a renewed desire to get a fun, family friendly fish taco recipe to the blog!

Sheet pan prep for busy families

…Because fish tacos on a Wednesday night is just the bees knees, and I promise it will be *the* thing that gets you through the rest of the week. Just a quick slice through some wild caught white fish, a toss through some taco season of your liking, and 10 minutes at the most in the oven. That is weeknight dinner at it’s best.

What kind of fish?

Any wild caught white fish will do, though we have certainly enjoyed fish tacos with wild caught salmon! Use whatever your family likes to eat. We pick up wild caught mahi-mahi, cod, and salmon at Costco. We also have a local fish monger that has the fish here and there. Check around where you live, and ask! Fish mongers are always happy to tell you about where their fish comes from!

Fish Taco Bar topping ideas!

  • Shredded cabbage or lettuce
  • Coleslaw
  • Fermented Red Onions (Recipe is below!)
  • Raw cheese or goat cheese
  • Guacamole
  • Shredded carrots (or ease your littles into the fermented topping idea by using shredded fermented carrots – my youngest eats them this way)
  • Salsa
Print Recipe
5 from 32 votes

10 Minute Sheet Pan Fish Tacos

Ingredients

FOR THE FISH

  • 4 fillets of white wild caught fish such as cod or mahi mahi Cut into strips, or bit sized chunks if you have little ones at home.
  • 3-4 tsp taco seasoning I use my own taco season mix.

FISH TACO TOPPING OPTIONS

  • Shredded cabbage or lettuce
  • Coleslaw
  • Fermented Red Onions (See above recipe)
  • Raw cheese or goat cheese
  • Gauacamole
  • Shredded carrots
  • Salsa

Instructions

  • Preheat the oven to 400 degrees, and line your baking sheet with Silpat, or spray with avocado oil spray, or lightly grease with butter or coconut oil.
  • Toss the cut up fish with the taco season and spread the pieces of coated fish onto the sheet pan. Bake for 10 minutes. If you made smaller pieces for little kids, you will have a shorter cook time.
  • Serve on your favorite tortillas with toppings of your choice!
My sweet tween, happily inhaling said fish tacos after the photoshoot 😉

More real food recipes you might like ::

Batch Up Meals Condiments Feeding Babies Healthy Kids and Teens Instant Pot Lunch Ideas Real Food 101 Real Food Tips Snack Ideas

Kid Prep Instant Pot No Peel Applesauce! :: Let Them Make It Start To Finish!

September 29, 2018

Give them ownership over a kitchen project with Instant Pot no peel applesauce! Let the kids make it start to finish!

Product links in this post are affiliate links. It does not cost you anything, and helps maintain the free information on this site, as well as answer the questions of “what brand do you use?” Please know I never personally recommend any product I wouldn’t use on my own family.

Still making time for it…

A little real food blogger confession. As the girls have been getting older, I’ve been less likely to invite them into the kitchen to work with me. Shocking, right? The real food blogger that literally shoves it into your face the importance of getting your kids into the kitchen with you, struggles with making time for it now that the littles aren’t so little anymore? Well, when those babes are super little, they are constantly needing you, hanging on you, and forever by your side, so inviting them up to the counter to help is really survival mode many days, yes?! {And all the toddler mommas are nodding their heads!} Now that the girls are older, more independent, and off doing their own thing a lot, I really have to make a conscious effort to make them a part of what I’m doing in the kitchen.

A big job, made into a family project

So I also must confess that I was somewhat dreading apple season. I knew we wanted to go picking – it is the highlight of the fall me to watch them, and the girls love it. But man, oh man, the food prep that goes along with picking a bushel or 2 of apples! It is a lot of work! Older kiddos also mean less time at home, busier schedules outside the home, and the desire on their part to do more adventuring outside the home. Catch the theme? Less home time, means mom gets stuck doing all the kitchen work tending to the apples, and I decided on a plan to get through the apples and maintain my sanity! Make them a part of it! So off we went apple picking…!

A one day job!

What used to take me a full week to get through with a bushel of apples and applesauce on my mind, now just takes a day thanks to the Instant Pot. We started making applesauce in the IP last year, and I’ll literally never go back! It still locks in all the nutrients in the apple, and gets the job done in a fraction of the time. Remember that whole, away from home, busy schedule thing? This definitely is right up my alley right now!

So kid friendly, you can just leave it up to them!

Kids eat up independence. When you let them know that they can have a whole kitchen task to themselves, well, that ownership is magical, dear momma. I gave my 2 older girls a quick lesson to remind them of how to make applesauce with the Instant Pot, including having them write down step by step instructions, and I left the kitchen. Did you hear that part? I left. They have made it with me so many times, cut apples since they were toddlers, and respect kitchen tools, so I just left them to it. Sure I popped in if there was a question, and I popped in simply because I wanted to spend time with them, but I left them to own their project. And I can’t tell you the pride that that gives a child – to make their own food.


How To Make Kid Prep Instant Pot Applesauce!


1.) Wash and Cut The Apples

Your toddlers can help with washing the apples! In fact find yourself some laundry to fold, because your toddler will probably want to wash your apples for a good half hour! They just love it. Use an apple cutter for the easiest slicing. This task can be tough for littles if the apples are very hard. Get them up and over their work surface because the leverage helps cut in. Standing on a chair at a kitchen table works well for little ones. My oldest still uses a step stool to get up and over the counter best.

2.) Put The Apples Into The Instant Pot

Dump them in! All ages can help with this part! Fill the Instant Pot up to about half inch below the “Fill” line.

3.) Add 1 cup of Water

Dump it in! Your older children around Kindergarten on up can measure 1 cup if you show them how, and all ages can help pour the water in. Hand over hand with your littles to show them, and let your bigs do it themselves.

4.) Put The Lid On the IP, and Set the Timer, and Quick Release

Make sure the valve on your IP lid is closed, press “Manual” and bring the time down to 4 minutes. The Instant Pot will start automatically. Once the IP reaches pressure, it will count down the 4 minutes. Once the 4 minutes is over, you can do a quick release. I make my girls cover their hand with a towel to open the valve, so they don’t accidentally get steam on their hand. Older children around the age of 7 or 8 and older are best for this job.

5.) Put the Cooked Apples Through The Food Mill

Let the apples cool off for about 10 minutes so the children don’t burn themselves with the steam, and then let them scoop the apples into your food mill to churn. My toddlers needed hand over hand help to learn how turn the food mill, but were independent with this job after a bit! Let everyone take a turn! The color of your applesauce will depend on the type of apples you used! Namely, the color of the skin. If your apples have red skins, your no-peel applesauce will be pink in color. If your apples were more gold/light green, the applesauce will be golden in color!

To sweeten or not?

I’ve never had to sweeten our applesauce. Fresh picked apples are plenty sweet if you get the right variety. If your apples happen to be on the tart side, you can add some raw honey to the hot applesauce after it is run through the food mill. Cook and taste the applesauce first though and see what it needs. If you have really little guys at home, I’d skip it!

How we store our applesauce

I use these BPA free freezer containers and just freezer ours. We don’t make more than maybe 6 to 8 quarts, so it really doesn’t take up a lot of room in our freezer, and we eat it pretty quickly! If you tend to make more, and like to can it, you can certainly do that.

Freezing time…

One thing that you cannot, in fact do, is freeze time. It is always so worth slowing down to spend some time making and sharing food in the kitchen with your kids!

Print Recipe
5 from 10 votes

Kid Prep Instant Pot No Peel Applesauce!

Give them ownership over a kitchen project with Instant Pot no peel applesauce! Let the kids make it start to finish!
Prep Time15 minutes
Cook Time15 minutes
Total Time30 minutes
Course: Snack
Cuisine: American
Keyword: homemade applesauce recipe, how to make applesauce in the Instant Pot, Instant Pot applesauce
Author: Renee - www.raisinggenerationnourished.com

Ingredients

  • Apples cored
  • 1 cup of water you can add more if you like thinner applesauce

Instructions

  • Fill your Instant Pot liner with apple slices to about half inch below the “Fill” line, and then pour 1 cup of water in.
  • Put the IP lid on and close the valve. Press “Manual” and then bring the time down to 4 minutes. The Instant Pot will start automatically. Once the IP reaches pressure, it will count down the 4 minutes. Once the 4 minutes is over, you can quick release the valve.
  • Run the cooked apples through a food mill for the smoothest applesauce. You can use a blender if you wish as well.
  • Taste your applesauce for sweetness at this point. You can add raw honey if your apples were more tart, or leave as is if the apples are sweet enough.

More real food APPLE RECIPES you might like!

Condiments Dinner Ideas Lunch Ideas Real Food 101 Real Food Tips

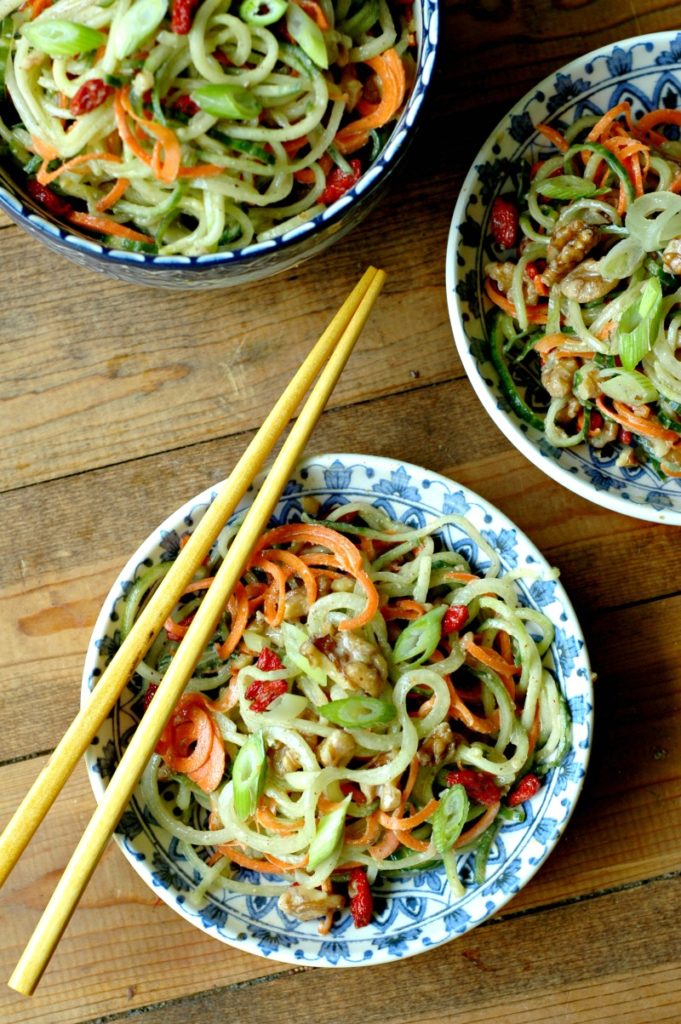
10 Minute Asian Almond Cucumber Noodle Bowls :: Paleo, Grain Free, Gluten Free, Dairy Free, Refined Sugar Free

August 4, 2018

Fresh and crisp cucumber noodle bowls tossed with a savory Asian almond dressing, all in just 10 minutes of time!

Product links in this post are affiliate links. It does not cost you anything, and helps maintain the free information on this site, as well as answer the questions of “what brand do you use?” Please know I never personally recommend any product I wouldn’t use on my own family.

Sweet summer moments

I’m treasuring them! We are officially less than a month away from the school year, and I’m savoring all I can!

Same nourishing goals, less kitchen time

For myself, summer can be too easy to fall in to settling on the same lunches, or quicker, easier options for meal time. There is certainly nothing wrong with that – especially if you can still make it quick, easy, AND healthy. Summer presents a load of amazing produce to stock your kitchen with every week, so the possibilities are endless really.

Summer cucumber abundance

This is the time of year where you either have cucumbers coming out of your ears from your own home garden, or you are unloading the abundance of cucumbers coming out of your local farmer’s garden! It is such a money saver to your budget to buy produce in season, and when those summer veggies are in full swing, you can really take advantage of the abundance and save some money on your grocery bill.

Cucumber “noodles?!”

Honestly, I hesitate to even call them noodles, because this self proclaimed carb lover adores her some real pasta every now again! But when you spiralize cucumbers they look just like noodles (This is the spiralizer I have), and this noodle bowl is  so satisfying with the savory Asian dressing to go along with the crisp crunch of the veggies. The best cucumbers to spiralize are the long, skinny kind. They don’t have as many big seeds, and they are less watery. They are nice and firm, and hold up in the spiralizer well. Just cut the ends off, and then cut the cucumber in half, then spiralize away! I also spiralized the carrots in this recipe – if you can get your hands on some thick carrots, they spiralize really well. If your carrots are on the skinny side, just peel strips of the carrot instead.

10 minutes?!

YES! This means that not only could it make a great potential lunch, it also makes a very fast prep dinner side dish. Which is how I have been using it the majority of the time. This recipe as written feeds my family of 5 for one dinner as a veggie side dish. It is fast to prep while hamburgers or chicken are grilling.

Make ahead tips

If you want to bring this noodle bowl to lunch with you at work, or a park trip, you’ll want to pack the dressing on the side. The dressing draws the water out of the cucumber noodles after it sits for more than 15 minutes. Also, your dried goji berries will start to pick up some of the liquid from the cucumbers when it sits too long, so if I am taking this along with me, I keep the goji berries on the side to add in with the dressing. My girls actually like it when the goji berries re-hydrate and get super soft, so if that is your preference, go for it!

Other add-in options:

The recipe as written is bare bones minimum which we definitely love! If you want to change things up here are some other ideas to add in, or swap around!

  • Hardboiled eggs. One of my favorites, and a great way to make this a full lunch meal.
  • Other nuts and/or seeds. It’s always nice to change things up for different flavors, and for adding different nutrients to your diet. Try sunflower seeds, sesame seeds, pumpkin seeds, pistachios, or cashews!
  • Cherry tomatoes
  • Thinly sliced bell peppers
  • Leftover roasted chicken or beef
  • Mushrooms

Print Recipe
5 from 20 votes

Asian Almond Cucumber Noodle Bowls

Fresh and crisp cucumber noodle bowls tossed with a savory Asian almond dressing, all in just 10 minutes of time!
Prep Time5 minutes
Cook Time10 minutes
Total Time15 minutes
Course: Main Course
Cuisine: Asian
Keyword: Asian almond dressing, Asian zucchini noodle bowl, cucumber zoodles
Servings: 1 serving
Author: Renee - www.raisinggenerationnourished@gmail.com

Ingredients

FOR THE NOODLE BOWL:

  • 2 cucumbers spiralized (the long, skinny kind work best.)
  • 2 large carrots spiralized (I don’t even peel mine since I buy organic, but you can if you wish. The nice wide ones will spiralize best)
  • 3-4 stalks of green onion sliced
  • ½ cup goji berries
  • 2 handfuls of walnuts crushed (I just take 2 handfuls of walnuts, and crush it in my hands. It’s about 1 ½ cups – you can chop through with a knife or in the food processor if you want them smaller pieces)

FOR THE DRESSING:

Instructions

  • Toss all of the noodle bowl ingredients in a medium mixing bowl.
  • Put all of the dressing ingredients into a pint size mason jar and blend with an immersion blender until smooth. (Alternatively, you could add the dressing ingredients into a food processor except the oil. Then, while the food processor is blending, use the oil drip cup on the lid to drizzle the oil in slowly to emulsify into the dressing.)
  • Start with pouring 1/3 cup of dressing into your salad and then add more per your preference. You will not use all the dressing most likely, but it keeps in the fridge for weeks, so you can make this noodle bowl (or even a regular salad”) more often and quicker with the dressing already made!

More real food recipes you might like ::

Condiments Dinner Ideas Real Food 101 Real Food Tips Snack Ideas

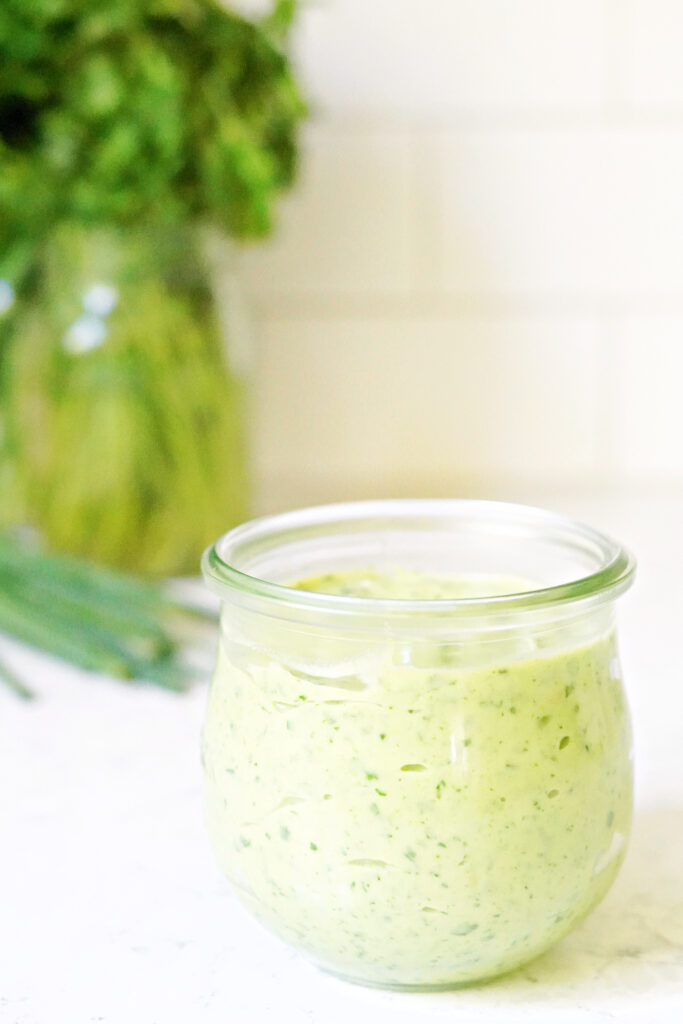
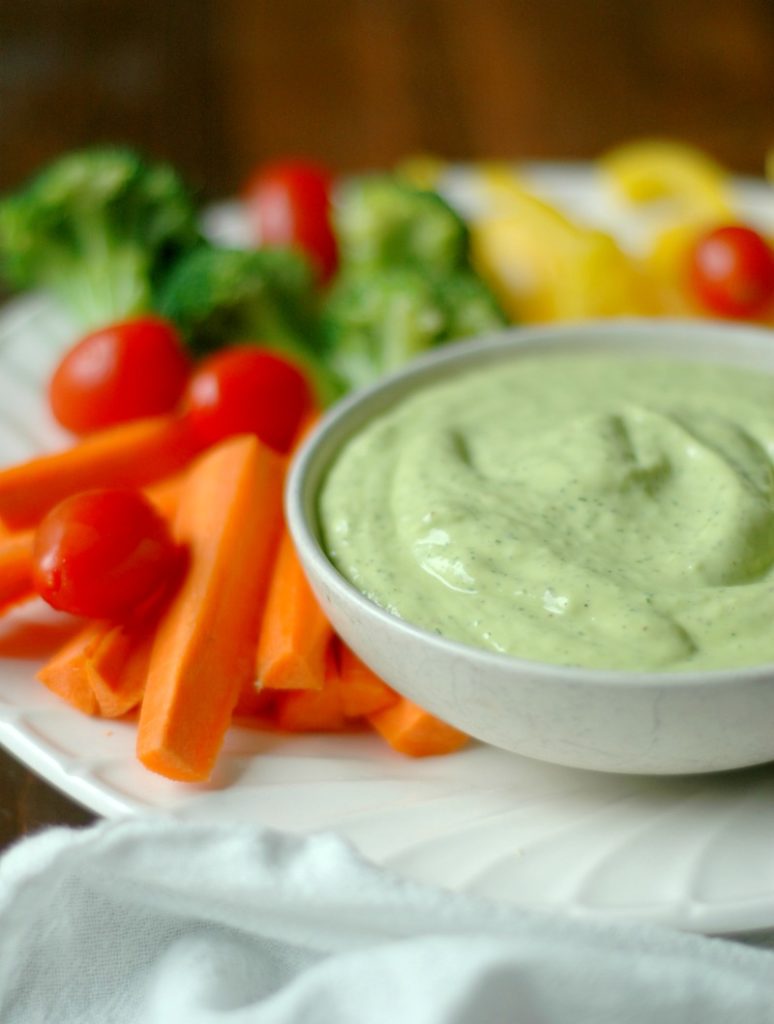
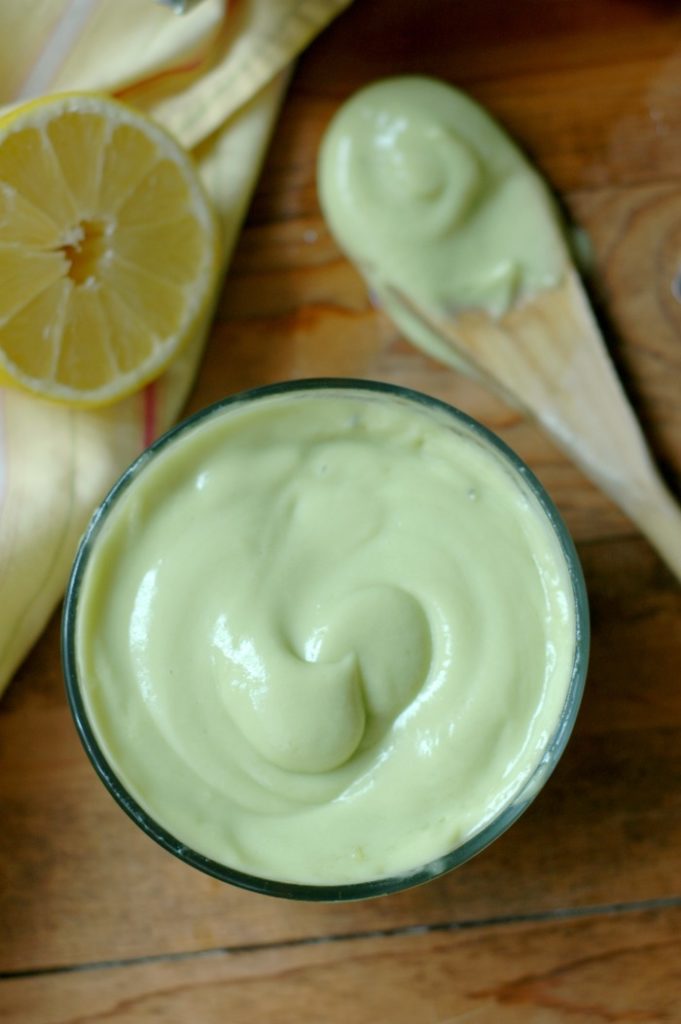
Thin & Crispy Oven Baked Paleo Zucchini Fritters PLUS, A Creamy Garlic Dipping Sauce! :: Gluten Free, Grain Free, Dairy Free, Nut Free!

July 27, 2018

These oven baked crispy bites are about to  less hands on time and the most amazing creamy garlic dipping sauce!

Product links in this post are affiliate links. It does not cost you anything, and helps maintain the free information on this site, as well as answer the questions of “what brand do you use?” Please know I never personally recommend any product I wouldn’t use on my own family.

Summer zucchini overload!

I just never tire of it! It is my favorite summer vegetable to play with during this season, and zucchini fritters have been on my mind since June!

Sooo many versions…

It really just depends on what kind of a person you are! Do you like soft pillowy zucchini fritters? Then most fritter recipes you find will give you that crispy outside with a soft pillowy inside. I don’t mind those, but last year I accidentally squished my fritters in the pan super thin, and realized just how much I LOVE a thin, crispy zucchini fritter! It is serious heaven!

Oven baked freedom!

But what about all that hands on time? I love a good pan seared zucchini fritter, but honestly I would probably make it twice a summer if I had to fuss with standing at the stove for 30 minutes for one side dish. You can only fit so many in one pan, and with my large crew to feed, well…it takes a while! I timed myself the last couple times I’ve made these oven-baked zucchini fritters, and from start to finish including making the batter, and flattening them onto a tray for the oven and it takes me 10-15 minutes (depending on kid interruptions!). From there, it’s as simple as popping the tray into the oven and then your hands are free to make the rest of dinner, or tend to kiddos.

Thin and crispy secrets to success!

There is definitely a method to the madness!

  • Get the water out of the zucchini. I know it seems like pain to drain the water from your zucchini before making your fritters, but this is really key. I like to speed the process up by adding the sea salt to the shredded zucchini. It draws the water out while I add the rest of the ingredients to the bowl, and you can squeeze that water right out.
  • Skip the other water-logged veggies. While I’m all about extra veg in my food, adding onion and other veggies just adds more water to the mix. I use dried herbs and dried onion/garlic for these to avoid the extra water.
  • Baking sheet surface matters. I love my Silpat liners, but I have just found that things crisp up better without them. From roasted veggies to these zucchini fritters, I tend to fore-go the Silpat or parchement paper. I use this avocado oil spray to spray the pan down (you can spread butter or coconut oil if don’t have that), and the zucchini fritters crisp up and slide right off.
  • Squish ‘em down! The cassava flour and egg really help these fritters come together, so they aren’t super fragile. Form them into your hand, get them onto that greased baking sheet, and use your hand to lightly flatten them a bit more.

That sauce though!

This quick sauce just takes these zucchini fritters over the top! It is so special, you’ll quite possibly lick the bowl clean! The smooth and creamy garlic dipping sauce is dairy free and you’ll never miss it. In fact you may just want to let everyone have their own little dipping bowl of sauce because you’ll definitely want to double dip this one! Here are a couple notes on the sauce to tailor it to what you have around, or what you have to do for special diets:

  • I prefer whole plain coconut yogurt for the base. I get large 32oz tubs of plain So Delicious coconut yogurt at our grocery store.
  • Full fat coconut milk or cream would work as the base as well as would raw milk/cream if you tolerate dairy.
  • Sour cream or full fat dairy yogurt would work for the base if you tolerate dairy.
  • Finally, tailor the garlic amount to your taste. I tend to boost the garlic on just about any recipe I come across, so my palate for garlic is pretty in love. If you prefer your food lighter on the garlic, I’d halve the amount.

Print Recipe
5 from 20 votes

Thin and Crispy Paleo Zucchini Fritters PLUS, A Creamy Garlic Dipping Sauce!

These oven-baked crispy bites have a most amazing creamy garlic dipping sauce!
Prep Time10 minutes
Cook Time20 minutes
Total Time30 minutes
Course: Side Dish
Cuisine: American
Keyword: Paleo zucchini fritters, zucchini fritter recipe, zucchini fritters
Servings: 12 servings
Author: Renee - www.raisinggenerationnourished.com

Ingredients

FOR THE ZUCCHINI FRITTERS:

FOR THE SAUCE:

  • ½ cup plain full fat coconut yogurt see above notes for other options here
  • ¼ cup avocado oil or olive oil
  • Juice of ½ lemon
  • 1 small avocado pitted
  • 2 garlic cloves peeled
  • 2 tsp raw honey
  • ½ tsp sea salt

Instructions

  • Pre-heat the oven to 425 degrees.
  • Place a thin kitchen towel over a colander, dump the grated zucchini in, and toss the zucchini with the sea salt. Let the zucchini/salt sit while you prepare the rest of the ingredients into a bowl. The sea salt draws all the water out of the zucchini, so you can squeeze it out easily.
  • Put the eggs and seasonings into a medium mixing bowl and whisk together.
  • Pull up the sides of the kitchen towel that the zucchini is sitting in, twist, and squeeze out as much of the water from the shredded zucchini as you can.
  • Put the grated and drained zucchini into the bowl with the egg/seasoning mixture, add the cassava flour, and mix together.
  • Spray 2 baking sheets with avocado oil spray – this helps with sticking and also helps the fritters crisp and brown up. DO NOT line your baking sheet with parchment paper or with Silpat – the fritters will stick more with them (trust me) and they get much crispier on just the plain baking sheet. Make flat disks out of the zucchini batter, place them on the baking sheet, and then lightly flatten the disks on the tray using your hand a little more.
  • Bake the fritters in the 425 degree oven for 10-15 minutes. Take the tray out, flip the zucchini fritters over, and bake for another 10 minutes until crispy, golden brown. Let the fritters cool before handling.
  • To make the dipping sauce, put all of the sauce ingredients into a pint mason jar, and blend with an immersion blender until smooth.

More real food *ZUCCHINI* RECIPES you might like! ::

Condiments Dinner Ideas Healthy Kids and Teens Real Food 101 Real Food Tips

How To Make Soy Free and Refined Sugar Free Teriyaki Sauce :: Plus! A 20 Minute Beef Teriyaki Stir Fry Recipe!

September 9, 2017

Learn how to make soy free and refined sugar free teriyaki sauce, and a bonus 20 minute beef teriyaki stir fry recipe for those busy weeknights!

Product links in this post are affiliate links. It does not cost you anything and helps maintain the free information on this site, as well as answer the questions of “what brand do you use?” Please know I never personally recommend any product I wouldn’t use on my own family. 

Season transitions…

While most that are unfamiliar with Michigan think we are buried in snow most of the year, the reality is…we have just about the most amazing summer you’ll find anywhere on the planet! And while that snow *is* our reality about 3-4 months out of the year, having distinct seasonal changes is what keeps me in love with this place we call home.

We are hanging up our body boards and swimsuits and welcoming the new school year with open arms!

Season changes and new school routines

The new school year brings a different kind of busy to our house. With 3 young children, we kept pretty “busy” all summer long, but the school year type of busy is just a little different. There are places to be *on time*, lessons and practices to be *on time*, and bedtimes that are not as flexible as the lazy days of summer.

Which brings me to dinner…

Efficient but nourishing is the name of my game!

I know many of you picture this foodie blogger momma floating around the kitchen all day preparing elaborate meals for her family. That is just not my reality! This house is about as real as it gets, and as a work at home mom with kids that need to be taken to and from school, as well as still has a little one that isn’t in full time school yet…well, dinner needs to be efficient.

But how do we make a quick dinner, and still meet those goals of using real food instead of convenience foods?

My veteran momma school year dinner prep tips!

Well, maybe not veteran, but I do have a few years under my belt with school aged kids, and I have learned a few things about dinner time during the school year that I hope will help you.

  • Make weekend meals stretch into the weekdays. Plan your big roasted chicken for Sunday dinner, and use the leftover meat for a stir fry on Monday. Plan a doubled up stir fry on Saturday or Sunday and use the leftovers for dinner on Tuesday. You get the idea. Take a good 1-2 days out of that 5 day work week to use leftovers, and the week of dinners will feel less daunting.
  • Prep “the little things” ahead of time. Salad dressings, dips, sauces (like this teriyaki sauce!) may take just a few minutes to make, but that few minutes on a crammed out Wednesday night of activities will rush you. Every Sunday I like to make some “little things” like salad dressings, mayo, or a sauce for dinner and just stash it away for the week. Repeat after me…one. less. thing. (!!)
  • Take 5-10 minutes before bed to prep anything for dinner the next day. Again, it doesn’t take long to chop veggies, but that 5 minutes of time is precious on a school night. Chop your veg, slice meat (or get it marinating!), peel garlic, and make that dinner prep fly by the next day. You can even do things like make the rice for this dinner meal the night before. This could be considered one of those “little things” from the above point. If you know you eat rice 1-2 times per week, make that rice up while you are having your prep time in the kitchen over the weekend.
  • And a quick tip for work at home or stay at home moms! I know this isn’t everyone, but since I fall in this category, I do have a tip to share for my friends in this place. Make dinner before school gets out – or at least have it ready to go, on a sheet pan, chopped, half way made, etc. I don’t know about you, but my kids are starving after school, and a lot of times we just go ahead and have dinner when they get home around 4pm. Most days, I make dinner when I put my toddler down for her nap so it can run quick without interruption, and I’ll just warm it back up when the kids get home from school. Again, I understand this is not do-able for every momma. If you are a work outside the home momma, we would absolutely love to hear your tips and tricks for dinner time in the comments!

Naturally sweetened teriyaki sauce {made in 5 minutes!}

Sticky and sweet teriyaki sauce will make just about any hesitant stir fry eater in the house change their minds! Most teryaki sauces you find on the market or in restaurants are loaded with corn syrup or sugar. In just about 5 minutes, you can make your own teriyaki using natural sweeteners, and it seriously tastes like anything you would love right out of a restaurant!

Print Recipe
5 from 14 votes

5 Minute Teriyaki Sauce

Learn how to make soy free and refined sugar free teriyaki sauce.
Prep Time5 minutes
Total Time5 minutes
Course: Condiment
Cuisine: Asian
Keyword: gluten-free teriyaki sauce, how to make teriyaki sauce, sugar-free teriyaki sauce
Servings: 16 tablespoons
Author: Renee - www.raisinggenerationnourished.com

Ingredients

Instructions

  • Put everything except the arrowroot slurry into a small sauce pan and bring to a simmer for 2 minutes.
  • Add the arrowroot slurry and whisk until the sauce thickens. This will take less than a minute.
  • Pour your sauce over any stir fry! You can freeze your sauce in ice cube trays or small freezer containers too. This recipe makes a little over 1 cup of sauce – enough for 1 family sized stir fry.

So I’ve got my 5 minute teriyaki sauce made…now what???

Well…you make a stir fry with whatever is in season near you! Here’s a quick template recipe, but it is really forgiving. If you have chicken instead of beef, use that. If you have different veggies on hand, swap them out!


20 Minute Beef Teriyaki Stir Fry


For the beef ::

  • 2 tbsp potato starch (arrowroot or tapioca starches would work, but I like the crispy finish that potato starch lends)
  • ½ tsp sea salt
  • ¼ tsp pepper
  • ½ lb grass-fed swiss steak, cut into strips
  • 2 tbsp friendly fat to cook in such as tallow, butter, ghee, or coconut oil

For the stir fry ::

  • 2 tbsp friendly fat to cook in such as tallow, butter, ghee, or coconut oil
  • ½ large white onion
  • 2 small or 1 large bell pepper (I used orange)
  • 1lb frozen broccoli, thawed (or 1 head fresh broccoli. I get large bags of frozen organic broccoli at Costco)
  • 1 large carrot peeled into strips (I use this Y-peeler to make the cool, noodle like strips!)
  • 3 cloves of garlic, minced
  • 1 recipe of the teriyaki sauce above
  • Sea salt and pepper to taste

Instructions :: 

  1. Make the teriyaki sauce, and set aside. See the above instructions for the 5 minute teriyaki sauce!
  2. Make the beef strips: Whisk the potato starch, sea salt, and pepper in a bowl and toss the beef strips in to coat. Melt your fat in a skillet over medium-high heat, add the beef, and cook until crispy, about 5 minutes. Set the crispy beef aside.
  3. Make the stir fry: Melt the friendly fat in the skillet over medium-high heat. Add the onion, pepper, and broccoli and cook for 5 minutes. You can cook this for an additional 5 minutes if you prefer your veggies softer. Add the garlic and carrot strips and cook another 3 minutes. Add the crispy beef and teriyaki sauce and simmer 3-5 minutes. Sea salt and pepper to your taste.
  4. You can serve your stir fry as is, or over a bed of cauli rice, bone broth cooked white rice, veggie noodles, or gluten free rice ramen.

More real food recipes you might like ::

Breakfast Ideas Condiments Lunch Ideas Occasional Treats Real Food 101 Real Food Tips school lunches

Pectin Free Cherry Jam :: Honey Sweetened Too!

July 7, 2017

Preserve the best of cherry season with delicious cherry jam, perfect for all of your jam topping dreams!

Product links in this post are affiliate links. It does not cost you anything and helps maintain the free information on this site, as well as answer the questions of “what brand do you use?” Please know I never personally recommend any product I wouldn’t use on my own family.

It’s no secret…

We love cherry season! Cherry picking has become one of the summer activities my older girls look forward to all year, and my youngest is really starting to get the hang of this whole cherry picking thing too 😉

A short but sweet season!

Only about a week or so long, we try to get right in there as soon as we hear word of those cherries being ready to pick, because before you know it – they are gone! This year, we had a late spring frost that damaged a lot of the cherry blossoms, but thankfully some were salvaged and we have been enjoying every juicy {messy!} bite of the 60 pounds we picked.

Novice cherry jam maker…

As many years as we have been picking cherries, I have never made cherry jam! I usually pick one fruit from the summer to make jam with, and this year I decided cherries were the lucky ones! I was so thankful that despite the frost this spring we were still able to pick, and I really wanted to do something special with them.

Since our cherry picking was literally the day before the 4th of July holiday, I didn’t have time to get to the store to buy the pectin for jam making I like…(If you are really loving jam making season, THIS is the safe, preservative free pectin I like to use!)

…So a pectin free trial run happened…

…and while my first batch was a bit runny (made a great syrup for pancakes!), we loved the result once I got it right! Since making the first trial, I have made 3 batches of this jam, and really nailed a great consistency for all your jam topping dreams, as well as the perfect amount of sweet and cherry flavor.

A note on the “sweet” and types of cherries

I have made a couple batches of this jam with our favorite local raw honey, and 1 batch with organic cane sugar to be sure it worked, and to get the amount right. For those of you who don’t have access to a good raw honey that tastes really light and delicious, the organic cane sugar is your best bet at a good jam. If your raw honey is too floral, dark, and rich, it will overpower the cherry flavor, and you don’t want that in this kind of recipe – the cherries are SO good!

Be sure to taste your jam before jarring it up. We all have different sweet palates, and your cherries might have a different level of sweetness. If you are using sour cherries you will probably have to double the sweet. Ours were sweet cherries that were perfectly ripe – almost over ripe and were very sweet.

Storage!

In my house, homemade jam is a treat, so I just don’t make a ton of it anymore. Jam for run of the mill use like PBJ’s for school are reserved for a cost effective organic brand from Costco – 3 mouths to feed, times 3 sandwiches, a few times per week equals a lot of jam! I reserve our homemade jam for a treat to top weekend pancakes, or to stir into yogurt, or to swirl into homemade ice cream!

That said, you can batch up and store this jam however you wish. I am just keeping mine in the fridge – it will go that fast!  Since I made some extra batches to prepare for this post, I’ll be giving some away as gifts, and I stored the extra in the freezer as freezer jam. If you like to can, you can water bath can the jars and just be sure to check the seal the next day to make sure it took. If they are good to go, you can pantry store them, and if you get one that doesn’t seal right just freeze it.

Recipe size and jar storeage

This recipe makes enough jam for four 8oz jelly jars. I happen to think this style is much cuter for gift giving by the way! You could also use eight 4oz jelly jars which also make wonderful gifts, or are great for storage when you don’t want to pull out a larger jar of jam. I freeze my jam for 24 hours, and then put the lids on to prevent the jars from breaking.

Print Recipe
5 from 5 votes

Pectin Free Cherry Jam

Preserve the best of cherry season with delicious cherry jam, perfect for all of your jam topping dreams!
Course: Condiment
Cuisine: American
Keyword: honey sweetened jam recipe, jam without pectin, pectin free cherry jam
Servings: 2 pints
Author: Renee - www.raisinggenerationnourished.com

Ingredients

  • 8 cups sweet cherries pitted (you can use sour cherries, but will have to adjust the honey/sweet to your taste)
  • 1/4 cup water
  • Juice of 1 large lemon about ¼ cup juice
  • ¾ cup raw honey organic pure cane sugar will work too. Be sure you enjoy the taste of your honey – pick a light color honey – if it is very floral in taste it will cover up the cherry flavor. If you can’t find one you love, I’d suggest using organic cane sugar!
  • 2 tsp almond extract optional but so good!

Instructions

  • Put the cherries and water in a pot and bring to a simmer. Use a potato masher or spoon to squish the cherries while it simmers for about 15 minutes.
  • Add the lemon, honey, and almond extract and bring to a constant, rolling boil until it thickens, and you can feel it thicker to stir, about 20-25 minutes. Stir often to prevent sticking and scorching. You will see the jam thicken up toward the 20 minute mark, looking more viscous. You can jar it up and put it in the fridge or freezer, or water bath can it at this point! Recipe makes 4 of these 8oz jelly jars.

More real food recipes you might like ::

Condiments Dinner Ideas Healthy Kids and Teens Lunch Ideas Nourishing Staples Real Food 101 Real Food Tips school lunches Snack Ideas

Paleo Ranch Dressing and Dip :: Dairy Free, Egg Free, and Filled With Healthy Fats!

June 23, 2017

From salad dressing to dip and everything in between, Paleo Ranch dressing is everything you love about Ranch, without the dairy!

Product links in this post are affiliate links. It does not cost you anything and helps maintain the free information on this site, as well as answer the questions of “what brand do you use?” Please know I never personally recommend any product I wouldn’t use on my own family.

Little kids and Ranch dressing…

It’s a bit like my 6 year old and toads…they just go hand in hand! We’ve been enjoying all the creatures that summertime brings…especially this little one who I am pretty sure is destined to be some sort of animal scientist!

But back to the kids and Ranch!

I don’t remember using many other dressings as a kid, and I don’t know too many kids who don’t love Ranch dressing! As the commercials usually show, most kids will gobble up just about any vegetable if there’s Ranch involved!

So what’s the problem with commercial Ranch dressings?

Store bought Ranch dressings (yes, even many with “healthy” claimed on the bottle), are filled with rancid vegetable oils, soy, preservatives, sugar, and other additives. Kinda ruins the idea of the kids loading up on mineral rich, healthy veggies when they are drowning in it all that doesn’t it?!

It’s truly just not worth it. We have generations of kids (including my generation) that grew up on these toxic, rancid fats that did our bodies zero favors. Everything from our brains, to organ function, and even hormone regulation relies on real, healthy fats to work right.

All the flavor, using real ingredients!

Real food is so delicious dear friends! Big box companies just have to bottle up that flavor somehow faster and cheaper, as well as make it last long on the shelf. Which is why they have to add so much junk to it!

The good news, is that when you stick to the basics, and make it yourself, not only does it take just minutes to make, the real flavor from everything from the onion-y scallions to the herb-y dill and parsley give that dressing the Ranch flavor without even having to work hard!

Lightning fast prep!

I’m talking literally 5 minutes to dump it all in a jar and blend it up. It is easy and fast enough to prep on your prep day every week – if it will last that long. This dip/dressing goes really fast in my house – I swear the girls would drink it out of the jar if they could, and they definitely lick the bowl clean!

Why dairy free?

I’ll be the first one in the room to raise my hand when asked if raw dairy is a good food source. I am a huge believer in the power of raw dairy – and I love our local raw dairy farmers! Sadly, I just don’t tolerate it. So while it is a very healthy food, it just doesn’t work for some people, and that’s where I come in! You can swap the coconut milk for raw milk or cream easy peasy if you tolerate dairy and wish to!

And my dear dairy free friends, I hope you enjoy this creamy dreamy Ranch – I promise you won’t taste the coconut! Pinky swear!

A note on the fresh herbs versus dried

This time of year, my herb garden is loaded to the brim with herbs to make Ranch. In the winter we swap to dried herbs a lot (simply figure cutting the amounts of the fresh herbs down to a couple teaspoons of dried to make the swap). I do think that fresh herbs just make the Ranch that much sweeter…it really just takes the flavor up a few notches. If you have access to fresh, do it!

Different ways to flavor your Ranch!

Change things up a little big with these really fun ways to flavor your Ranch for a fun dip or dressing. My kids to tend to prefer just the plain Ranch, but 2 of them really love the Asian dressing mixed with a slaw salad – don’t knock it til you try it!

  • Chipotle Ranch :: Add 1 tsp chipotle powder (start with this and add more if you like more heat)
  • Bacon Ranch :: Swap the avocado oil for 2-4 tablespoons of bacon grease. You can also fold in chopped crispy bacon after blending
  • BBQ Ranch :: Add 3 tbps of your favorite BBQ sauce (we like this safe ingredient 5 minute homemade BBQ sauce)
  • Asian Style Ranch (so good on a cabbage slaw salad!) :: Swap the avocado oil for sesame oil. Swap the parsley for 1/2 tsp or more of ground ginger to your taste. Swap the white wine vinegar for 2 tbsp coconut aminos (tastes like soy sauce without the soy).

A note on tools…

It is easiest to make this dressing in a quart sized jar. The recipe makes a little over a pint of dressing. The quart jar just gives you more room to get all the fresh herbs in there, as well as use the blender. And speaking of the blender…the immersion blender will become your most beloved kitchen tool if you have never tried one before! Put it on your wishlist – you won’t be sorry. It gets daily use in my kitchen from dressings to soups!

Print Recipe
5 from 11 votes

Paleo Ranch Dressing and Dip

From salad dressing to dip and everything in between, Paleo Ranch dressing is everything you love about Ranch, without the dairy!
Prep Time5 minutes
Total Time5 minutes
Course: Condiment
Cuisine: American
Keyword: dairy-free ranch dip recipe, dairy-free ranch dressing, Paleo ranch dressing recipe
Servings: 1 pint
Author: Renee - www.raisinggenerationnourished.com

Ingredients

  • 1 cup whole coconut milk I like this gum free coconut milk. If you tolerate dairy, raw milk would work
  • 1/4 cup avocado oil Olive oil would work too.
  • 1 small avocado pitted
  • 1 tbsp white wine vinegar
  • 3 large green onions chopped (use the green and white part!)
  • 1/4 cup fresh dill no need to chop
  • 1/4 cup fresh chives no need to chop
  • 2-3 tbsp fresh parsley no need to chop
  • 3-4 basil leaves no need to chop
  • 1 tsp garlic powder 1 garlic clove would be fine but might adds a bit of heat to the dressing
  • 1 tsp sea salt
  • 1/2 tsp pepper

Instructions

  • Everything into a quart mason jar (I just measure the liquids using the measurements right on the jar instead of dirtying measuring cups!).
  • Use an immersion blender to blend until smooth. Taste for salt/pepper to your taste.

More real food recipes you might like ::


Condiments Dinner Ideas Healthy Kids and Teens Real Food 101 Real Food Tips

How To Make Balsamic Reduction Sauce :: Plus! A 30 Minute Sheet Pan Dinner!

June 2, 2017

Sweet and sticky, this balsamic reduction sauce is the perfect, kid friendly compliment to any meal!

How To Make Balsamic Reduction Sauce :: Plus! A 30 Minute Sheet Pan Dinner!

Ladies and gentlemen, we made it to the beach last weekend!

I’m not real sure what is going on with the cooler late spring temps around here, but we just couldn’t help it! Because I have 3 big time water bugs, I decided to go with the bathing suits despite the 60 degree weather, and 54 degree water temps (!!), because inevitably they are like a moth to a flame when it comes to the big lake.

I bundled them up in sweatshirts on top of their suits and off we went…my oldest and youngest flung their sweatshirts off the second their feet hit the sand…and yes my dear friends they did the polar plunge and totally swam in the icy water!

How To Make Balsamic Reduction Sauce :: Plus! A 30 Minute Sheet Pan Dinner!Three extremely busy kiddos, means 3 extremely hungry kiddos!

Summer time beach days sometimes call for light, snacky suppers, but more often than not, that doesn’t fly with my kids! They burn through everything so fast – they really need meals that count when they are so active. And I’ve got a super quick one for you today that will still give you enough time to spend the whole day at the beach if you want!

How To Make Balsamic Reduction Sauce :: Plus! A 30 Minute Sheet Pan Dinner!One sauce, multiple possibilities!

I am not sure that balsamic reductions are the first sauce that comes to mind when it comes to kid friendly meals, but I’m telling you – my kids ask for this over ketchup any day of the week! Sweet and sticky, it makes any dinner meal that I drizzle it over completely disappear.

Balsamic reduction sauces are so versatile, tasting amazing over everything from chicken and fish, to steak or even salads and roasted veggies. It’s a great sauce to keep in your back pocket when you want to dress something up a little bit and need a little change up.

How To Make Balsamic Reduction Sauce :: Plus! A 30 Minute Sheet Pan Dinner!So here’s the balsamic reduction sauce recipe!

Use your sauce however you like! If you are stuck on a whole meal idea, keep scrolling for the sheet pan dinner idea to use your sauce with!

How To Make Balsamic Reduction Sauce :: Plus! A 30 Minute Sheet Pan Dinner!

Print Recipe
5 from 5 votes

How To Make Balsamic Reduction Sauce

Sweet and sticky, this balsamic reduction sauce is the perfect, kid-friendly compliment to any meal!
Prep Time10 minutes
Cook Time15 minutes
Total Time25 minutes
Course: Condiment
Cuisine: American
Keyword: balsamic reduction recipe, balsamic reduction sauce, how to make a balsamic reduction
Servings: 1 cup
Author: Renee - www.raisinggenerationnourished.com

Ingredients

Instructions

  • Put everything into a small sauce pan and bring to a low boil.
  • Reduce the heat to medium/medium-low and simmer until the sauce has reduced by half, stirring occasionally along the way. This will take about 15 minutes. It will be viscous and sticky when finished. You can fix the rest of your meal or bake/roast a sheet pan meal while the balsamic sauce is simmering.

So what about that “quick” meal you were talking about?!

I promise I’m not going to leave you hanging. This sauce sounds amazing, but how do we make it work into a meal idea that is not only kid friendly, but do-able on a time crunch?

I’m so glad you asked!

How To Make Balsamic Reduction Sauce :: Plus! A 30 Minute Sheet Pan Dinner!Sheet pan dinners to the rescue!

I’m all about these hands free cook methods, dear friends! Pile up that sheet pan with whatever veggies are in season and let the oven do the rest. While your veggies and meat are roasting, you can simmer your balsamic sauce up on the stovetop (recipe above!). Start to finish the sauce just takes 15ish minutes so it is perfect timing for a sheet pan meal!

How To Make Balsamic Reduction Sauce :: Plus! A 30 Minute Sheet Pan Dinner!

Balsamic Glazed Salmon & Roasted Veggies:

Ingredients:

  • ½ large onion, sliced
  • 2-3 medium carrots, peeled and sliced on the bias
  • 1 bunch of asparagus, woody ends trimmed off
  • 3 medium red potatoes, cubed
  • 4 oz mushrooms, sliced
  • 3 tbsp avocado oil (or other friendly fat to roast with)
  • 1 tsp sea salt (to taste)
  • ¼ tsp pepper
  • 1 tsp dried parsley
  • 1 tsp dried dill
  • 3-4 salmon filets (If you have little ones like I do, you can cut the filets in half for smaller portions – I use 3 filets and half them to make 6 total servings.)
  • Avocado oil to brush over the salmon
  • Sea salt/pepper to taste to sprinkle over the salmon
  • 1 recipe of the balsamic reduction sauce from above

Instructions:

  1. Preheat the oven to 400 degrees.
  2. Toss all of the veggies with the avocado oil, sea salt, pepper, parsley, and dill on a large sheet pan. Spread them out evenly and roast for 10 minutes while you get the balsamic sauce going and prepare the salmon.
  3. While the veggies are roasting you can get your balsamic sauce simmering on the stove (see recipe above). You can also brush each salmon filet with avocado oil and sprinkle sea salt and pepper to your taste on both sides of each filet.
  4. After the veggies have roasted 10 minutes, take them out and stir the veggies around. Place the salmon fillets on top of the veggies and roast another 20 minutes until the veggies are bite tender and the salmon is cooked through to your liking. If you like your veggies softer, you can cook them longer than that first 10 minutes. The salmon will only need the last 20 minutes of cook time.
  5. Spoon the balsamic reduction sauce over each salmon filet and drizzle over the veggies as well before serving.

More real food recipes you might like ::


Condiments Dinner Ideas Feeding Babies Healthy Kids and Teens Lunch Ideas Nourishing Staples Real Food 101 Real Food Tips

Probiotic Rich Asparagus Pickles (Fermented Asparagus!)

May 26, 2017

A big probiotic boost and delicious salty, sour bite from your fresh spring asparagus!

Probiotic Rich Asparagus Pickles (Fermented Asparagus!)Product links in this post are affiliate links. It does not cost you anything and helps maintain the free information on this site, as well as answer the questions of “what brand do you use?” Please know I never personally recommend any product I wouldn’t use on my own family.

We’ve been jarring up some yummy Michigan asparagus over the last couple weeks!

This is a fun project to get the kids in on. The steps are so easy that even a toddler can follow along! (And said toddler will probably be more willing to eat them if he gets to help!)

Probiotic Rich Asparagus Pickles (Fermented Asparagus!)Little helpers and seasonal produce!

My littlest helper in the house has been eager to hone her asparagus snapping skills, and she makes a really good jar stuffer too, packing those spears of asparagus in like a pro does!

Here are some great tips for including little ones in your kitchen tasks (without losing your ever loving mind 😉 )

    • Show them first. Literally do each step you want them to do. Break it down momma. They haven’t done this before!
    • Hand over hand next. For the really little guys, get your hands over theirs and show them how to do what you are asking them to do. Whether that is stirring, cracking an egg, or snapping some beans. They need to feel it.
    • Let them try with you narrating the steps. Slow down. Yes I know that is so hard when there is so. much. to. do., but it is worth it when they will be able to do it independently. I promise you will be more frustrated if they are doing it the “wrong way” over and over again because you didn’t show them the proper way to do something. (Please learn from my experience!)
    • Tell them the why! If you are snapping the ends off the asparagus, tell them why. If you are slicing the stems off the strawberries, let them know why! Giving them purpose and a reason will help them remember how to do what they are doing better instead of just blinding doing a task.
    • Keep it positive. Spills happen. Mistakes will happen. You’ll see that I even let an asparagus go into the jar that is right here in this post that Caitlyn forgot and snapped the wrong end so it ended up really short! Go over the steps again and show them. You’ll frustrate them and tear them down if you get angry or frustrated with them. If it turns out they can’t handle a task, simply let them know we’ll try something else, and maybe we will try this task again another time.

Probiotic Rich Asparagus Pickles (Fermented Asparagus!)Sooo…Asparagus “Pickles?!”

Yep! I brine these babies just like I would pickling cucumbers, and they disappear just as fast as regular pickles around these parts! A little sour and salty bite, I use the same dilly, mustardy, garlicy blend I do with cucumbers and add a bit of heat with red pepper flakes. It leaves a perfectly kid friendly taste, and I even make a jar just for momma with a little extra heat for my liking 😉

Probiotic Rich Asparagus Pickles (Fermented Asparagus!)2 birds…1 stone!

Not only do pickled asparagus taste amazing, they are loaded with beneficial bacteria for our guts too! The salty brine keeps the bad bacteria at bay, and allows the naturally good bacteria in the vegetable to proliferate and grow. Adding a spear or 2 of pickled asparagus to that lunchtime salad or wrap will not only get your veggie minerals in, but it will nourish the gut with the most cost effective source of probiotics around!

Probiotic Rich Asparagus Pickles (Fermented Asparagus!)Fermenting tools

While you can definitely get your ferments going today with just glass jar and a plastic lid (metal lids will corrode over time so plastic is recommended), as you get going you may want to take a look at fermenting tools that make the process even easier and stress free.

Vegetable ferments do best in an anaerobic environment (that is, “no oxygen” using an air tight seal). Plastic lids work fine, though some air does get through, and as the gasses build up in the ferment you need to “release” them by opening the lid here and there. The air that gets through also makes it easier for stray airborne microbes and molds to get in which can make the whole jar go bad.

There are a couple of sealing options you can choose from, and I really have found these to give the best fermenting results. The one that I use is the first recommendation, the Pickle Pipe.

    • The Pickle Pipe :: I am convinced a busy, “every day” mom invented this fermenting tool! Talk about zero fuss, *easy to clean,* and affordable! The Pickle Pipe creates a seal with a simple (easy to wash!) silicone disk, and the metal ring your jar comes with. The “pipe” part of the silicone disk has a special opening that only pressures open when the gasses build up in the jar and need to be released. So basically…set it and forget it! You don’t have to check for pressure everyday at all. I also am in love with their Pickle Pebbles which weight down the ferment at the top so you don’t have to worry about molding or the tips of the veggies going bad from being out of the brine. Invaluable! I have never had a ferment go bad or mold using my Pickle Pipes and Pebbles.
    • Fido Jar :: Fido jars create an incredible anaerobic sealed environment and are super easy to clean and take care of. No crazy parts to clean, and they are beautiful lined up in the kitchen to ferment! You will need to “burp” these every day or so to let the gasses out but they work very well! They are pricier than mason jars (especially if you already have a lot of mason jars at home, and can just get some Pickle Pipes to top them off), but they will last forever and, again, they are beautiful!
    • Traditional Fermentation Crock :: I have to be honest…I love these! I really do! They are on my foodie dream list and when I can afford a really beautiful new fermenting crock I really, really want one for my kitchen! They are gorgeous, easy to clean and work fantastic. They come with a weight to keep the veggies down to prevent molding and they create a perfect anaerobic environment.
    • Air-Lock Lids :: These are a really great, inexpensive option – especially if you already have a lot of mason jars at home. I think the Pickle Pipes are easier to clean and use, but if you have some of these lying around don’t let them go to waste – they work great!

Probiotic Rich Asparagus Pickles (Fermented Asparagus!)

Print Recipe
5 from 11 votes

Probiotic Rich Asparagus Pickles (Fermented Asparagus!)

A big probiotic boost and delicious salty, sour bite from your fresh spring asparagus!
Prep Time5 minutes
Cook Time5 minutes
Rest4 days
Total Time10 minutes
Course: Condiment
Cuisine: American
Keyword: asparagus pickles, fermented asparagus, pickled asparagus
Servings: 8 servings
Author: Renee - www.raisinggenerationnourished.com

Ingredients

  • 2 cups warm water
  • 1 1/2 to 2 tbsp sea salt
  • 3 cloves of garlic smashed
  • 2 tsp mustard seeds
  • 1 tbsp fresh dill OR 1 ½ tsp dried dill
  • ½ tsp red pepper flakes
  • 1 bunch of asparagus woody ends discarded (spears should fit into a quart mason jar with a good inch of headspace at the top. Trim up the ends if you need to accommodate this)

Instructions

  • Dissolve the sea salt into the warm water and set aside. This is your brine to pour over the asparagus later.
  • Put the garlic, mustard seeds, dill, and red pepper flakes into a clean, 1 quart mason jar. Then the pack the asparagus spears into the jar as tightly as you can.
  • Pour the salt water brine over the packed in asparagus and spices, leaving 1 inch of headspace at the top. Be sure the asparagus is completely submerged under the brine (I like to use a weight, like this Pickle Pebble to keep the veggies down).
  • Seal your jar with your fermenting seal of choice. I use these Pickle Pipes<. See the above section about sealing options.
  • Let the sealed jar sit at room temperature until the taste is to your liking, anywhere from 1-3 weeks. You can taste them every few days to see where they are at. Remember that if you live in a warm climate, the fermenting will go faster. It is still quite chilly up here, and so my veggie ferments take more like 2-3 weeks to get to where we like them.

More real food recipes you might like ::

Condiments Feeding Babies Healthy Kids and Teens Lunch Ideas Nourishing Staples Real Food 101 Real Food Tips school lunches

Homemade Paleo Mayonnaise :: Free from common allergens! {Egg, Dairy, Soy, & Gluten Free!}

April 9, 2017

Just 5 minutes and this creamy paleo mayo is ready to go for your favorite salads, slaws, wraps, and more!

Homemade Paleo Mayonnaise :: Free from common allergens! {Egg, Dairy, Soy, & Gluten Free!}Product links in this post are affiliate links. It does not cost you anything and helps maintain the free information on this site, as well as answer the questions of “what brand do you use?” Please know I never personally recommend any product I wouldn’t use on my own family.

When life hands you a lemon…

…you make lemonade, of course!

I don’t consider myself a natural optimist. I have always been quite the black and white realist when it comes to pretty much everything. But, if there is anything that I have learned in almost 15 years of autoimmune thyroid disease, it is that getting down about healing roadblocks and restrictions only makes life gloomy. And when you have a house full of kids, that just plain doesn’t work well.

Homemade Paleo Mayonnaise :: Free from common allergens! {Egg, Dairy, Soy, & Gluten Free!}Life handed me a big ‘ol bucket of lemons

Healing roadblocks and autoimmune diet restrictions have been some of my best moments – because this stubborn go-getter fights back making gallons of lemonade out of those lemons. Sometimes it takes those flare ups to get fired up. I had a few days of feeling sorry for myself, and then I got busy. Why? Because I know this isn’t a life sentence. And I know that some of my best work comes during these times.

Homemade Paleo Mayonnaise :: Free from common allergens! {Egg, Dairy, Soy, & Gluten Free!}Why no eggs?!

Pastured eggs are so healthy – I mean they are full of really good fats, vitamins, and minerals. But, my friends, just because a food is inherently “healthy” doesn’t mean that it works for every “body.” After a Hashi’s flare up that we are thinking is in part due to an EBV infection coming out of dormancy, I decided to pull eggs out of my diet to help calm the flames of inflammation. Eggs are just one of those foods that can be inflammatory for those with any autoimmune conditions.

Within a month of keeping the eggs out of my diet I had lost 10 pounds. In essence, 10 pounds of inflammation. Even though I was not experiencing digestive distress when I ate them, eggs just weren’t working for me!

(I highly recommend the book Hashimoto’s Protocol by Dr. Isabella Wentz if you have not explored root causes and effective treatments for Hashis – according to her book, the vast majority of Hashimoto’s sufferers should be off eggs {along with dairy, gluten, and soy}. I want to make sure you all know that I am NOT a doctor, and what is working for me, may not necessarily be the case for you. Especially when it comes to autoimmune/Hashis/thyroid stuff, the root cause for one is not always the same for the other. Dr. Wentz’s books have been life changing – highly recommended!)

Homemade Paleo Mayonnaise :: Free from common allergens! {Egg, Dairy, Soy, & Gluten Free!}No eggs (or dairy)?! No problem!

I’ve been there and done that – in fact I’ve already been off dairy for the last few years because I know it just doesn’t jive with thyroid conditions. I also couldn’t eat eggs with any of my newborns least they be super fussy, and one of my girls couldn’t eat eggs during her babyhood/toddlerhood. Might there be a genetic component here? Could be. I have had numerous food allergy and sensitivity tests done in the last decade, and I never have come out as allergic or sensitive to eggs. It very well just may be that my body doesn’t do well with them – especially when my thyroid is acting up.

We’ll talk about baking without eggs another day. To be honest, I’m not doing a ton of baking. I’m keeping things as simple, rustic, and gentle as possible right now while I calm my system. Back to the basics…it’s cheaper, easier to plan, tastes amazing, and you know what? It works. If you are needing to calm inflammation, keeping it simple is key.

Homemade Paleo Mayonnaise :: Free from common allergens! {Egg, Dairy, Soy, & Gluten Free!}With a good, staple mayo, you can make just about anything!

Why mayo? Because with a good mayo, you can make Ranch dressing, flavored aioli, and just about any slaw, salad, or creamy dressing you need!

I have been craving coleslaw and salads! Probably that spring fever bug that is bitten me! I have been using my Italian dressing, French dressing, and Asian dressing (subbing almond butter for peanuts right now), but I have been wanting my Olive Garden dressing and tuna salad which both need a scoop of mayonnaise to make it taste really amazing! Eggless mayo isn’t a new concept to me – I created this mayo years ago when my toddler couldn’t eat eggs. It is so amazing, and if you can tolerate dairy it is so good – you’ll love it!

Homemade Paleo Mayonnaise :: Free from common allergens! {Egg, Dairy, Soy, & Gluten Free!}The real deal…legit…whatever you wanna call it – I want it to taste GOOD!

Over the last month I have been working on this egg and dairy free mayo making sure it tastes *just* like the real thing – ie one that does NOT taste like avocado or coconut! Ha! And I want that smooth, creamy consistency – not too thick and not too thin.

Thank you for being so patient with me as I perfect these recipes – I know my Instagram followers have been asking for these egg free recipes as I post them! I want them to be the real deal before I post, and I am confident your family will love this! The taste *and* texture is just like what I grew up on – you know…that blue lidded container! Only this is made without the rancid soy oils and preservatives!

Homemade Paleo Mayonnaise :: Free from common allergens! {Egg, Dairy, Soy, & Gluten Free!}Ingredient notes and swaps!

  • Olive oil will swap for the avocado oil if that is what you have. Avoid vegetable/canola oils. I purchase avocado oil from Costco.
  • Almond or cashew milks should swap for the coconut milk if that is what you have. If you are following an anti-inflammatory (AIP) type diet, coconut milk would be the best option over a nut milk. I promise this doesn’t turn out tasting like coconut! (I love this coconut milk that doesn’t have gums or preservatives, and keep it on hand in the pantry. You can also make your own coconut milk.) If you tolerate dairy, raw milk/cream works too.
  • You can leave the raw honey out if you are sugar free. Organic pure cane sugar or coconut sugar would work too. The hint of sweet makes it really taste like Miracle Whip if that is what you are used to. Without the sweet it tastes more like a Hellmann’s type mayo and is really yummy too! I purchase raw honey from a local farmer.
  • Make sure you taste the mayo once it is blended for sea salt/pepper to your taste, as well as “tang” – you can add more mustard or lemon juice if you want more tangy bite.

I literally eyeball everything into a mason jar – mason jars have measurements on the side so I just fill the avocado oil and coconut milk to the levels on the jar and toss in the rest – it takes less than 5 minutes!

Print Recipe
5 from 15 votes

Homemade Mayonnaise :: Free from common allergens!

Just 5 minutes and this creamy paleo mayo is ready to go for your favorite salads, slaws, wraps, and more!
Prep Time5 minutes
Total Time5 minutes
Course: Condiment
Cuisine: American
Keyword: allergen-friendly mayonnaise, homemade mayo, Paleo mayonnaise
Servings: 8 servings
Author: Renee - www.raisinggenerationnourished.com

Ingredients

Instructions

  • Put everything into a pint mason jar, and use your immersion blender to blend until smooth and thick. (I think this would work in a food processor if you drizzle the oil into the oil drip cup to slowly be added in to emulsify.)
  • Taste for sea salt/pepper to your taste, as well as “tang” – you can add more mustard or lemon juice if you want more tangy bite.
  • Store your mayo in the fridge up to a week.

More real food recipes you might like ::

Condiments Feeding Babies Nourishing Staples Real Food 101 Real Food Tips

Probiotic Rich Homemade Sauerkraut {Fermented Cabbage} :: 2 Ingredients, Quick Prep, Real Food!

January 27, 2017

Homemade sauerkraut is the simplest way to populate your gut with a variety of nourishing probiotics for robust gut health and immune systems!

Probiotic Rich Sauerkraut {Fermented Cabbage} :: 2 Ingredients, Quick Prep, Real Food!

Product links in this post are affiliate links. It does not cost you anything and helps maintain the free information on this site, as well as answer the questions of “what brand do you use?” Please know I never personally recommend any product I wouldn’t use on my own family.

The status of your gut determines just about everything…

At this point most people know that just about everything in the body relies on the status of your gut health. And that the status of your gut health is tied to the type of flora (bacteria) dominating the territory.

Probiotic Rich Sauerkraut {Fermented Cabbage} :: 2 Ingredients, Quick Prep, Real Food!If the good bacteria reigns “king,” digestion is sound, the immune system works more effectively, and the brain is clear.

When the bad bacteria is more prevalent, digestion is disrupted in a myriad of different ways (YES we should be pooping daily – if you are not you are constipated. NO your poop shouldn’t be runny, it shouldn’t hurt to poop, and indigestion, heartburn, and tummy aches are not normal!), the immune system is completely off (ie getting sick often, autoimmune disease, cancer, etc), and the brain is a foggy mess (the gut-brain connection is tied to many brain/neurological disorders from depression and Alzheimer’s to ADHD, autism, and everything in between.)

Probiotic Rich Sauerkraut {Fermented Cabbage} :: 2 Ingredients, Quick Prep, Real Food!Infiltrate and populate!

Traditionally fermented foods provide easy to absorb probiotics to our guts to use for battle every day. Whether you are generally healthy or have a few health issues, fermented vegetables such as sauerkraut can populate your gut with the bacteria it needs to sustain a robust immune system, healthy digestive system, and sound mind.

Probiotic Rich Sauerkraut {Fermented Cabbage} :: 2 Ingredients, Quick Prep, Real Food!The simplest prep – let nature do the work!

Sauerkraut prep is so simple, and yet what actually happens as the fermentation happens takes place is so interesting and complex. Just a few teaspoons of sea salt sprinkled over shredded cabbage lends the the cabbage its own brine to ferment. Over the course of a few days to a week, the sauerkraut increases in beneficial digestive enzymes, vitamins C and B, as well as a variety of strains of beneficial bacterial for the gut to flourish. It’s as simple (and as complex!) as that!

Probiotic Rich Sauerkraut {Fermented Cabbage} :: 2 Ingredients, Quick Prep, Real Food!How to add sauerkraut to your meal plan

My favorite way to eat sauerkraut is as a brine-y, pickled bite to a sandwich wrap, burger, or a salad. Think of anything you like to add a salty, brined bite to! If you are eating sauerkraut in a medicinal way, such as if you are on the GAPS protocol, sometimes it’s just best to eat a tablespoon or so before you eat your meal to get the digestive enzymes in your gut to help you digest your meal – and to get it over with if you don’t particularly care for the taste. I have to admit, not growing up on sauerkraut, it took me some time to get used to. I ate it because I knew I needed it, and over time I have grown to love it!

Probiotic Rich Sauerkraut {Fermented Cabbage} :: 2 Ingredients, Quick Prep, Real Food!Ok, but what about the kids?!

Let’s start with the little guys first! If you have little ones at home, say between the ages of 6 months to 1 year old, jump on it! You are at a really great window of time to introduce new flavors and textures where baby is willing and open – and hasn’t really learned or tested the word *no* yet 😉 I served my babies teaspoons of the brine from fermented vegetables not only to get the health benefits from it, but to get them used to the sour bite! I was always really surprised at how my babies took to ferments after the initial pucker! The cabbage softens during fermentation, so small pieces of the sauerkraut makes great finger food material for the little ones chasing food around their tray or table. Out of my 3 {very} different personality kids, they all willingly eat sauerkraut, and I truly believe it is because their palates were trained for it young.

But don’t give up on those toddlers and big kids! My biggest advice would be not to make a big deal out of it. If you have toddlers, give them bites of YOUR food first. They love eating off your plate. Set the example and eat it yourself and maybe give them bites of it straight up, or get it into a yummy sandwich and let them have at it. If you have older, school aged kids and teens I would start with just serving it in a sandwich. If they question it or turn it down, discuss the why. Talk to the school aged kids about what the bacteria in their gut is for. Let the teens read this post! Let them see the why behind it. Talk about how much better they will feel if there are some gut issues or gut related issues (from ADD to anxiety, allergies to frequent colds and on and on!). Some kids might just prefer to get a spoonful in and over-with and then enjoy their meal. Go for it! This is such an inexpensive way to get probiotics in!

Probiotic Rich Sauerkraut {Fermented Cabbage} :: 2 Ingredients, Quick Prep, Real Food!How do I begin eating fermented vegetables if I have never tried them before?

Fermented vegetables are teeming with good bacteria, and, especially for those with sensitive tummies, food allergies, or digestive disorders, fermented vegetables make the entire eating process easier on the gut by acting as a digestive aide! Eating even a tablespoon or so of ferment with each meal will aide in digesting your food as well as provide stability to your immune system and brain health.

Start with 1 tablespoon or so per day to begin with to allow the friendly bacteria to make their home in your gut. Starting out with too much all at once can lead to tummy upset as the good bacteria takes over the bad. Increase to 1 tablespoon 3x per day as you feel comfortable. Once your body is used to the ferments, you can eat as much as you like and tolerate. My school aged girls eat around 2 or so tablespoons of sauerkraut at a time when they eat it.

Probiotic Rich Sauerkraut {Fermented Cabbage} :: 2 Ingredients, Quick Prep, Real Food!Fermenting tools

While you can definitely get your ferments going today with just glass jar and a plastic lid (metal lids will corrode over time so plastic is recommended), as you get going you may want to take a look at fermenting tools that make the process even easier and stress free.

Vegetable ferments do best in an anaerobic environment (that is, “no oxygen” using an air tight seal). Plastic lids work fine, though some air does get through, and as the gasses build up in the ferment you need to “release” them by opening the lid here and there. The air that gets through also makes it easier for stray airborne microbes and molds to get in which can make the whole jar go bad.

There are a couple of sealing options you can choose from, and I really have found these to give the best fermenting results. The one that I use is the first recommendation, the Pickle Pipe.

    • The Pickle Pipe :: I am convinced a busy, “every day” mom invented this fermenting tool! Talk about zero fuss, *easy to clean,* and affordable! The Pickle Pipe creates a seal with a simple (easy to wash!) silicone disk, and the metal ring your jar comes with. The “pipe” part of the silicone disk has a special opening that only pressures open when the gasses build up in the jar and need to be released. So basically…set it and forget it! You don’t have to check for pressure everyday at all. I also am in love with their Pickle Pebbles which weight down the ferment at the top so you don’t have to worry about molding or the tips of the veggies going bad from being out of the brine. Invaluable! I have never had a ferment go bad or mold using my Pickle Pipes and Pebbles.
    • Fido Jar :: Fido jars create an incredible anaerobic sealed environment and are super easy to clean and take care of. No crazy parts to clean, and they are beautiful lined up in the kitchen to ferment! You will need to “burp” these every day or so to let the gasses out but they work very well! They are pricier than mason jars (especially if you already have a lot of mason jars at home, and can just get some Pickle Pipes to top them off), but they will last forever and, again, they are beautiful!
    • Traditional Fermentation Crock :: I have to be honest…I love these! I really do! They are on my foodie dream list and when I can afford a really beautiful new fermenting crock I really, really want one for my kitchen! They are gorgeous, easy to clean and work fantastic. They come with a weight to keep the veggies down to prevent molding and they create a perfect anaerobic environment.
    • Air-Lock Lids :: These are a really great, inexpensive option – especially if you already have a lot of mason jars at home. I think the Pickle Pipes are easier to clean and use, but if you have some of these lying around don’t let them go to waste – they work great!

One last equipment note! Many people find these Pickle Packers useful for squeezing the cabbage for making the natural brine. I have use a wooden spoon for years but think these are great too! {My birthday is in the fall if anyone wants to send me a wishlist gift! 🙂 }. Please keep in mind not to use metal spoons as it messes with the fermenting process – only wooden utensils.

Probiotic Rich Sauerkraut {Fermented Cabbage} :: 2 Ingredients, Quick Prep, Real Food!

Print Recipe
5 from 8 votes

Probiotic Rich Homemade Sauerkraut {Fermented Cabbage}

Homemade sauerkraut is the simplest way to populate your gut with a variety of nourishing probiotics for robust gut health and immune systems!
Prep Time10 minutes
Ferment2 days
Total Time10 minutes
Course: Condiment
Cuisine: American
Keyword: fermented cabbage recipe, homemade sauerkraut, sauerkraut recipe
Servings: 8 servings
Author: Renee - www.raisinggenerationnourished.com

Ingredients

  • 1/2 medium head of cabbage sliced thin or shredded
  • 2-3 tsp sea salt
  • 1-2 cloves of garlic smashed (Optional. I love the flavor and sweetness the garlic gives to sauerkraut - it is the only way I like it!)

Instructions

  • Put a big handful of the sliced cabbage into a clean pint jar, and sprinkle the sea salt over top. Using a wooden spoon or a vegetable pounder, press and stir the cabbage, squeezing the cabbage down. The salt will draw out the natural juices in the cabbage and it will create it's own brine with the sea salt. (It takes a few minutes for the juices to develop so be patient!)
  • Keep adding cabbage into the jar, packing it down into the jar, letting the salt soften the cabbage until you reach the top of the jar (Leaving about 1 inch of head-space at the top). Allow the salt to draw out enough juices in the cabbage to be fully submerged in the brine.
  • Put your fermenting weight on top of the cabbage/brine if you are using one, and wipe the rim of the jar clean.
  • Close up your jar (Put on your Pickle Pipe, or close the lid of your Fido Jar, or lid and use your Air-Lock. A simple plastic lid can work for your first time until you get the hang of things and want to invest in something to make your fermenting process easier.).
  • Set the jar at room temperature for 1-3 weeks depending on the taste you are going for. The longer it sits, the more flavor will develop. You can open and taste along the way until you are satisfied. I ferment mine for about 2 weeks, and that is the taste my kids enjoy best. Keep in mind that if you live in a warmer climate, you may not need as much time to ferment.

Tips on recipe size

This recipe makes 1 pint of sauerkraut. It is a great amount to get started on. I typically double this recipe into 2 pint jars (you could double into a quart jar, but I like to use the 2 smaller jars so my kids can get it out of the fridge to help themselves).

A quick note for those with histamine sensitivities!

If you have a hard time tolerating fermented foods or have a histamine sensitivity/allergy, sauerkraut is not recommended. Don’t beat yourself up! I have been there (and healed from!) histamine sensitivity, and it is worth avoiding foods that bother you. I used this soil based probiotic while I was healing and tolerated it well. (UPDATE 2021 – Amazon does not seem to have the probiotic I used anymore, but Perfect Supplements does have it!) (I am not a doctor or an expert in this area, so if you have questions I can try to answer them, but the Healing Histamine website is my favorite resource for this topic!)

More real food recipes you might like ::

Condiments Dinner Ideas Feeding Babies Lunch Ideas Nourishing Staples Real Food 101 Real Food Tips school lunches

Fermented Carrots {that kids will actually eat!} & The Benefits of Fermented Vegetables

January 6, 2017

You are 2 household ingredients away from a jar of fermented carrots teeming with gut nourishing probiotics, enzymes, and B vitamins!

Fermented Carrots {that kids will actually eat!} & The Benefits of Fermented VegetablesProduct links in this post are affiliate links. It does not cost you anything and helps maintain the free information on this site, as well as answer the questions of “what brand do you use?” Please know I never personally recommend any product I wouldn’t use on my own family.

Simplicity.

Last week I asked my Instagram and Facebook audiences what they wanted to see more of in the next year and what I heard loud and clear was that many of you wanted to see more of the simple, nourishing staples from our home, and the “why” behind them.

Easy to fix, easy to find ingredients, and food that normal, everyday people have time to make.

I couldn’t be more overjoyed at your request to add more traditional, real food staples to my writing!

Because truthfully, while fancy brunches and fun treats are great, nourishing everyday meals, nutrient dense breakfasts, and staples like these fermented carrots are really where it’s at! This is where we get down to the nitty gritty, nutrient packed foods that are going to make a real difference in your family’s health.

Fermented Carrots {that kids will actually eat!} & The Benefits of Fermented VegetablesThe status of your gut determines just about everything…

At this point most people know that just about everything in the body relies on the status of your gut health. And that the status of your gut health is tied to the type of flora (bacteria) dominating the territory.

If the good bacteria reigns “king,” digestion is sound, the immune system works more effectively, and the brain is clear.

When the bad bacteria is more prevalent, digestion is disrupted in a myriad of different ways (YES we should be pooping daily – if you are not you are constipated. NO your poop shouldn’t be runny, it shouldn’t hurt to poop, and indigestion, heartburn, and tummy aches are not normal!), the immune system is completely off (ie getting sick often, autoimmune disease, cancer, etc), and the brain is a foggy mess (the gut-brain connection is tied to many brain/neurological disorders from depression and Alzheimer’s to ADHD, autism, and everything in between.)

Infiltrate and populate!

Traditionally fermented foods provide easy to absorb probiotics to our guts to use for battle every day. Whether you are generally healthy or have a few health issues, fermented vegetables such as these fermented carrots can populate your gut with the bacteria it needs to sustain a robust immune system, healthy digestive system, and sound mind.

Fermented Carrots {that kids will actually eat!} & The Benefits of Fermented VegetablesProbiotic powerhouse without the fuss!

I know, I know…first it’s bone broth, now it’s “get the ferments in!” You’re thinking you are going to be in the kitchen all day! Not in the least! I, for one, don’t have the time to be in the kitchen all day.

A little salt water, a jar, and some chopped carrots is all you need to get your ferment going, and it truly is one of the least hands on activities going on in my kitchen. The process of the natural bacteria feeding on the sugar and starches in the carrots not only creates a variety of strains of beneficial flora for the gut, it also produces beneficial digestive enzymes and B vitamins. It is truly amazing!

That sounds great, but how in the world am I supposed to get my kids to eat this?!

If you have super little kids – as in ages 6 months to 2 years old, this is where it’s at! Get those palates used to ferments and soured foods as soon as you can! I was always so surprised at how easily my babies took to sour plain yogurt, sauerkraut, and shredded fermented carrots. You can even give the little ones a half teaspoon or so of the fermenting liquid from the jar which is loaded with probiotic goodness!

If you have older kids, I have a couple suggestions. First, don’t make a big deal out of it. Don’t tell them “I’m not sure that you are going to like this but let’s try it”. If they already eat carrot sticks and dip, serve it to them with homemade Ranch – it is delicious! Any age above 2 or 3 years old is also a great time to explain the “why” behind healthy food. Tell those toddlers and younger school aged kids that fermented carrots puts the “good guys” into their tummy to fight off the bad guys! Pull out an anatomy book for those older school aged kids and teens and show them the why. Give them examples of what goes on if the good bacteria isn’t winning the battle.

(I also would recommend halving or leaving out the garlic if you think that might deter the kids. My kids looove garlic and I think the garlic gives an even sweeter flavor to the finished product but you can leave it out and they are a yummy salty/sweet carrot stick to dip in Ranch!)

Fermented Carrots {that kids will actually eat!} & The Benefits of Fermented VegetablesTips for prepping the carrots for babies, toddlers, and big kids

Cut your carrots depending on what texture the kids will like better and what you are using it for. Sticks work best for lunch packing, and shredded works well for sandwiches and salads. Shredded also works best for older babies/toddlers that can’t chew thicker cut sticks. I tend to make sticks so they are ready for lunchboxes, and then just chop them up for salads or wraps. When I had babies in the house, I always had a jar of the shredded fermented veggies on hand for them.

If the taste is overwhelming to your kids at first, try chopping them up small into a salad, sandwich, or wrap. My kids love shredded chicken wraps with fermented veggies. You can make this 5 minute mayo that has a sweeter taste and top the sandwich with sweet tomato slices or even shredded apples to sweeten the deal a little.

Dips!

Listen, so long as it’s sans the store bought junky oil dressings, I say let them dip whatever they want if it is getting it into them! My kids prefer homemade Ranch, though right now my toddler is in a raw honey kick and I’m totally cool with that. Other options might be guacamole or hummus!

Fermented Carrots {that kids will actually eat!} & The Benefits of Fermented VegetablesHow do I begin eating fermented vegetables if I have never tried them before?

Fermented vegetables are teeming with good bacteria, and, especially for those with sensitive tummies, food allergies, or digestive disorders, fermented vegetables make the entire eating process easier on the gut by acting as a digestive aide! Eating even a tablespoon or so of ferment with each meal will aide in digesting your food as well as provide stability to your immune system and brain health.

Start with 1 tablespoon or so per day to begin with to allow the friendly bacteria to make their home in your gut. Starting out with too much all at once can lead to tummy upset as the good bacteria takes over the bad. Increase to 1 tablespoon 3x per day as you feel comfortable. Once your body is used to the ferments, you can eat as much as you like and tolerate. My school aged girls eat up to 1/4 cup or more at a time.

Fermented Carrots {that kids will actually eat!} & The Benefits of Fermented VegetablesFermenting tools

While you can definitely get your ferments going today with just glass jar and a plastic lid (metal lids will corrode over time so plastic is recommended), as you get going you may want to take a look at fermenting tools that make the process even easier and stress free.

Vegetable ferments do best in an anaerobic environment (that is, “no oxygen” using an air tight seal). Plastic lids work fine, though some air does get through, and as the gasses build up in the ferment you need to “release” them by opening the lid here and there. The air that gets through also makes it easier for stray airborne microbes and molds to get in which can make the whole jar go bad.

There are a couple of sealing options you can choose from, and I really have found these to give the best fermenting results. The one that I use is the first recommendation, the Pickle Pipe.

    • The Pickle Pipe :: I am convinced a busy, “every day” mom invented this fermenting tool! Talk about zero fuss, *easy to clean,* and affordable! The Pickle Pipe creates a seal with a simple (easy to wash!) silicone disk, and the metal ring your jar comes with. The “pipe” part of the silicone disk has a special opening that only pressures open when the gasses build up in the jar and need to be released. So basically…set it and forget it! You don’t have to check for pressure everyday at all. I also am in love with their Pickle Pebbles which weight down the ferment at the top so you don’t have to worry about molding or the tips of the veggies going bad from being out of the brine. Invaluable! I have never had a ferment go bad or mold using my Pickle Pipes and Pebbles.
    • Fido Jar :: Fido jars create an incredible anaerobic sealed environment and are super easy to clean and take care of. No crazy parts to clean, and they are beautiful lined up in the kitchen to ferment! You will need to “burp” these every day or so to let the gasses out but they work very well! They are pricier than mason jars (especially if you already have a lot of mason jars at home, and can just get some Pickle Pipes to top them off), but they will last forever and, again, they are beautiful!
    • Traditional Fermentation Crock :: I have to be honest…I love these! I really do! They are on my foodie dream list and when I can afford a really beautiful new fermenting crock I really, really want one for my kitchen! They are gorgeous, easy to clean and work fantastic. They come with a weight to keep the veggies down to prevent molding and they create a perfect anaerobic environment.
    • Air-Lock Lids :: These are a really great, inexpensive option – especially if you already have a lot of mason jars at home. I think the Pickle Pipes are easier to clean and use, but if you have some of these lying around don’t let them go to waste – they work great!

Fermented Carrots {that kids will actually eat!} & The Benefits of Fermented Vegetables

Print Recipe
5 from 11 votes

Fermented Carrots {that kids will actually eat!}

You are 2 household ingredients away from a jar of fermented carrots teeming with gut nourishing probiotics, enzymes, and B vitamins!
Prep Time5 minutes
Ferment1 day
Total Time5 minutes
Course: Condiment
Cuisine: American
Keyword: fermented carrots, how to ferment carrots, pickled carrots
Servings: 8 servings
Author: Renee - www.raisinggenerationnourished.com

Ingredients

  • 1 pint warm water
  • 3-4 tsp sea salt
  • 4 medium/large carrots peeled, and sliced into sticks, or into "coins," or strips/shredded (see notes above for help choosing the size that will work best for you)
  • 1 clove of garlic smashed (Optional. If you have other household favorite herbs go for it! Many people like to use dill for fermented carrots - I love those too. Garlic happens to be our favorite!)

Instructions

  • Make the brine. Stir the sea salt into the warm water until it dissolves. You will need most of this brine but will have a little bit left over - you can store the remaining brine in the fridge, or use it for another batch.
  • Put the carrots into a clean pint jar, packing them in as tight as you can, leaving about 1 inch of head-space at the top.
  • Pour the warm salt water brine over the carrots to cover them completely. Put your fermenting weight on top of the carrots/brine if you are using one, and wipe the rim of the jar clean.
  • Close up your jar (Put on your Pickle Pipe, or close the lid of your Fido Jar, or lid and use your Air-Lock. A simple plastic lid can work for your first time until you get the hang of things and want to invest in something to make your fermenting process easier.).
  • Set the jar at room temperature for 2 days up to 2-3 weeks depending on the taste you are going for. The longer it sits, the more flavor will develop. You can open and taste along the way until you are satisfied. I ferment mine for about a week, and that is the taste my kids enjoy best. Keep in mind that if you live in a warmer climate, you may not need as much time to ferment. 

Tips on recipe size

This recipe makes 1 pint of fermented carrots. It is a great amount to get started on. I typically double this recipe into 2 pint jars (you could double into a quart jar, but I like to use the 2 smaller jars so my kids can get it out of the fridge to help themselves). For a doubled recipe, I use 1 1/2 to 2 tablespoons of sea salt into a quart of warm water to make the brine to divide up into the 2 pint jars.

More real food recipes you might like ::

Condiments Dinner Ideas Lunch Ideas Nourishing Staples Real Food 101 Real Food Tips school lunches

Paleo Avocado & Bacon Salad Dressing

May 7, 2016

Nourishing friendly fats, a big amazing flavor, and prepped in just 5 minutes! Your lunchtime salad has never been faster, healthier, or tastier!

Paleo Avocado & Bacon Salad Dressing :: Nourishing friendly fats, a big amazing flavor, and prepped in just 5 minutes! Your lunchtime salad has never been faster, healthier, or tastier!

Links in this post are affiliate links. It does not cost you anything and helps maintain the free information on this site, as well as answer the questions of “what brand do you use?” Please know I never personally recommend any product or service I wouldn’t use on my own family.

Ohhh man are we getting the end of the school year jitters over here!

Spring is in full swing with absolutely gorgeous weather, and it takes all we can not to stop at a park or the beach on the way home from school. And, after 6 months of cold, I have been doing just that! I can tell the girls are just itching to climb, slide, swing, and get their feet in the beach sand!

Paleo Avocado & Bacon Salad Dressing :: Nourishing friendly fats, a big amazing flavor, and prepped in just 5 minutes! Your lunchtime salad has never been faster, healthier, or tastier!

Spending a little more time outdoors means I have been pulling out a lot more of my quicker prep summer time dinner meals.

We make “BLT” salads about once a week or so during the warm summer months, and they are definitely a family favorite.

Paleo Avocado & Bacon Salad Dressing :: Nourishing friendly fats, a big amazing flavor, and prepped in just 5 minutes! Your lunchtime salad has never been faster, healthier, or tastier!
We had a surplus of ripe avocados one time, and since there was some fresh bacon grease sitting in the pan from making bacon for our BLT salads, I decided to combine them for the base of a dressing, and boy was it a hit!
Paleo Avocado & Bacon Salad Dressing :: Nourishing friendly fats, a big amazing flavor, and prepped in just 5 minutes! Your lunchtime salad has never been faster, healthier, or tastier!
Avocado and bacon dressing has become our staple dressing for our BLT salads now because I almost always have the ingredients on hand, and it goes with it so well.

Paleo Avocado & Bacon Salad Dressing :: Nourishing friendly fats, a big amazing flavor, and prepped in just 5 minutes! Your lunchtime salad has never been faster, healthier, or tastier!
The dressing is creamy and feels rich because of the hint of bacon flavor, but it is super fresh and light. It makes a great veggie dip for the school lunchboxes the next day too.

It doesn’t get any better than a 5 minute dressing prep too!

Paleo Avocado & Bacon Salad Dressing :: Nourishing friendly fats, a big amazing flavor, and prepped in just 5 minutes! Your lunchtime salad has never been faster, healthier, or tastier!

Paleo Avocado & Bacon Salad Dressing

Nourishing friendly fats, a big amazing flavor, and prepped in just 5 minutes! Your lunchtime salad has never been faster, healthier, or tastier!
Prep Time5 minutes
Total Time5 minutes
Course: Condiment
Cuisine: American
Keyword: Paleo avocado bacon salad dressing, Paleo avocado bacon salad dressing recipe, Paleo salad dressing recipe
Servings: 8 servings
Author: Renee - www.raisinggenerationnourished.com

Ingredients

  • 1/3 cup avocado oil or olive oil
  • Juice of 1/2 lemon
  • 3 TB white wine vinegar
  • 2 TB bacon grease
  • 1 TB raw honey
  • 1 tsp sea salt
  • 1 tsp onion powder
  • 1 tsp garlic powder
  • 1 small avocado or 1/2 large avocado pit removed and flesh scooped out

Instructions

  • Everything into a pint mason jar and use an immersion blender to blend until smooth and creamy. If you don't have an immersion blender, you can add everything but the oil to a food processor and turn it on. Slowly pour the oil into the drip cup on top to drizzle it in slowly so the oil emulsifies.

For more salad dressing ideas, you can try these!

5 Popular Store Bought Dressings Made Real Food Style (Ranch, Thousand Island, French, etc!)

16786684395_22a3842d16_z
DIY Olive Garden Copycat

16054500053_7d1d6a2e4d_z
Caesar Salad Dressing

14722471049_707574c45c_z
Asian Salad Dressing

COVER

Breakfast Ideas Condiments Dinner Ideas Nourishing Staples Real Food 101 Real Food Tips

Spanish Chorizo Season Blend

February 27, 2016

Traditionally flavored Spanish chorizo makes the perfect addition to any breakfast!

Spanish Chorizo Season Blend

Links in this post are affiliate links. It does not cost you anything and helps maintain the free information on this site, as well as answer the questions of “what brand do you use?” Please know I never personally recommend any product or service I wouldn’t use on my own family.

The very first time I tried chorizo was sometime during my childhood – probably early elementary, and I remember really loving it.

I’m not sure if it was because I loved the flavor, or if it was because I got to watch my Grandma make it, or maybe it was because I got to sit on the porch with my Grandpa tearing bread for the migas that were served with it.

It was always a special meal shared with extended family, and when I started having my own kids I wanted to share it with them too. I remember being surprised at how much my little ones loved such a flavorful sausage, but it is truly delicious. My 2 year old eats this sausage by the fist-full!

Spanish Chorizo Season Blend

A mixture of pimenton and garlic, traditional Spanish chorizo highlights very simple ingredients with big flavor.

Over the years I have noted there is a bit of a difference in American pimenton, called paprika, and pimenton that is from Spain. Possibly how they handle the Nora peppers and how they blend it with other pimentos but I’m not sure.  You really can use whatever you have on hand, though if it becomes a family favorite I would definitely try a good imported pimenton.

Spanish Chorizo Season Blend

I would consider this mixture on the mild side as far as heat goes. I have little ones in the house and while I actually have 2 kids that really love heat, I have one that does not, so we keep the heat mild. If you love flavorful heat, I would definitely play with the ratios of the sweet pimenton to the hot. If you can find a smoky pimenton/paprika it really gives more depth of flavor and it is so good. (You can find the blends I use here.)

Spanish Chorizo Season Blend

We usually serve chorizo as a breakfast side with browned potato hash cooked in pastured lard and a fried egg. You have never tasted anything like a bite of chorizo and hash dipped in a yolky egg! Pure bliss! If you have some sourdough around the house, you can make migas which is served with chorizo a lot. Just toast cubed bread in a pan with pastured lard or butter and garlic.

Spanish Chorizo Season Blend

Print Recipe
5 from 3 votes

Spanish Chorizo Season Blend

Traditionally flavored Spanish chorizo makes the perfect addition to any breakfast!
Prep Time5 minutes
Cook Time10 minutes
Total Time15 minutes
Course: Breakfast
Cuisine: Spanish
Keyword: chorizo seasoning, homemade chorizo, how to make chorizo
Servings: 2 servings
Author: Renee - www.raisinggenerationnourished.com

Ingredients

Instructions

  • Put everything into a small mixing bowl and combine well.
  • Cook the chorizo how you wish - either browned in skillet over medium high heat, or you can make little sausage patty rounds and brown in a skillet over medium high heat.
  • Serve with a fried eggs and browned potato hash or migas (a traditional garlic cooked bread - sourdough is fantastic)

For more real food breakfast ideas you can follow my breakfast ideas board on Pinterest!


Condiments Dinner Ideas Lunch Ideas Nourishing Staples Real Food 101 Real Food Tips school lunches Soup

15 Minute Chicken Tortilla Soup PLUS! How To Make Chips Out Of Any Tortilla & A Kid Friendly {Mild} Guacamole!

January 1, 2016

Keep *Taco Tuesday* quick and delicious with this light & flavorful chicken tortilla soup loaded with bone broth in just 15 minutes of time!

15 Minute Chicken Tortilla Soup PLUS! How To Make Chips Out Of Any Tortilla & A Kid Friendly {Mild} Guacamole!

There’s a reason Taco Tuesday is on Tuesdays…

Tuesdays… Weekday dinners need to be efficient, right? There’s homework to be done, sports practices to attend, lunches to be packed for the next day, etc , etc.

Taco nights are so fast, and they make for a great weeknight meal. This chicken tortilla soup is just as fast as doing a taco bar, and changes up the routine for a little something different. It is also loaded with bone broth to pack a nourishing punch for your family.

15 Minute Chicken Tortilla Soup PLUS! How To Make Chips Out Of Any Tortilla & A Kid Friendly {Mild} Guacamole!

This tortilla soup has a mild to medium heat to it that I find very kid friendly in my house. One out of my 3 girls is more sensitive to heat and she likes this soup, often having 2 bowls. You can pull the heat down to your preference, or you can kick it up a notch and add a small can of green chilis (which I happen to love in here!), or a little extra taco season.

So how do we make it a complete Taco Tuesday meal?

15 Minute Chicken Tortilla Soup PLUS! How To Make Chips Out Of Any Tortilla & A Kid Friendly {Mild} Guacamole!

While that soup is simmering, slice up a little guacamole into a bowl for community dipping! I like to do a quick cook on some rice or millet tortillas in a pan to make crispy chips too.

Again, I have found that for the kids that are more sensitive to heat, keeping the guac on the mild side is helpful. Since raw garlic has a heat kick to it, powdered garlic works well. You can always add a pinch of chipotle or raw garlic to your serving if you like the heat. When I make this milder guacamole it gets consumed really (really!) fast, as in by the spoonful!

15 Minute Chicken Tortilla Soup PLUS! How To Make Chips Out Of Any Tortilla & A Kid Friendly {Mild} Guacamole!

Print Recipe
5 from 1 vote

15 Minute Chicken Tortilla Soup

Keep *Taco Tuesday* quick and delicious with this light & flavorful chicken tortilla soup loaded with bone broth in just 15 minutes of time!
Prep Time5 minutes
Cook Time10 minutes
Total Time15 minutes
Course: Soup
Cuisine: Mexican
Keyword: chicken tortilla soup, chicken tortilla soup recipe, easy guacamole
Servings: 4 servings
Author: Renee - www.raisinggenerationnourished.com

Ingredients

CHICKEN TORTILLA SOUP ::

  • 3 TB friendly fat to cook in such as butter coconut oil, tallow, lard, or avocado oil. I like to use a couple TB of butter and a TB of avocado oil)
  • 1/2 medium onion diced
  • 1/2 medium green bell pepper diced
  • 1/2 medium red bell pepper diced
  • 4 large cloves of garlic minced
  • 1 TB organic tomato paste I usually have Costco's organic tomato paste around.
  • 1 quart bone broth
  • 1 cup cubed or shredded cooked chicken leftovers
  • 1/2 cup organic frozen corn Optional if you are grain free. I get organic non-GMO frozen corn at Costco.
  • 2 TB organic chunky salsa I usually have Costco's organic salsa around
  • 1 tsp taco season I keep a small 8oz Ball jar of my DIY taco season doubled up in my cupboard so it is easy and quick to scoop from
  • 1 heaping handful of fresh spinach
  • Sea salt and pepper to taste
  • Garnish with green onions and if you tolerate dairy you can do whole sour cream or freshly grated raw cheese

SIMPLE KID FRIENDLY GUACAMOLE ::

  • 1/2 medium onion diced
  • 1 medium tomato diced
  • Juice of 1/2 lemon
  • 2 avocados pitted and scored into cubes
  • 1 clove of garlic minced OR 2 tsp garlic powder if you don't want the raw garlic heat
  • Sea salt to taste

Instructions

  • Melt the friendly fat in a medium soup pot and add the onion and green & red peppers. Add a big pinch of sea salt to bring out their juices and sweeten them and cook them on medium heat for about 5 or so minutes.
  • Add the garlic and tomato paste, stir, and cook for a minute or two.
  • Add the bone broth, chicken, corn if using it, salsa, and seasoning and bring to a low simmer for a few minutes and then add in the spinach to wilt. Salt and pepper to taste.
  • Garnish each bowl with green onions if you wish and if you tolerate dairy you can use whole sour cream or freshly grated raw cheese.
  • To make the guacamole, just put all the guac ingredients in a bowl and combine. Serve the soup guacamole and tortillas pan-cooked in butter or avocado oil to crisp and then cut into triangles. I like to sea salt the tops of the chips too.

For more real food dinner ideas check out my Dinner Ideas board on Pinterest!

More real food recipes you might like:
Simple & Quick Enchilada Sauce

10 Minute Enchilada Sauce :: Plus a delicious enchilada recipe!
Fiesta Soup

14100206265_7784683865_z
DIY Taco Seasoning

16223589878_3baed82ac0_z
Delicious Sprouted Refried Beans

13048304535_92908653d8_z

Batch Up Meals Condiments Dinner Ideas Real Food 101 Real Food Tips

10 Minute Enchilada Sauce :: Plus a delicious enchilada recipe!

November 28, 2015

Enjoy enchilada night – real food style! Smokey, spicy, sweet and tangy this enchilada sauce has nothing on canned, and only 10 minutes to simmer stovetop!

10 Minute Enchilada Sauce :: Plus a delicious enchilada recipe!

Let’s do the taco Tuesday thing this week!

Enchiladas are one of my favorite make ahead meals for a busy weeknight that everyone loves to eat. The sauce can be made way ahead of time and only takes 10 minutes to simmer stovetop. It can even be frozen – I love making double or triple batches to stash in my freezer for a quick weeknight dinner anytime.

10 Minute Enchilada Sauce :: Plus a delicious enchilada recipe!

Smokey, flavorful heat is the name of my game – I love this sauce.

You can play around with the heat how you wish. This is really kid friendly heat – you can add more smoky heat with more chipotle powder, or more heat in general with a pinch or two of cayenne.

10 Minute Enchilada Sauce :: Plus a delicious enchilada recipe!

Once the sauce is made the enchilada filling is super quick to make. Whether choosing chicken, beef, pork, or sprouted beans, I take the opportunity to stuff my enchiladas with a big handful or two of greens. Once everything is cooked and drowning in that yummy sauce no one will even notice there is spinach or kale in there!

10 Minute Enchilada Sauce :: Plus a delicious enchilada recipe!I’ll share my 10 minute enchilada sauce here and you can make your enchiladas how you like to in your house, or you can follow my favorite way to make them just below this recipe!

10 Minute Enchilada Sauce :: Plus a delicious enchilada recipe!

Print Recipe
5 from 5 votes

10 Minute Enchilada Sauce

Enjoy enchilada night – real food style! Smokey, spicy, sweet and tangy this enchilada sauce has nothing on canned, and only 10 minutes to simmer stovetop!
Prep Time5 minutes
Cook Time5 minutes
Total Time10 minutes
Course: Condiment
Cuisine: Mexican
Keyword: enchilada sauce recipe, homemade enchilada sauce, how to make enchilada sauce
Servings: 8 servings
Author: Renee - www.raisinggenerationnourished.com

Ingredients

  • 2 TB friendly fat to cook in butter, lard, avocado oil etc
  • 1 small onion chopped
  • 2 cloves garlic minced
  • 2 TB chili powder
  • 1 TB cumin
  • 1/8 tsp chipotle pepper powder or more if you want more heat
  • 3 tsp honey
  • 15 oz organic tomato sauce I get mine at Costco
  • 1 cup bone broth or water
  • Sea salt /pepper to taste)

Instructions

  • Melt a couple of TB of friendly fat in a sauce pan and cook the onion with a pinch of salt for about 5 minutes.
  • Add the garlic and cook for a minute.
  • Add the rest of the ingredients and low simmer the sauce for about 10 minutes stirring occasionally.
  • Puree the sauce with handheld blender or in a blender until smooth and then sea salt and pepper to taste.

Ok! So here is how I like to make the enchiladas at my house – I left plenty of play so you can use whatever veggies you have around or like to use.

10 Minute Enchilada Sauce :: Plus a delicious enchilada recipe!I like to use the Sami’s Bakery “Lavish” for my enchilada tortilla wrapping. Sprouted rice or corn tortillas work fine too. If you can handle the gluten go for a sprouted wheat tortilla. You can find all of these in the freezer section of most health food stores. If you want to make your own, you can use this GF pita recipe and just thin out the batter to make a tortilla texture. If you are grain free you can Google grain free wraps – there are so many to try! Or just use the sauce in a great stir fry sans the wraps.

  • 2-3 cups ground or shredded beef, pork, or chicken or sprouted beans of choice
  • 1 tsp cumin
  • 1 tsp chili powder
  • 1/8 tsp or more chipotle powder depending on the heat you like
  • 1 small onion, chopped
  • 2 cloves of garlic, minced
  • 3 cups vegetables of choice (zucchini, spinach, kale, peppers, etc)
  • 1-2 cups organic corn (I get frozen organic/non-GMO at Costco)
  • 1 recipe of my enchilada sauce (a little over 2 cups)
  • 1 ½ cups cheese, freshly grated
  • Sea salt/pepper to taste
  • Tortillas of choice
  1. Melt a tablespoon of butter in a large skillet, and add the meat and seasonings. If your meat was already cooked you can just heat through and go onto the next step. If your meat was not cooked just cook it all the way through and go onto the next step.
  2. Add the onions, vegetables, and corn and cook over medium heat until the vegetables are cooked through.
  3. Turn the heat off the skillet and stir in ½ cup of the enchilada sauce, and 1 cup of the cheese and combine.
  4. Put  ½ cup of the enchilada sauce at the bottom of a 9×13 baking dish and tip the dish around so the sauce covers the bottom of the dish.
  5. Scoop the meat/veggie mixture into tortillas and roll. Place them seam side down into the baking dish. My trick for rolling gluten free wraps that can be “dry” and hard to fold is to run them under a little water and then steam them in a pan quick – they soften and roll right up.
  6. Pour the rest of the enchilada sauce over the rolled up tortillas, sprinkle with about ½ cup cheese, cover the baking dish with foil, and bake in a 400 degree oven for 20 minutes.

10 Minute Enchilada Sauce :: Plus a delicious enchilada recipe!For more real food dinner ideas you can follow my Dinner ideas board on Pinterest!

More real food recipes you might like:

Real Food Sloppy Joes

15628011423_fa5c538e92_z

DIY Taco Season Mix

scoop spill

Gaucamole

13157971603_430a5f64bc_z

Slow Cooker Fiesta Soup

14100206265_7784683865_z

How to Make Refried Beans

13048304535_92908653d8_z


Condiments Dinner Ideas Holiday Recipes Real Food Tips

Homemade Cranberry Sauce

November 2, 2015

The perfect sweet and tart side to compliment that Thanksgiving day turkey – in about 10 minutes of cook time!

Homemade Cranberry SauceBesides the gravy…cranberry sauce is just about the perfect complement to that Thanksgiving turkey!

Even as a kid I used to take a little bit of the cranberry sauce with a bit of turkey and it was just heaven together! Sweet, salty, tart, and delicious all in one bite!

Homemade Cranberry SauceI did grow up on the canned cranberries, and a number of years ago I decided I wanted to learn how to make “real” cranberry sauce. Because let’s face it…our ancestors would not have been busting out the can of cranberry sauce at their big meal!

I thought I would miss the “jello” texture of the canned cranberries, but…oh! Was I wrong! This was even better! Fresh cranberries are so delicious – not a fake, high fructose corn syrup jello, but there is a depth of flavor to using real cranberries.

Homemade Cranberry SauceMaking homemade cranberry sauce doesn’t get any easier. Just a quick cook on the stovetop and this Thanksgiving side dish can be prepped days ahead of the big meal. This is the batch I make for our large family Thanksgiving gathering – it makes a lot. If you have a smaller gathering definitely half this.

Homemade Cranberry SauceProduct links in this section are affiliate links. It does not cost you anything and helps maintain the free information on this site, as well as answer the questions of “what brand do you use?” Please know I never personally recommend any product I wouldn’t use on my own family.

Homemade Cranberry Sauce

The perfect sweet and tart side to compliment that Thanksgiving day turkey – in about 10 minutes of cook time!
Prep Time5 minutes
Cook Time10 minutes
Total Time15 minutes
Course: Side Dish
Cuisine: American
Keyword: cranberry sauce recipe, homemade cranberry sauce, how to make cranberry sauce
Servings: 8 servings
Author: Renee - www.raisinggenerationnourished.com

Ingredients

  • 8 cups fresh cranberries I get the large bags at Costco - if you are using the smaller 12oz bags from a grocer you will need 2 bags
  • 2 cups water
  • 3/4 cup organic pure cane sugar or coconut sugar I get our organic sugar in bulk at Costco.
  • 3/4 cup raw honey You can swap more sugar for this if you want to leave it out. I get my raw honey from a local farmer in bulk but this is a good brand too.

Instructions

  • Put the cranberries, water, and sugar into a large, high walled skillet, or soup pot and bring to a simmer.
  • Low simmer the cranberry mixture, stirring occasionally for about 10 minutes. You will hear the cranberries start to pop and you can squish some of them with the back of your wooden spoon if you like. The mixture will start to thicken after about 10 minutes.
  • Add the honey to the cranberry sauce, combine, and turn the heat off. The cranberry sauce will continue to thicken as it cools.

For more real food dinner ideas you can check out my Dinner Ideas board on Pinterest!

More real food recipes you might like:
Homemade Gluten Free Stuffing

Thanksgiving Stuffing
Bone Broth Gravy

5 Minute Bone Broth Gravy :: Gluten & Grain Free Options!
Slow Roasted Pastured Chicken


Gluten Free Pie Crust For ANY Pie!


Gluten Free Cornbread

Batch Up Meals Condiments Real Food 101 Real Food Tips

5 Minute BBQ Sauce

May 30, 2015

Stir it right up in the jar in just 5 minutes! Everyone needs a good barbeque sauce to use all summer!

5 Minute BBQ Sauce

A summer staple…and an updated recipe post!

When the girls were much younger, this was one of the very first recipes to ever hit my blog, and it was time for a photograph update!

5 Minute BBQ Sauce

Why homemade?

Store bought barbeque sauce is not only full of high fructose corn syrup in most cases, but also MSG and other preservatives that are completely unnecessary. MSG is an excitotoxin, and is linked to migraines and mood changes among other things, and in a lot of kids it can cause behavior problems. It’s just not worth it. Years later, I do have to say there are so many cleaner options for BBQ sauce on the store shelves than back then, but we use this super yummy barbeque sauce all summer. It tends to be a little better on the budget than some of the cleaner options, and it just doesn’t get any easier to prep!

5 Minute BBQ Sauce

It doesn’t get any easier!

This barbeque sauce comes together in 5 minutes! That’s it! No cooking, no chopping, no simmering, no fuss! It is perfect for brushing on your grilled chicken/burgers (or a whole spatchcock chicken!), dipping your chicken nuggets or french fries, spreading on a wrap, or using for a shredded BBQ beef or chicken! Play around with the seasonings to your taste and fire up the grill!

5 Minute BBQ Sauce
Print Recipe
5 from 3 votes

5 Minute BBQ Sauce

Prep Time5 minutes
Total Time5 minutes
Course: Condiment
Cuisine: American
Keyword: barbecue sauce recipe, homemade barbecue sauce, how to make barbecue sauce
Servings: 16 servings
Author: Renee – www.raisinggenerationnourished.com

Ingredients

Instructions

  • All ingredients into a container with a lid, combine and store in the fridge! That’s it!

Notes

The recipe makes up a pint container and keeps very well in the fridge for weeks to use! Cut the recipe in half it if you don’t want as much though!
5 Minute BBQ Sauce

More real food recipes you might like!

Condiments Dinner Ideas Lunch Ideas Real Food Tips school lunches

DIY Homemade Olive Garden Salad Dressing

March 1, 2015

DIY Homemade Olive Garden Salad Dressing
I thought I would bring you a little restaurant indulgence this week and I am really excited to finally share this recipe with you! It is one that I have been tweaking and working on over the last couple years and this fall I finally got it.

Olive Garden probably isn’t the fanciest restaurant in the world, but I think everyone would agree they totally nailed it when they created their house salad dressing. It is so addicting! And conveniently too, considering they do that whole all you can eat salad thing before your dinner comes!

DIY Homemade Olive Garden Salad Dressing
When they started selling their famous salad dressing by the bottle I used to save up to buy it (think college years…). But really that bottle that I thought I was being so healthy pouring over a nice salad for lunch, was full of blood sugar spiking high fructose corn syrup, and toxic, rancid soybean oil, among other additives.

DIY Homemade Olive Garden Salad Dressing
I started making my own salad dressings when I started my real food journey years ago, and as it turns out, many popular dressings at the store like Ranch, French, and Thousand Island are so fast to make at home with safer, more nourishing ingredients. This dressing comes together super quick and truly tastes just like the one from the restaurant! Don’t be afraid to serve it to the kids too – I pack it in my kindergartener’s lunch and my 3 year old devours it and likes to use it for dip with veggie sticks.

Get a pot of spaghetti going on the stove and let me show you how to make your own Olive Garden dressing for the salads and you can have an Italian night out at home!

DIY Homemade Olive Garden Salad Dressing
Product links in this section are affiliate links. It does not cost you anything and helps maintain the free information on this site, as well as answer the questions of “what brand do you use?” Please know I never personally recommend any product I wouldn’t use on my own family.

Print Recipe
4.75 from 4 votes

DIY Homemade Olive Garden Salad Dressing

I thought I would bring you a little restaurant indulgence this week and I am really excited to finally share this recipe with you! It is one that I have been tweaking and working on over the last couple years and this fall I finally got it.
Prep Time5 minutes
Total Time5 minutes
Course: Condiment
Cuisine: American
Keyword: copycat Olive Garden salad dressing, Olive Garden salad dressing recipe
Servings: 16 servings
Author: Renee - www.raisinggenerationnourished.com

Ingredients

  • 1 cup avocado oil Or combo avocado oil & olive oil. I get my avocado oil at Costco.
  • ¼ cup white wine vinegar
  • ¼ cup water
  • 2 TB mayonnaise homemade preferable to avoid toxic oils
  • 1 TB Italian dressing mix this is not Italian seasoning – use salad dressing mix – my recipe is super quick to mix up! Go to the Italian dressing in THIS post and use the mix.
  • ½ tsp garlic powder
  • Optional ¼ cup Parmesan cheese I often make it without and it is just as delicious without if you can’t do the dairy! This batch did not have the cheese so you can see it is still creamy and delicious.

Instructions

  • Everything into a jar and use an immersion blender to mix. If you don’t have an immersion blender, you can put all of the ingredients into a food processor except the oil. Then use the oil drip spout on your food processor to add the oil in to emulsify in the dressing slowly.
  • This recipe makes a good pint of dressing. Store the dressing in the refrigerator up to 2 weeks.

If you are looking for more restaurant inspired dressings, try this Caesar dressing, and this Asian dressing!

Also check out my DIY condiments pintrest board for more inspiration!