Browsing Category

School Holidays

Holiday Recipes Occasional Treats Real Food 101 Real Food Tips School Holidays Uncategorized

Gluten Free Flourless Chocolate Cake

January 24, 2023

Gluten free flourless chocolate cake is the easiest prep in less than 10 minutes, and the most rich, decadent chocolate cake for any occasion!

Gluten Free Flourless Chocolate Cake

Product links in this post are affiliate links. It does not cost you anything, and helps maintain the free information on this site, as well as answer the questions of “what brand do you use?” Please know I never personally recommend any product I wouldn’t use on my own family.

“Just enjoy it…”

I know they said that these days would go fast. You know what I’m talking about – you’re the completely exhausted newborn momma with a toddler pulling on the yoga pants you haven’t changed in who knows how many days…and the well meaning relative or neighbor says, “Just enjoy it! It goes by so fast!” I know from experience that the comment barely computes on your two hours of sleep, but it stores away somewhere in your tired stupor. And they are right. It really does fly, even though your days feel endless. But if there are young moms reading this today, I also want to tell you it’s ok to tell someone you’re exhausted without the guilt. You can both enjoy your little ones, and admit that you are hanging by a thread!

Gluten Free Flourless Chocolate Cake

Create nostalgia and childhood memories in a simple way

I’m one of those “jump in with both feet” kind of people. So I remember when that well meaning person told me to “just enjoy it” and man did I jump in. I remember panicking that I wasn’t making enough memories, or creating enough joy. There is nothing wrong with planning a fun day with your littles, but expecting to do it all the time will most definitely end in one burned out momma! There are super simple things that you can make a part of your kids’ childhood that they will never forget, and you don’t have to spend days planning it. One of those simple things can be the tradition of Sunday dinner and dessert. (Or whatever day of the week works for your family!). I started this years ago when the girls were too little to understand, and now my 13, 11, and 9 year old’s, ask what Sunday dinner and their beloved treat will be almost every weekend. My husband and I often talk about how we hope that they will want to come home for Sunday dinner even after they have left the nest, and even if they don’t, or live far away, hopefully the memory of our Sunday hikes and Sunday dinner will be a sweet one for them.

Gluten Free Flourless Chocolate Cake

One of our favorite (fast!) Sunday dinner desserts

Sunday dessert looks different depending on the time of year. Most of the time, I am *not* making something fancy or time consuming. In fact, in the summer, it looks a lot like summer berries and whipped cream! In the fall, I like to make apple crisp often, and sometimes in the winter it’s a quick batch of vanilla bean pudding (this recipe is actually in the Treats section of my cookbook, Nourished Beginnings!), or an oatmeal raisin cookie. I just love this flourless chocolate cake, though, and I think you’ll see that the effort it takes to make is super fast. It can really become one of those recipes to fall back on when you need to have a treat made for just about any occasion!

Gluten Free Flourless Chocolate Cake

The Method :: Melting the butter and chocolate

You’ll start your cake by melting some butter in a sauce pan, and then letting that hot butter melt your chocolate. I have used both the Trader Joe’s dark chocolate chips and the Enjoy Life Chocolate Chips/Chunks for this recipe, and both work. If you don’t tolerate butter, a sustainable palm shortening works. Coconut oil would work too, but it will change the flavor of the cake, so keep that in mind.

Gluten Free Flourless Chocolate Cake

The Method :: Finishing the batter

Once the chocolate is melted, the rest of the ingredients get whisked in, and you’re ready to bake! Under 10 minutes to prep?! Yes please!

Gluten Free Flourless Chocolate Cake

Let’s talk about cake pan sizes!

You can bake your cake in just about any cake size or shape. I have made the cake in a 7-inch cake round (pictured in this post to fit the size cake plate and cake stand I used!), and also 8-inch and 9-inch cake rounds. The cake will obviously be thinner the larger the cake round, but the cake is very rich and brownie like, so it really fits the kind of cake it is!

Gluten Free Flourless Chocolate Cake

The Method :: The ganache topping

Once your cake has cooled completely, you can add the simple ganache to the top. Ganache is just a fancy name for chocolate that has been melted in cream. In this case, I used butter. If you are dairy free, sustainable palm shortening works. Just like with the cake, coconut oil would work too, but will change the flavor. Simply melt the butter, and then pour the chocolate in to melt. You can spread it right on the top of the cake and let it set.

Gluten Free Flourless Chocolate Cake

Dairy free friends, this part is for you!

If you do not tolerate butter, you can use sustainable palm shortening. I have made this recipe with it once and it worked just the same. You will also want to be careful with your choice of chocolate chips if you have to avoid dairy, since some of them do contain milk. The Trader Joe’s dark chocolate chips and the Enjoy Life Chocolate Chips/Chunks are both good choices, though I have seen other dairy free chocolate chips in the store.

Gluten Free Flourless Chocolate Cake

Let’s dress it up for Valentine’s Day!

Chocolate and Valentine’s Day are pretty much BFF’s, so this is a great treat for the little sweethearts in your home, or that night in with your spouse that you planned! If you like sprinkles, you can find dye free Valentine’s Day sprinkles here and here.

Gluten Free Flourless Chocolate Cake

Let’s dress it up for a birthday!

This is the *perfect* opportunity for your kids to work on following a very simple recipe to either make their own cake, OR make YOU a cake for your birthday! If you ask them, I’m willing to bet they would love the chance to make something for you! You can find dye free rainbow sprinkles here!

Gluten Free Flourless Chocolate Cake

Gluten Free Flourless Chocolate Cake

Ingredients

For the Chocolate Cake ::

  • 1/2 cup butter
  • 1 cup semi-sweet or dark chocolate chips
  • 3/4 cup pure cane sugar or coconut sugar
  • Pinch of sea salt
  • 1 tsp vanilla
  • 3 eggs
  • 1/2 cup cocoa powder

For the Chocolate Ganache ::

  • 3 Tbsp butter
  • 2/3 cup semi-sweet or dark chocolate chips

Instructions

  • Pre-heat the oven to 375 degrees. Butter and line a round 7″, 8″, or 9″cake pan with parchment paper. I have made this cake with all 3 of those sizes and they all work. In this post, the pictures have a 7″ cake to fit the cake stand and cake plate used.
  • Melt butter in medium sauce pan. Turn the heat off, and add the chocolate chips. Let the chocolate sit for a minute in the hot butter, then whisk together until the chocolate is smooth.
  • Add the sugar, salt, and vanilla into the chocolate mixture, and whisk to combine. Then, add the three eggs, and whisk until the egg is incorporated fully.
  • Stir in the cocoa powder completely, and scoop the batter into the prepared cake pan. Spread the cake evenly.
  • Bake at 375° for 25 minutes or till toothpick comes out clean. I feel like I have to let the cake bake an extra few minutes when I use the smaller, 7" cake pan, so use the toothpick method and make sure it is set. Let cake cool in the pan for about 10 minutes, then transfer to a cooling rack to cool completely.
  • Melt the butter for the glaze in a small sauce pan, turn off the heat, and then pour in the chocolate chips. Let the chocolate melt for a minute before stirring it smooth. Pour the ganache over the cooled cake, and let it set.

Notes

  • I have used both the Trader Joe’s dark chocolate chips and the Enjoy Life Chocolate Chips/Chunks for this recipe, and both work. 
  • I have used palm shortening in place of the butter in the cake and the ganache, and it works great, so if you do not tolerate butter, this is a good swap. Coconut oil would work as well, but will change the flavor.
Gluten Free Flourless Chocolate Cake

More real food recipes you might like!

Breakfast Ideas Healthy Kids and Teens Holiday Recipes Occasional Treats Real Food 101 Real Food Tips School Holidays

Fresh Pumpkin Donuts :: Gluten Free, Dairy Free, Nut Free, Egg Free

October 10, 2022

These super soft, super delicious pumpkin donuts are the perfect treat for all of your fall weekend adventures!

Fresh Pumpkin Donuts :: Gluten Free, Dairy Free, Nut Free, Egg Free

Product links in this post are affiliate links. It does not cost you anything, and helps maintain the free information on this site, as well as answer the questions of “what brand do you use?” Please know I never personally recommend any product I wouldn’t use on my own family.

It’s pumpkin time!

You never know what your going to get as far as the weather goes on pumpkin patch weekend, and this year it was probably the warmest we’ve ever experienced! I also never know what we’re going to get as far as what kind of pumpkins my little people pick out, and while I’m a traditionalist, and love an orange pumpkin, the girls always tend to find the coolest colors, varieties, and sizes just to stretch me 😉

Fresh Pumpkin Donuts :: Gluten Free, Dairy Free, Nut Free, Egg Free

A new pumpkin challenge!

As the girls get older, this time of year has gotten hard as they definitely know what they are missing when we take a pass on the pumpkin patch donuts. When they were little, we’d steer clear of the bakery area, and call it good. But, they know a little better now, and last year I ended up playing around with a new donut pan, coming up with some fun recipes so they could feel like they got to enjoy a special treat, and I could feel good about keeping the ingredients on the healthier side.

Fresh Pumpkin Donuts :: Gluten Free, Dairy Free, Nut Free, Egg Free

Roasted pumpkin or canned?

I’m an absolute sucker for fresh roasted pumpkin. I designed this pumpkin donut to make a good 15 donuts so that I only had to make them once per fall, freezing any leftovers, which absolutely makes it feel more do-able to go fresh on the pumpkin in my book. Canned pumpkin will work just fine as well, so go that route if you are shorter on time. If the kids have never seen a pumpkin go from the patch to the oven to a baked good though, it is so, so worth the time to do that! Simply pre-heat your oven to 425 degrees, use some good avocado oil or butter if you can have that on the flesh of the pumpkin, and roast flesh side down on a baking sheet for about 40 minutes until tender. You can scoop the flesh into a food processor or blender to puree from there. I don’t think you’ll turn back once you taste it!

Fresh Pumpkin Donuts :: Gluten Free, Dairy Free, Nut Free, Egg Free

Easy peasy, one bowl batter!

If you have been around these parts for very long, you know that I freely admit that I don’t enjoy baking – it is just not my thing! I love to cook, but baking is fussy and finicky, and I barely have the patience for it! So most of my baked items are super fuss free, including this one. You’ll whisk the dry ingredients in a bowl, add the wet ingredients to mix, and then get them into the donut pan! The batter is thicker than a muffin batter, but not as thick as a cookie dough.

Fresh Pumpkin Donuts :: Gluten Free, Dairy Free, Nut Free, Egg Free

Let’s talk donut pans and how to bake!

Silicone is the way to go from my experience. I had metal donut pans last year, and the middle part didn’t come up very high, so it made it hard to fill the pan and keep the hole in the center of the donuts in tact as the donuts rose. My silicone donut pans have a nice high center, and the donuts come out of a silicone pan SO easily too! Since the batter is thick, I have found it easiest to pipe the batter into the donut pan so that you get a really pretty, and smooth donut. If you don’t have piping bags around, you can snip the end of a zip top bag just as easily.

Fresh Pumpkin Donuts :: Gluten Free, Dairy Free, Nut Free, Egg Free

That topping though!

I have played around with a few different donut toppings for these pumpkin donuts, and just love the traditional donut glaze that has a fun shiny top – it really looks like a store bought or bakery bought donut! You’ll just melt some butter or coconut oil in warm coconut milk and molasses, and then whisk the powdered sugar into the pan. Keeping the glaze warm is key in getting a really pretty, smooth frosting top. As it cools, it will harden and have that shiny gorgeous finish! Here’s the deal though – if you have really little ones at home, they are not going to know ANY differently if these donuts are glazed or not. It’s really just a mildly sweet muffin without the glaze, and if I had small children or toddlers at home, I’d be leaving the frosting off – they will still love them!

Fresh Pumpkin Donuts :: Gluten Free, Dairy Free, Nut Free, Egg Free

Storage and freezing options

This recipe makes a good 15 donuts – my kids do NOT need 15 donuts! You can certainly halve this recipe, but I like to freeze them. It’s nice to do a fun treat on pumpkin patch day, and then freeze some for Halloween morning! That is one less thing you have to make on Halloween, and they really do freeze up well. I freeze them with the frosting on, but you can also just freeze the donuts once they cool, and then make fresh glaze when you pull them out.

Fresh Pumpkin Donuts :: Gluten Free, Dairy Free, Nut Free, Egg Free

Fresh Pumpkin Donuts :: Gluten Free, Dairy Free, Nut Free, Egg Free

Ingredients

For the Pumpkin Donuts:

For the Brown Sugar Icing:

Instructions

For the Pumpkin Donuts:

  • Pre-heat the oven to 350 degrees, and spray your donut pans with avocado oil spray. This recipe makes about 15 donuts. You can halve it if you need!
  • Whisk the flour, coconut sugar, baking powder, baking soda, salt, and pumpkin pie spice in a medium mixing bowl.
  • Add the pumpkin puree, coconut milk, avocado oil, vanilla extract, and apple cider vinegar, and mix to combine.
  • Snip the tip of a piping bag or Zip Top bag to make a thick circle for the batter to come out of. Scoop the batter into the piping bag, and pipe the batter into the donut pan. I filled my silicone molds up to the top.
  • Bake the donuts at 350 degrees for 25 minutes, or until a toothpick comes out clean and the tops are golden.
  • Let the donuts cool for a few minutes before turning them out onto a cooling rack to cool completely before glazing.

For the Brown Sugar Icing:

  • Put the coconut milk, butter, and molasses in a small saucepan, and melt together, whisking along the way.
  • Turn the heat off, add the powdered sugar, and whisk until smooth.
  • You’ll want the glaze to stay warm so that the donuts will dip easily, so I just keep the glaze in the sauce pan and dip the donuts from there. Dip the donuts, let the glaze run off into the saucepan, and then set on the cooling rack to dry.

Notes

  • Canned or fresh pumpkin puree will work just fine in this recipe. If the kids have never seen a pumpkin go from the patch to the oven to a baked good though, it is so, so worth the time to do that! Simply pre-heat your oven to 425 degrees, use some good avocado oil or butter on the flesh of the pumpkin, and roast flesh side down on a baking sheet for about 40 minutes until tender. You can scoop the flesh into a food processor or blender to puree from there. I don’t think you’ll turn back once you taste it!
Fresh Pumpkin Donuts :: Gluten Free, Dairy Free, Nut Free, Egg Free

More real food PUMPKIN RECIPES you might like!

Breakfast Ideas Healthy Kids and Teens Holiday Recipes Occasional Treats Real Food 101 Real Food Tips School Holidays

Strawberry Valentine’s Day Waffles :: Gluten & Dairy Free and Naturally Flavored!

February 8, 2022

Celebrate Valentine’s Day with super yummy naturally flavored strawberry waffles that are gluten free, dairy free, and packed with protein!

Strawberry Valentine's Day Waffles :: Gluten & Dairy Free and Naturally Flavored!

Product links in this post are affiliate links. It does not cost you anything, and helps maintain the free information on this site, as well as answer the questions of “what brand do you use?” Please know I never personally recommend any product I wouldn’t use on my own family.

A fun, new kitchen toy, and a special Valentine’s Day treat

Earlier this winter, I noticed these adorable mini heart waffle makers on sale right around the same time that I created the Hot Cocoa Waffles with my mini snowflake waffle maker. I enjoyed creating that recipe so much, that I decided I needed to come up with a Valentine’s day flavor for the heart shape, and it has been fun to play around with!

Strawberry Valentine's Day Waffles :: Gluten & Dairy Free and Naturally Flavored!

One of my favorite ways to naturally flavor and naturally dye!

I just love using freeze dried fruit for naturally flavoring and dying food! The process for freeze drying is very simple, and does not ruin the integrity of the fruit. The fruit is place in a freezer, untouched, until it dries out – it’s that simple! The result is a super dry, crispy fruit, that blends into a fine powder or crumbles into a fun sprinkle topping. I get my freeze dried fruit at Trader Joe’s typically, but you can get them online and price compare, and they are in many grocery stores now. I have also freeze dried my own in the summer when berries are in season, and it is so easy!

Strawberry Valentine's Day Waffles :: Gluten & Dairy Free and Naturally Flavored!

Let’s talk about waffle color!

So my first attempt at making these waffles made me a little disappointed – I really wanted them to turn red – or at least pink! I do think that freeze dried raspberries might turn them a bit more of a color, but in order to have bright color, you’ll have to use a natural dye. All of my natural dyes are still packed away in storage (yes, we are still waiting for our house to be finished!), so I just stuck with the freeze dried fruit, and also used it crumbled on top for color!

Strawberry Valentine's Day Waffles :: Gluten & Dairy Free and Naturally Flavored!

The Method :: The Fluffy Egg Whites

If you are familiar with my other waffle recipes, you know this is a part we don’t skip! Yes it’s an extra bowl, and a few extra minutes, but the secret to fluffy waffles is those whipped egg whites, and it is so worth it! Separate your eggs and blend until fluffy!

Strawberry Valentine's Day Waffles :: Gluten & Dairy Free and Naturally Flavored!

The Method :: Finishing the Waffle Batter

Once you whip your egg whites, you can blend the wet ingredients, and add that into your dry ingredients. The dry ingredients include your blended freeze dried strawberries, so don’t forget to add those! Then, you will fold the fluffy egg whites into the batter, and you’re ready to make your pretty waffles.

Strawberry Valentine's Day Waffles :: Gluten & Dairy Free and Naturally Flavored!

The Method :: Making the Waffles

If you are using the little mini waffle maker, I found that a couple of tablespoons is all you need to fill it up. Of course you can use a regular waffle maker, and use more to make bigger ones – in fact, before this little mini maker, I use to just make big ones and cut hearts out with a cookie cutter, and that absoluetely works too!

Strawberry Valentine's Day Waffles :: Gluten & Dairy Free and Naturally Flavored!

Now let’s dress them up for the occasion!

My favorite way to dress Valentine’s Day waffles is with a drizzle of coconut butter and little heart strawberries. My coconut butter was packed away (no, we were not planning on the house taking this long!), so I grabbed the canned coconut whipped cream from Aldi to make a pretty topping. A little crumble of more freeze dried strawberries makes a pretty “sprinkle” and some heart strawberries made the plate even prettier! The coconut butter really is my favorite though, and it looks like a little “frosting” touch – if you have little ones in the house, I would really recommend trying this on waffles and pancakes because it is such a great, low sugar, good fats way to dress them up. My girls still love it to this day!

Strawberry Valentine's Day Waffles :: Gluten & Dairy Free and Naturally Flavored!

Strawberry hearts…help!

As simple as this is, I knew there might be someone that might not know how, so here is a little visual for you! I remember looking up this method a long time ago when my girls were toddlers and I wanted to give them a special Valentine’s Day treat without the sugar, and I hope this helps you too! Just slice the green stem off, and then hull the strawberry – there are special hulling tools for this, but I just use a paring knife. Once you slice the strawberry in half, you can cut a little “V” into the top and voila! A strawberry heart!

Strawberry Valentine's Day Waffles :: Gluten & Dairy Free and Naturally Flavored!

Freezer tips

Listen, if I’m going to spend the time next to my little mini heart waffle maker to make a dozen little mini heart waffles, I’m gonna get some use out of them, amiright?! Double up and freeze them, dear momma. You can do this days in advance from Valentine’s Day, and it is one less thing to make on the special day.

Strawberry Valentine's Day Waffles :: Gluten & Dairy Free and Naturally Flavored!

Other ideas for your heart waffles!

Other than breakfast, these waffles will make a super cute heart “sandwich” in lunchboxes if Valentine’s Day lands on a school day. I froze mine and plan to pull them out the day before to make PBJ’s, but you could totally make coconut butter and jam waffle sandwiches too. I also think that the heart waffles could be so cute using my hot cocoa waffle recipe made into a dessert of sorts. I’m thinking a drizzle of dark chocolate and the heart strawberries! Chocolate and Valentine’s day go hand in hand!

Strawberry Valentine's Day Waffles :: Gluten & Dairy Free and Naturally Flavored!

Strawberry Valentine’s Day Waffles :: Gluten & Dairy Free and Naturally Flavored!

Ingredients

Instructions

  • Separate the eggs into 2 small mixing bowls, being careful to not have any little bit of yolk in the egg whites. If there is anything else in the bowl with the whites, they will not whip fluffy properly. To the egg yolks, add the coconut milk, olive oil, maple syrup, and vanilla extract.
  • Blend the egg whites until fluffy, and then blend the egg yolk mixture until smooth.
  • Put the rest of the ingredients (the dry ingredients) into medium mixing bowl. Add the egg yolk mixture to the dry ingredients, and blend until combined.
  • Gently fold the fluffy, whipped egg whites into the blended batter until just combined – if you over fold/stir, the fluffy egg whites will deflate.
  • Spray your waffle iron with avocado oil spray, and cook according to your waffle iron’s directions. If you are using the “Dash” Mini Heart Waffle Iron as pictured above, I have found that about 2-3 tablespoons of the batter works perfectly. If you are using a waffle iron like my regularly used, ceramic waffle iron, you’ll use ½ cup of the batter.
  • We like to top our hot cocoa waffles with strawberries and a squirt of the canned coconut whip from Aldi or Trader Joe's. So Delicious brand has a great Coconut Whip as well! Or you can make your own by whipping coconut cream with maple syrup until fluffy! I also love drizzling melted coconut butter on waffles and pancakes, and think that would be a great "frosting" look-alike option! If you have babies and toddlers at home, I would definitely train their palate for coconut butter over syrup – this is how my girls still eat them!

Notes

  • You can swap the coconut sugar for maple syrup or honey if you want.
  • The “chocolatey” flavor and sweetness of these waffles is a mild, and kid friendly. If you want a richer chocolate taste, add more cocoa powder. If you need them sweeter, you can add more coconut sugar.
Strawberry Valentine's Day Waffles :: Gluten & Dairy Free and Naturally Flavored!

More real food VALENTINE’S DAY recipes you might like! ::

Healthy Kids and Teens Holiday Recipes Occasional Treats Real Food 101 Real Food Tips School Holidays

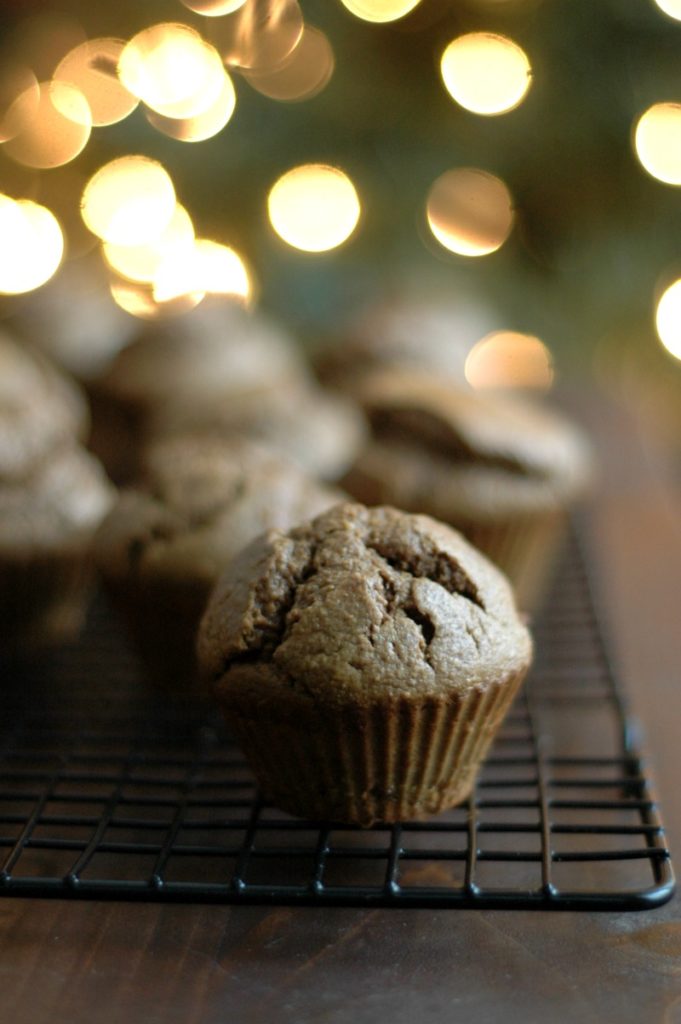
Gluten Free Chocolate Cupcakes For Birthday, Valentine’s Day, or any Occasion! :: Gluten Free, Dairy Free, Nut Free!

January 20, 2021

Use these decadent gluten free chocolate cupcakes for everything from birthday, Valentine’s Day, and everything in between!

Gluten Free Chocolate Cupcakes For Birthday, Valentine's Day, or any Occasion! :: Gluten Free, Dairy Free, Nut Free!
Product links in this post are affiliate links. It does not cost you anything, and helps maintain the free information on this site, as well as answer the questions of “what brand do you use?” Please know I never personally recommend any product I wouldn’t use on my own family.

Everyone needs a staple chocolate cupcake recipe in their back pocket!

And if you have tween and teen girlies in the house, it is an absolute must! This recipe is quite truly a few years in the making, as I have tried and tested it out every so often on holidays or birthdays. I can confidently say that this will become your very favorite, fool-proof chocolate cupcake on everything from birthdays to Valentine’s Day…and everything in between!

Gluten Free Chocolate Cupcakes For Birthday, Valentine's Day, or any Occasion! :: Gluten Free, Dairy Free, Nut Free!

Let’s talk about this dairy free thing!

I’ve become such a huge fan of using palm shortening for creamy frostings since my need to be off dairy years ago. While I can tolerate butter now, I still tend to go back to the palm shortening for frostings – if you are dairy free I think you are going to be so relieved to find a replacement to still make a “buttercream!” If you tolerate butter, you can swap the palm shortening for unsalted butter, and swap the coconut milk for regular milk in the cupcake recipe.

Gluten Free Chocolate Cupcakes For Birthday, Valentine's Day, or any Occasion! :: Gluten Free, Dairy Free, Nut Free!

No gluten, nuts, or soy either!

Because I want you to be able to host a birthday party for your little one’s, dear momma! And we want safe cupcakes for those birthday treats at school – even the schools with nut free school zones, or kids that have celiac. I promise the texture of these cupcakes feel exactly like regular cake – kids that are not gluten free will never know!

Gluten Free Chocolate Cupcakes For Birthday, Valentine's Day, or any Occasion! :: Gluten Free, Dairy Free, Nut Free!

Soft, fluffy, rich, and decadent!

These sweet little handfuls are everything you want in a chocolate cupcake. A few friends that have tested them out for me cannot even tell they are gluten and dairy free. So let’s just get right down to it! I’ll show you how the cupcakes are made, and then we’ll get to the fun part – dressing them up! I have so many ideas for you!

Gluten Free Chocolate Cupcakes For Birthday, Valentine's Day, or any Occasion! :: Gluten Free, Dairy Free, Nut Free!

The Method :: The Chocolate Cupcakes

Chocolate cupcake batter is about as easy as it gets. A one-bowl wonder, chocolate cake batter is a simple mix of wet and dry that come together into a very rich, dark batter loaded with chocolatey goodness! Over the years I have become a huge fan of coffee to replace some of the liquid in chocolate cakes – you’ll never taste the coffee, but it does, in fact give the chocolate a richness and depth that you can’t achieve with plain water or milk. So a simple half and half mixture of coconut milk and brewed coffee make up my cake liquid. You can see the Notes section of the recipe card for swaps if you are sensitive to coffee. Once the chocolate cake batter is mixed, you’ll scoop the decadent mixture into your cupcake tin and bake.

Gluten Free Chocolate Cupcakes For Birthday, Valentine's Day, or any Occasion! :: Gluten Free, Dairy Free, Nut Free!

The Method :: The Chocolate Frosting

Once you cupcakes are cooled, you can blend the frosting ingredients until smooth. Adjust the amount of coconut milk to your frosting texture preference. Around these parts, we like our frosting rich and thick, so just a few tablespoons is enough! You can spread or pipe your frosting, and if you don’t have a fancy piping bag, simply snip the corner of a zip top freezer bag, and voila! You can pipe your frosting!

Gluten Free Chocolate Cupcakes For Birthday, Valentine's Day, or any Occasion! :: Gluten Free, Dairy Free, Nut Free!

Let’s dress them up! :: BIRTHDAYS!

There is nothing like a chocolate cupcake to celebrate your birthday! While I’m perfectly giddy about a generous swirl of chocolate frosting and chocolate sprinkles for my birthday, if you have kiddos in the house, you’re sure to want to have these rainbow sprinkles on hand! I am also a huge fan of fun cupcake toppers using the theme of the birthday for my girls. For instance, we’ve done a beach birthday bash for my summer birthday sweetpea with these beach themed toppers! {HERE are the polka dot rainbow cupcake liners in the birthday cupcake images in this post!}

Gluten Free Chocolate Cupcakes For Birthday, Valentine's Day, or any Occasion! :: Gluten Free, Dairy Free, Nut Free!

Let’s dress them up! :: VALENTINE’S DAY!

Is it even Valentine’s Day without chocolate?! I think not! We are absolutely here for it in our house, and there are some great options for naturally dyed Valentine’s Day sprinkles now.

  • I used these Valentine’s Day sprinkles in the images for this post, or there is this option too.
  • I also happen to think that poking a little hole in the top of your baked cupcake, putting some strawberry jam in the middle, covering with frosting, and topping with a strawberry is the perfect heart day chocolate strawberry treat!
  • Another idea for your chocolate cupcakes on Valentine’s Day is using some freeze dried strawberries or raspberries blended into the frosting to give it a chocolate covered fruit flavor.
  • You could also skip the chocolate in the frosting and use the freeze dried strawberries or raspberries to make pink fruit flavored frosting.
  • {HERE are the cupcake liners used in the Valentine’s Day cupcake images!}
Gluten Free Chocolate Cupcakes For Birthday, Valentine's Day, or any Occasion! :: Gluten Free, Dairy Free, Nut Free!

Let’s dress them up! :: NEW YEAR’S EVE!

We rang in 2021 with the chocolate cupcakes pictured below that I posted to IG, and I truly couldn’t have thought of a better way to say good-bye to 2020! We sprinkled sugar crystals on the top – although I think the best adult way to make them would have been with flaked sea salt on the top! YUM!

Gluten Free Chocolate Cupcakes For Birthday, Valentine's Day, or any Occasion! :: Gluten Free, Dairy Free, Nut Free!

A cupcake for every occasion!

I can’t wait to see your chocolate cupcake creations this year! Be sure to tag on Insta or the Facebook, send emails or private messages, and comment below! Happy cupcake-ing to you!

Gluten Free Chocolate Cupcakes For Birthday, Valentine's Day, or any Occasion! :: Gluten Free, Dairy Free, Nut Free!
Print Recipe
5 from 1 vote

Chocolate Cupcakes :: Gluten Free, Dairy Free, Nut Free!

Ingredients

FOR THE CHOCOLATE CUPCAKES

FOR THE CHOCOLATE CREAM FROSTING

Instructions

  • Pre-heat the oven to 350 degrees and line 2 dozen cupcake tins with paper liners.
  • Brew your coffee while you prepare the batter.
  • Mix the ACV and coconut milk to make coconut “buttermilk.” Put the eggs, olive oil, sugar, vanilla extract, and coconut milk/ACV into a large mixing bowl and blend until smooth.
  • Add the flour, cocoa powder, baking soda, baking powder, sea salt, and brewed coffee, and blend until smooth and combined.
  • Scoop the batter into your cupcake tins (you’ll fill 24 cupcakes around ¾ full of batter). Bake the cupcakes at 350 degrees for 30-40 minutes. Bake time depends on oven variations, and cupcake tin material/color (Darker pans will bake faster than lighter pans or silicone pans.) A toothpick should come out clean from the center and the middle should spring back to touch.
  • Cool the cupcakes in the pan for a few minutes before turning them out onto a wire cooling rack to cool.
  • Let the cupcakes cool completely before frosting. Blend the frosting ingredients and frost to your liking.

Notes

  • If you tolerate dairy, you can swap the coconut milk for regular milk, and the palm shortening for unsalted butter.
  • If you are sensitive to coffee, you can swap the coffee for coconut milk or even just hot water (coffee is really just coffee infused water!). I had a friend trial the cupcakes with the coconut milk swap and the texture was great.
  • I have not tried this recipe with other GF flour blends. I think most will work, but if your blend does not have xanthan gum, you might want to add that for texture. I also have not tried the recipe with regular flour since I cannot have it. If you do try, let us know how you did in the comments!
  • This recipe only has 2 eggs, so I would imagine you could use egg replacer or flax egg if you are egg free. The cupcakes might not puff up as much, but it would bind ok with that! 
Gluten Free Chocolate Cupcakes For Birthday, Valentine's Day, or any Occasion! :: Gluten Free, Dairy Free, Nut Free!

More real food recipes you might like ::

Breakfast Ideas Holiday Recipes Occasional Treats Real Food 101 Real Food Tips School Holidays

Gluten Free Pumpkin Scones with Brown Sugar Glaze

October 21, 2020

The most perfect buttery scones swirled with sweet pumpkin and warm fall spices!

Gluten Free Pumpkin Scones with Brown Sugar Glaze

Product links in this post are affiliate links. It does not cost you anything, and helps maintain the free information on this site, as well as answer the questions of “what brand do you use?” Please know I never personally recommend any product I wouldn’t use on my own family.

Fall fun, and a new pumpkin breakfast treat!

We couldn’t have asked for a more perfect fall weekend for picking out pumpkins for Halloween! Pretty blue skies, and even a little warmth to the sun had my little Michigander kiddos peeling off their coats despite the crisp 50 degree air! The hayride was filled with anticipation, and when their eyes saw caught a glimpse of the pumpkin patch, you would have thought it was Christmas morning. These fields were packed! The girls will be working on carving their Halloween pumpkins this weekend, so I decided to work on a fun pumpkin scone recipe for them to savor this fun season!

Gluten Free Pumpkin Scones with Brown Sugar Glaze

A birthday treat favorite with a fall twist!

Last spring we created what has become our household birthday breakfast tradition in these Funfetti Birthday Scones. I had a feeling I could use that recipe for just about any scone flavor, so this summer I played around with various summer berries with some successes that I’ll probably share next summer! I fell in love with the warm spices of pumpkin pie in these scones, and they are going to be so perfect for Halloween morning and Thanksgiving brunch!

Gluten Free Pumpkin Scones with Brown Sugar Glaze

The Method :: The Pumpkin Scone Dough

I promise this scone batter is easy to work with and fuss free. Scones used to intimidate me because I’ve had numerous overly dry scones in my life! While the crispy, almost crunchy outside of a scone is a staple texture, one that falls apart in a crumble is not my idea of a great breakfast treat! These scones will gift you with a crispy outside and a super buttery, flaky inside – just perfect with your cup of coffee (or your favorite pumpkin spice latte!). Simply use a fork or pastry cutter to break up the butter into the dry ingredients, and then mix in the wet ingredients until a dough of cookie batter texture forms.

Gluten Free Pumpkin Scones with Brown Sugar Glaze

The Method :: Rolling & Cutting the Pumpkin Scone Dough

Once you’ve kneaded your pumpkin scone dough, you can flour your rolling surface and create a disk. Roll your disk out to about 1 inch or so, and then make sure the edges are smooth using your hands to form it into a perfect circle. I like to use my pizza wheel to cut the disk into eighths.

Gluten Free Pumpkin Scones with Brown Sugar Glaze

The Method :: Baking the Scones

Before you bake off your scones, you can sprinkle the tops with a bit of sugar if you are feeling sassy enough 🙂 You’ll want to completely cool your scones before moving on to the fun part – the brown sugar glaze!

Gluten Free Pumpkin Scones with Brown Sugar Glaze

The Method :: The Brown Sugar Glaze

Once the scones have cooled, you’ll whisk the glaze ingredients in a small dish and then let the kids have at it with the drizzle! It doesn’t have to be perfect and they will feel so proud to make their own swirly glaze designs!

Gluten Free Pumpkin Scones with Brown Sugar Glaze

How mild is the pumpkin pie spice?

Your home is going smell amazing while these scones are baking! If you love the aroma of pumpkin pie, you will be wanting to bake these off every weekend! I felt like the pumpkin pie spice flavor was very mild – in fact my non-pumpkin anything husband tried a slice of the scone and really liked it. That said you could swap the pumpkin pie spice for cinnamon if you think that might go over better.

Gluten Free Pumpkin Scones with Brown Sugar Glaze

Tips and swaps for the Brown Sugar Glaze

While we simply adore the dark brown sugar flavor that a full teaspoon of molasses gives, I understand that some may find that strong. If you prefer a milder, light brown sugar taste, just use half of a teaspoon. I also think that the glaze would be amazing as a Cinnamon Glaze! Leave the molasses out and sprinkle in some cinnamon if you think your crew would love that! The glaze drizzles so nicely and then will harden on the scone within about 20 minutes.

Gluten Free Pumpkin Scones with Brown Sugar Glaze

Freezer Friendly

Scones freeze so nicely! You can either freeze the scone dough, or you can bake the scones off and freeze them that way. I prefer to freeze them without the glaze, and then just glaze them when they thaw out, but you could glaze and freeze. This makes for a very nice make ahead breakfast or brunch idea for Thanksgiving – make the scones days in advance for your company, and you won’t have to bake them on Thanksgiving morning!

Gluten Free Pumpkin Scones with Brown Sugar Glaze
Print Recipe
5 from 1 vote

Gluten Free Pumpkin Scones with Brown Sugar Glaze

Ingredients

For the Pumpkin Scones:

For the Brown Sugar Glaze:

Instructions

  • Pre-heat the oven to 375 degrees and line a baking sheet with parchment paper.
  • Whisk the coconut milk, pumpkin puree, molasses, vanilla, and vinegar until smooth. I use my 2 cup Pyrex liquid measuring cup so that I can just measure the coconut milk and pumpkin right in the cup, add the molasses and vinegar, and whisk. Set this mixture aside.
  • In a large mixing bowl, whisk the flour, cane sugar, pumpkin pie spice, baking powder, and sea salt.
  • Use a pastry cutter or a fork to cut the cold butter into the flour. You want to still be able to see small pieces of butter throughout.
  • Pour the coconut milk/pumpkin mixture into the flour/butter mixture and use a rubber scraper to mix. I use the rubber scraper to start, and finish with my hands.
  • Flour your counter, and knead the dough a few times. Make a disk with your hands, roll the dough to about 1 inch thick, and then use your hands again to shape the disk into a perfect circle.
  • Cut the disk into eighths, and place the triangles onto the parchment paper lined baking sheet. (At this point, you can brush the tops of the scones with a light coating of milk or coconut milk, and sprinkle with a little sugar if you wish.)
  • Bake the scones at 375 degrees for 30 minutes until the edges are golden. Cool the scones completely before drizzling the glaze on top.
  • To make the brown sugar glaze, whisk the powdered sugar, molasses, and milk in a small dish and drizzle over the tops of the cooled scones. The glaze will dry and harden within about 20 minutes.
Gluten Free Pumpkin Scones with Brown Sugar Glaze

More real food recipes you might like ::

Holiday Recipes Occasional Treats Real Food 101 Real Food Tips School Holidays

Gluten Free Oatmeal Raisin Cookies :: Gluten Free, Dairy Free, and Nut Free

September 28, 2020

Chewy oatmeal raisin cookies with that perfect warm, sweet flavor and gluten, dairy, and nut free ingredients!

Gluten Free Oatmeal Raisin Cookies :: Gluten Free, Dairy Free, and Nut Free

Product links in this post are affiliate links. It does not cost you anything, and helps maintain the free information on this site, as well as answer the questions of “what brand do you use?” Please know I never personally recommend any product I wouldn’t use on my own family.

Early fall colors, long hikes, and cookie treats!

This momma was born for the summer. Barefoot, sandy beach days, tan lines, and all the sunshine are totally my jam. But there is this little sweet spot when summer turns just ever so slightly into fall where we have this dance between cool, crisp mornings that quickly warm up into gorgeous 70 degree days. Add in little pops of leafy fall color, and the fact that most of the bugs are gone, and you could say early fall runs a very close second to my favorite season of the year. We take advantage of this little weather sweet spot for as many weekend hikes as we can, and sometimes packing an extra special cookie in our lunchboxes for the long hiking day is warranted!

Oatmeal raisin cookie nostalgia

Because we all grew up eating them out of Grandma’s cookie jar right?! I remember my Grandma had a little tin of cookies ranging from windmill cookies and crisp little chocolate chip cookies, to chewy oatmeal raisin. When the weather turns a bit cool, and I don’t mind having my oven on for a little bit, it’s fun to surprise the girls with a little cookie treat in our hiking day lunchboxes. These little oatmeal raisin cookies are as easy as can be to make, and they make a fun treat!

Gluten Free Oatmeal Raisin Cookies :: Gluten Free, Dairy Free, and Nut Free

Busy momma style cookie dough prep!

I made these cookies for the weekend during that little hour window of time that I usually have before picking the girls up from school on Friday. You can have the cookie dough done before the oven even pre-heats! The cookie dough is very fool-proof and easy to work with – the kids will love making these with you too! The oatmeal raisin cookie dough starts by creaming the wet ingredients before blending in the dry. It really does prep fast, and then you can stir in the raisins.

Gluten Free Oatmeal Raisin Cookies :: Gluten Free, Dairy Free, and Nut Free

To raisin or not to raisin?!

We absolutely raisin in this house – my kids adore them! But if your kids don’t love them, try swapping them out for a dried fruit that they do love. One of my girls likes these cookies the best with chopped figs! Dried apricots are lovely as well. And yes, I will totally give you permission to swap the dried fruit for chocolate chips if that’s how you like to roll!

Gluten Free Oatmeal Raisin Cookies :: Gluten Free, Dairy Free, and Nut Free

Chewy versus crunchy

I know this can be a very strong topic! People care about their cookie textures! I have the perfect texture baking time just for you! If you prefer a chewy oatmeal raisin cookie, you’ll bake your cookies around 12 minutes. For a crunchier version, simply add on a few minutes of cook time to your liking and they will crisp up!

Gluten Free Oatmeal Raisin Cookies :: Gluten Free, Dairy Free, and Nut Free

Healthier version, but still a treat!

I’m super proud to say that these cookies are safe for gluten and dairy free friends! If you are very sensitive to gluten, or have celiac, just be sure that your oats are certified gluten free. I also used half coconut sugar, and half regular organic sugar. Some of that purpose is because of the warm flavor that coconut sugar plus the touch of molasses gives to the cookie – it is like brown sugar! It also reduces the glycemic index a bit – coconut sugar is lower! That said, a cookie is still a cookie, and I’m not going to pretend that we should have one of these everyday. Just keep that in mind! They are fun, and certainly a better choice than most store bought versions.

Gluten Free Oatmeal Raisin Cookies :: Gluten Free, Dairy Free, and Nut Free

Freezer friendly

Because this recipe makes 16 large cookies, I tend to freeze what we don’t eat. That makes pulling out a fun “just because” treat on a Friday night that much easier! Or when you have “drop in” friends that visit, you can pull out a fun cookie to enjoy with them. Just cool the cookies completely, and pop them in a freezer bag. They thaw pretty quick, or you can put them in a warm oven to thaw and get warm.

Gluten Free Oatmeal Raisin Cookies :: Gluten Free, Dairy Free, and Nut Free
Print Recipe
5 from 1 vote

Gluten Free Oatmeal Raisin Cookies :: Gluten Free, Dairy Free, and Nut Free

Ingredients

Instructions

  • Pre-heat the oven to 350 degrees and line a baking sheet with Silpat or unbleached parchment paper.
  • Cream the palm shortening, coconut sugar, sugar, molasses, and vanilla with hand beaters, and then add the eggs and blend until creamy.
  • Add the oats, flour, baking soda, and salt and blend to combine. Add the raisins and use a spatula to combine evenly.
  • Roll 2-inch balls of cookie dough in your hand and place on the lined baking sheet. Press the dough into a disk with the palm of your hands, being sure to leave space around each cookie.
  • Bake the oatmeal raisin cookies at 350 degrees for 12 minutes until the edges are lightly golden brown for a chewy cookie. For a crunchier texture, bake an extra 2-3 minutes. Leave the cookies on the baking sheet for a few minutes before transferring to a cooling rack. They will be soft at first and firm up as they cool.
  • The oatmeal raisin cookies will keep on the counter or pantry in an airtight container for 2 days before they start drying out too much. If you have some left after a day or so, I suggest freezing them to maintain their chewy texture and moisture. They can go into a freezer bag easily, and they thaw out fast at room temp, or you can put them in a warm oven.
Gluten Free Oatmeal Raisin Cookies :: Gluten Free, Dairy Free, and Nut Free

More real food recipes you might like ::

Holiday Recipes Occasional Treats Real Food 101 Real Food Tips School Holidays

Gluten Free Valentine’s Day Brownie Cookie Cut-Outs

February 1, 2019

The possibilities are endless with your favorite brownie flavors in an easy to work with gluten free cookie cut-out dough!

Product links in this post are affiliate links. It does not cost you anything, and helps maintain the free information on this site, as well as answer the questions of “what brand do you use?” Please know I never personally recommend any product I wouldn’t use on my own family.

Friday nights, little girls, Valentine’s Day excitement…and chocolate!

It’s just a match made in heaven right?! I decided to start working on this little brownie cookie concept the week before we had a house full of girls over to play after school, and the timing was just perfect! You just can’t do Valentine’s Day with a gaggle of girls without chocolate, and these cookies were just so fun!

A cookie dough you actually want to work with!

I’m all about fuss-free when it comes to sweet treat baking. I know it can be fun to get all fancy with 100 different steps and a really cool finish, but most of the time, I prefer an easy to deal with dessert, and this cookie dough is so lovely. You can knead it and roll it out multiple times without getting dense or crumbly, and the cut-outs don’t break. Just 8 ingredients is definitely my kind of recipe too!

The perfect texture!

Ok, so I know people can be really (really!) funny about their brownie textures! There’s those cake texture people, fudgy texture, and there’s just something about that brownie “chew!” These cookies are definitely more of a “cookie” feel, but you can tailor your finish the way you like! Less cook time and they will be nice and soft – it still feels like a cookie, but if you like a cake-like brownie, this one is for you. And if you go a bit longer on the cook time, you will get this amazing light crisp to the outside with a great “chew” to the inside. SO good!

Fun topping ideas!

Because it’s Valentine’s day right?! While the cookies are seriously amazing and perfect as is, you could certainly give the tops a sprinkle of powdered sugar. Just put some powdered sugar in a sift, and dust the tops. You could also make an icing if you prefer. Leave it plain white, or you can see how we dyed these great Valentine’s Day Sugar Cookies with naturally dyed pink frosting here.

Freezer friendly!

YES these have been freezing great, dear momma! You know what that means? Oh yes…make that second batch while you have the kitchen counter a mess, and freeze that extra set just for your afternoon coffee 😉 They are super yummy right out of the freezer. It also means you can make these up way ahead of time and be ready for that Valentine’s Day school party!

Cookie Cutter options!

We typically use a medium sized heart cut-out for my aged girls. I have this set of heart cut-outs, and you can even make the cookies “sandwich” style by cutting out smaller ones inside the bigger ones to make them like “Linzer” style cookies with frosting in the middle. When my girls were smaller, more toddler ages, I had these fantastic small cookie cutters. That way they still feel like they are getting a WHOLE cookie, or even 2, versus you cuttting a big one in half, and they are smaller so they aren’t getting a portion that isn’t appropriate for their size. The smaller cutters are also perfect for classroom parties where there are going to be multiple treats and the kids don’t need a huge cookie.

Swaps and tips

  • I am pretty sure organic palm shortening will swap for the butter if you are dairy free
  • I have a feeling coconut sugar will swap for the organic cane sugar if you want to try keeping the glycemic index lower. Coconut sugar will darken the cookie a bit more, and will change the flavor a bit – coconut sugar has a warmer, molasses flavor. I would not lower the sugar amount anymore than it is, or the texture will be off. These are cookies, after all, and it is a once a year treat. The recipe makes at least 2 dozen cookies so it’s pretty spread out – and you can always make them smaller for your little guys! See the above section for ideas on how to make that happen.
  • I’m sure other GF flour blends will swap for the Namaste. I am not sure how to swap a whole wheat or Einkorn as we cannot have gluten. If you give that a try, let us know in the comments how you swapped for it, so others who can have gluten can know how to do it!
Print Recipe
5 from 24 votes

Valentine’s Day Brownie Cookies

Ingredients

Instructions

  • Cream the butter and sugar with a hand mixer, and then add the eggs and vanilla. Blend until creamy and well combined, about 1 minute.
  • Add the rest of the ingredients, and blend to combine the dough. Scrape the bowl down, turn the dough out and form into a disk. Wrap the dough or cover it in a bowl and chill in the refrigerator for at least an hour.
  • When you are ready to cut out your cookies, pre-heat the oven to 350 degrees.
  • Toss some of the GF flour blend onto a clean surface, and roll out your dough – just like sugar cookies, only I made mine just slightly thicker – you can see in the pictures above. Put the cut-out cookies onto a Silpat or parchment paper lined baking sheet.
  • Bake the cookies for 10-12 minutes, depending on how thick you made your cookies, and how you want the texture to be. I’ve done about 6 batches with varying times – if you go lower time, they will be softer but still hold together well like a cookie, and if you go a little longer, they will be slightly crisp/firmer on the outside with some “chew” to the brownie inside – they are still soft this way, but it is a different feel. The cookies do firm up once they cool a bit. Cool on the tray for a couple minutes and then transfer to a cooling rack to completely cool. You can leave the cookies as is, dust powdered sugar over the top, or frost with icing when they are cooled completely.

More real food Valentine’s Day treats you might like!

Batch Up Meals Breakfast Ideas Healthy Kids and Teens Holiday Recipes Real Food 101 Real Food Tips School Holidays Snack Ideas

Gingerbread Granola :: Gluten & Dairy Free!

December 20, 2018

Gingerbread granola is perfect for your last minute gift giving, and a healthier “all holiday season long” breakfast!

Last minute momma…

Oh man, you guys. I am usually never the person to be “last minute” on gift giving, but this whole having 3 kids in school thing has made me…not as organized, ironically! I think I figure I have all this time during the day to get stuff done, and it gets pushed off to get work done, or clean the house, or…well you get the idea! This year I really did think that I had all of my gift set, and then remembered I hadn’t covered all of the teaching staff that our family so desperately loves! Once again, that whole all 3 kids in school thing…times a teacher and assistant in each class, plus office staff and the beloved specials teachers. These people are a part of my village and I love to take care of them!

A granola tradition

We’ve been jarring up granola for teachers for years – since my 4th grader was in preschool! It is such a simple gift that everyone will love. I always picture these hard working teachers sitting back with their coffee and a big blanket enjoying their first breakfast of the well deserved 2 week holiday break on us! We usually make this cranberry orange granola for Christmas, and this honey rhubarb granola for the end of the school year. It is always so loved, and the girls like making it.

Short on time!

Because those well loved recipes require soaking (read, time), and I was short on that commodity, I decided to use sprouted oats, so we could skip the soaking step (if you have regular oats, you can still make this too!). I also didn’t have cranberries or oranges on hand for the cranberry orange granola, and with a little one that had to stay home with an upset tummy, there was no store running on this day. I scanned through my cupboards and when I got to the spices, I hit the jackpot! Gingerbread flavor. No special store runs – I bet you have all of these ingredients right in your pantry! I also decided to forgo the dehydrator and just bake this granola. It went super fast, only taking just over 20 minutes to finish! I had the entire granola mixed, onto trays, and fully baked in a half hour.

Homemade gift giving

The kids can truly help make this granola from start to finish, and then scoop it all up into mason jars with a pretty ribbon for their teachers. It is so special to be able to let them say “I made this!” when they hand over those jars! Of course, this crazy momma did wait last minute and ended up making it for the girls, but I’ll be having them jar it up and write notes on the jars which is just as special. It is such a simple gift, and so many people get sweets and treats for these kind of gifts – it’s a nice change up to give them something with holiday flavors that can be used as an actual meal!

How to use your gingerbread granola

  • Top your breakfast or snacktime yogurt or coconut yogurt with it!
  • Pour raw milk or coconut milk over a bowl of your granola!
  • Mix it with coconut, nuts, and seeds to make a trailmix for holiday road trips!
  • Pack it up in lunchboxes or morning snack boxes throughout December for a fun Christmas snack throughout the season!

Sprouted versus regular oats

If you only have regular oats on hand, I’m totally going to tell you to use them (this is the Non-GMO brand of oats that I use). I would rather you make this with regular oats, then not make it at all and have to buy something for a gift at the store. If you have time to order, we love these sprouted oats, and I keep them on hand for times that I don’t have time to soak. Once isn’t going to be the end of the world not to soak, but over time it is a good idea to eat your oats soaked or sprouted for easiest digestion.

A note on the “sweet”

This granola is a bit sweeter than I typically make our “everday” granola. When I created this, I was keeping gift giving in mind, which a lot of the times means people that are not used to mildly sweetened foods. I made a second batch for my girls and backed off on the coconut sugar and maple syrup by half and it tastes really good still. Do not back off on the molasses – this is what gives the gingerbread flavor! If you have really little guys around the house that you will be making this for, I would consider backing off the sweet by a bit. As written, this granola totally tasted like a treat to my girls – ha! It is nice a sweet, and perfect for a sour/tart bowl of yogurt. Or to give as a gift to someone who is more used to sweet breakfast cereals.

Merry Christmas to you and your family!


Another year has literally flown by, and I am so honored to continue to be able to write in this space, and share conversation with you all. Healthy and happy new year to you!

Print Recipe
5 from 13 votes

Gingerbread Granola :: Gluten & Dairy Free!

We've been jarring up granola for teachers for years - since my 4th grader was in preschool! It is such a simple gift that everyone will love.
Prep Time10 mins
Cook Time25 mins
Total Time35 mins
Course: Breakfast
Cuisine: American
Keyword: dairy-free granola recipe, gluten-free granola, pecan granola
Servings: 20 servings

Ingredients

Instructions

  • Preheat the oven to 325 degrees
  • Melt the coconut oil, maple syrup, and molasses in a small sauce pan. Turn off the heat, and add the vanilla extract.
  • Combine the rest of the ingredients (the dry ingredients) into a large mixing bowl, and then stir in the melted coconut oil/syrup/molasses, until all of the dry ingredients are coated.
  • Spread the granola mixture onto 2 large baking sheets and bake at 325 for 10 minutes. Take the trays out, stir the granola, and then return to the oven. Bake for another 13 minutes. Take the trays out, stir the granola, and then let the granola cool completely. It will crisp up more as it cools. Store your granola in airtight containers up to a month in the pantry, or months in the fridge or freezer.

More real food recipes you might like ::


Holiday Recipes Occasional Treats Real Food 101 Real Food Tips School Holidays

How To Make Gluten Free Shortbread Cookies

December 12, 2018

Learn how to make gluten free shortbread cookies, perfect for everything from your afternoon cup of tea to your holiday cookie plate!

It all began with a cup of tea and a book…

When my oldest was just a toddler, were reading a story (and in my sleepy momma stupor I cannot for the life of me remember which story, for her sister who is just 22 months younger than her was just a baby…and she gets the award for the toughest newborn sleeper in the house…). Anyway, this sweet story had a mouse or some sort of animal that was enjoying a cup of tea and cookies, and my little one thought that was just the bees knees…and from that day forward reminded me {daily} how we must try this tea and cookies deal.

My toddlers’ favorite “butter cookie”

For purposes of the SEO gods of Google, I’ve named these adorable cookies shortbread cookies because that is really what they are. But when Chloe was making them with me for the first few times and saw the big chunk of butter that was used to make them, she declared them “butter cookies” and from there forward, whenever she had a craving for tea and cookies she would ask for these amazing “butter cookies”…from the mouth of babes, right?!

Simple ingredients for busy motherhood

I couldn’t have asked for a simpler cookie to make than this cookie that my kids grew to ask for whenever they wanted a special treat to have with a cup of tea. Motherhood has a way of forcing the hand at time management, and with only 3 ingredients, shortbread cookies were able to find their way into my schedule easily – because let’s face it…momma kinda wanted a little cookie to go with her cup of coffee in the afternoon every once and a while too. 😉

Blender dough?! Yes please!

While a hand-held blender will work just fine for this recipe, I typically find myself just dumping it all into my food processor. In just a few minutes the dough is ready to roll out, and by the time the oven pre-heats the cookies are on the tray ready to go. This shortbread cookie dough is so very soft and easy to work with. You can re-roll it out easily to get every last little bit of it used up for your cookies too.

Shortbread cookie cutters

For years I just used a small mason jelly jar to make round circle shortbreads – this works just fine. While I do love the fancy scalloped edge of my cookie cutter, the mason jar is nostalgic for me because it is the way my girls ate them as little ones. If you want to get technical, and also have a better shortbread for dipping, the scalloped rectangle shortbread cookie cutter is the traditional way to shape these cookies.

Freezer friendly!

In fact, these little shortbread cookies are my favorite right out of the freezer. Which just so happens to mean that you can stash them away for those afternoons when all of the planets align making all the babes decide to take a nap at the same time…make your favorite brew and enjoy a cookie. Or for those times when you decide to take the school friends last minute and you want to win a few cool mom points for having fun cookies to enjoy after school.

 A blank slate

Shortbread cookie recipes are pretty endless as far as the possibilities to dress things up. This no-fuss momma just tends to keep them on the simple side with just a splash of almond extract or a dusting of real vanilla bean (my favorite). But you can dip them in chocolate and sprinkle with candy cane for the holidays (we LOVE these naturally dyed candy canes!), or fold in lavender or rose petals for a special valentine’s day treat. This basic shortbread recipe is fool-proof and has been a staple year after year in our oven!

Print Recipe
5 from 16 votes

How To Make Gluten Free Shortbread Cookies

Learn how to make gluten-free shortbread cookies, perfect for everything from your afternoon cup of tea to your holiday cookie plate!
Prep Time10 mins
Cook Time10 mins
Total Time20 mins
Course: Dessert
Cuisine: American
Keyword: gluten-free shortbread recipe, how to make gluten-free shortbread
Servings: 2 dozen
Author: Renee - www.raisinggenerationnourished.com

Ingredients

Instructions

  • Pre-heat the oven to 350 degrees and line 2 baking sheets with Silpat.
  • Put the softened butter and powdered sugar into your food processor and blend to cream them. You could alternatively use a hand-held blender.
  • Add the flour to the food processor, and blend to combine until the dough gathers. You could use a hand mixer for this part too.
  • Turn the dough out onto a flour dusted counter top to roll out. You could use more Namaste flour blend or even just some white rice flour which is super inexpensive. You can use a generous amount of rice flour or Namaste to dust the surface and your rolling pin. Roll the dough out to your desired thickness and cut out the shapes you want. Traditional shortbreads are about ¼ inch in thickness.
  • Place the cut cookies onto a Silpat lined baking sheet and bake at 350 degrees for 10-15 minutes, until the edges are just starting to become golden brown. The time will depend on how thick you made your cookies. The cookies in the images of this post take about 15 minutes. Cool for a couple minutes on the tray, and then transfer to a cooling rack to cool completely. If you want to dust your cookies with powdered sugar, it is best to do this while the cookies are warm so it sticks best.
  • Store your cooled cookies in an airtight container, or freeze them for long term storage.

More real food recipes you might like ::

Batch Up Meals Breakfast Ideas Healthy Kids and Teens Holiday Recipes Real Food 101 Real Food Tips School Holidays school lunches Snack Ideas

Healthy Gluten Free Gingerbread Muffins :: A Perfect Christmas Morning Breakfast!

December 8, 2018

Healthy gingerbread muffins with warm gingerbread flavor and healthy ingredients, perfect for Christmas morning breakfast!

Product links in this post are affiliate links. It does not cost you anything, and helps maintain the free information on this site, as well as answer the questions of “what brand do you use?” Please know I never personally recommend any product I wouldn’t use on my own family.

The wonder of Christmas morning!

We take this picture every year, and I’m pretty sure I create a post surrounding this special time each year, and it just never gets old. They serious grow up before your eyes!

Let them play

I have talked about Christmas morning breakfasts often. Years back, I came to the realization that when you are in a season of these littles running around, having a quick, portable {not sugar-filled} breakfast for them to munch on while they play with a new toy is the key to happy kids with stable blood sugars. Sure, you can still make your fancy Christmas brunch later on that morning, but most kids need a little something when they wake up in the morning, and it is really hard to pull them away from the excitement surrounding the Christmas tree! We have created a number of handheld breakfast ideas for Christmas morning over the years – here are a few:

Easy pour blender batter – yes please!

Because as much as I know you want to have a special homemade breakfast out for the kids on Christmas morning, it is even more special if you get to sit in your favorite chair to watch them enjoy the special morning, or join them on the floor as they play with their new toy instead of being in the kitchen all morning. Kids spell love T-I-M-E, and you can enjoy special time making these easy muffins together, as well as enjoying the wonder of Christmas morning. In fact, my oldest (age 9 this holiday season), was able to make a batch of the muffins completely independently, so this would be a fun “night before” or morning of activity for your older kids to give them something to do too!

How to create a warm, gingerbread flavor that kids will love

Gingerbread can really be all over the board as far as “spiciness” or more of a mild, warm sweetness. I admit, that as an adult, I will totally go for a really spicy gingersnap and totally love it with my tea or coffee. Little kids might find it strong on their young palates though! I feel like I found a very happy medium between have a very apparent gingerbread flavor without being overpowering for little kids. I also love the warm sweetness that coconut sugar brings to the table pairing with the stronger molasses – these muffins are mildly sweet versus cupcake or cookie-like, which makes these gingerbread muffins perfect for a healthy breakfast.

Why soak the oats?

Soaking grains like oats in an acid medium (the yogurt in this recipe) reduces phytic acid in the grain. Over time, phytic acid can upset digestion, so it is a good idea to practice what our ancestors would have done with grains, and soak them. If you really don’t have the time, don’t sweat it. I would rather you make the recipe than not make it and buy store bough muffins instead. It only takes one minute to set up the soak the night before. If you happen to buy sprouted oats, you can skip the soaking process.

Tips for making a quick morning prep

Plan ahead just a little bit, and it can make the morning run even smoother.

  • The soaking actually helps you along! Part of the recipe is already done and in the blender!
  • Measure out all of the dry ingredients (nuts, flours, spices, etc) beforehand – the gingerbread spices are a pain, I know, but the flavor is SO worth it, so just measure them out the night before so you can just dump it all in.
  • Have your muffin pan lined and ready to go the night before too.
  • These muffins are freeze-able too! You can make them weeks ahead of time, and just pop them in the freezer until Christmas morning!

Special tip for working with molasses!

Here is my super special trick that will make your hands less of a sticky mess! You will be measuring out the oil in a ¼ cup measuring cup. This will line the measuring cup with slippery oil, and if you measure your molasses in that measuring cup, it will slide right out without having to touch it! Since you only need 2 tbsp of the molasses, you can fill the ¼ cup measure half way with the molasses which is the same as 2 tablespoons! You’re welcome!

Print Recipe
5 from 20 votes

Gluten-Free Gingerbread Muffins

Healthy gingerbread muffins with warm gingerbread flavor and healthy ingredients, perfect for Christmas morning breakfast!
Prep Time7 hrs
Cook Time20 mins
Total Time7 hrs 20 mins
Course: Breakfast
Cuisine: American
Keyword: gingerbread muffins, gluten-free gingerbread muffin recipe
Servings: 12 muffins
Author: Renee - www.raisinggenerationnourished.com

Ingredients

  • 2 cups oats
  • 2/3 cup full fat coconut milk or whole milk if you tolerate dairy
  • ¼ cup full fat coconut yogurt or regular full fat yogurt if you tolerate dairy
  • 3 large eggs
  • ¼ cup avocado oil melted butter, coconut oil, or olive oil will work here
  • ½ cup pecans walnuts or almonds should work here. If you are nut free I think pumpkin seeds would be nice – sunflower seeds would work too
  • ¼ cup tapioca flour
  • ¼ cup grass-fed collagen I think the recipe will work without this if you don't have access
  • 1 tsp aluminum free baking powder
  • ½ tsp baking soda
  • ¼ cup coconut sugar Organic pure cane sugar, maple sugar, honey, or pure maple syrup should work here. This amount leaves the muffins mildly sweet – if you have older kids used to sweeter things, you may want to add more.
  • 2 tbsp blackstrap molasses older, adult palates might enjoy this bumped up by a tablespoon or 2 for a richer molasses taste - this is mild and kid friendly
  • 1 tsp almond extract if all you have is vanilla extract that is fine
  • 2 tsp cinnamon
  • 1 tsp ground ginger
  • ¼ tsp ground cloves
  • ¼ tsp ground nutmeg

Instructions

  • If you want to soak your oats for digestion, 7-10 hours before you want to make the muffins (usually the night before), put the oats, coconut milk, and coconut yogurt into your blender and do a quick stir with a spoon to combine – doesn’t have to be perfect. Put the top on the blender and let the mixture soak overnight. This soaking process breaks down the phytic acid in the oat grain making it easier on digestion over time. (If you don’t wish to soak your oats, you can just put all of the ingredients into the blender to combine.)
  • The next morning, pre-heat your oven to 375 degrees.
  • Add the rest of the ingredients to the blender, and blend to combine.
  • Pour the muffin batter into a silicone muffin cup or paper muffin cup lined muffin pan, and bake at 375 degrees for 20 minutes. Let the muffins cool in the pan 5 minutes before turning them out onto a cooling rack to cool completely.

More real food recipes you might like ::

Holiday Recipes Occasional Treats Real Food 101 Real Food Tips School Holidays

Gluten Free Halloween Cupcakes :: Ghost Cupcake Treat PLUS Other Halloween Cupcake Decorating Ideas!

October 6, 2018

These gluten free Halloween cupcakes will be the hit of Halloween night! Make them ghost cupcake treats or other Halloween characters with these fun ideas!

Product links in this post are affiliate links. It does not cost you anything, and helps maintain the free information on this site, as well as answer the questions of “what brand do you use?” Please know I never personally recommend any product I wouldn’t use on my own family.

Age 9 has not been as “scary” as I thought it was going to be…

You know…when your sweet baby goes from all things little girl to occasionally throwing in some “tween” mannerisms, it can really throw you for a loop! As with all things “first born child,” I was not prepared for age 9, but honestly I’m finding this mom gig getting sweeter by the day. Nine year old’s are so fun to chat with – like real conversations. Not just discussions about their 4th favorite color, or why they have to wear socks today like you do with toddlers and little guys. Like real life stuff – friendships, passions, and real books. Oh sure, she is still completely and utterly obsessed with unicorns, fairy tales, and pretend play {we’ll hang onto that as long as we possibly can!}, but I’m really loving this age. And this age LOVES to bake – and still shows her little girl side when she gets to bite into a fun treat for Halloween 😉

Let’s chat about being a “real food mom” on Halloween…

Because we all come from different stages of our real food journey. Some of us have true food allergies or health crisis situations where Halloween treats are going to have to take a back seat for a year or more. Others are literally on day 1 of trying to get processed food out of the house and just want to celebrate the way they always have. And yet others are pretty in between. Last year, I went out on the line and admitted that I’ve been the “lame” Halloween mom before that kept all the fun away simply to avoid the junk food. I’ve learned that honestly, kids just want to have a fun day to dress up and run around – in other words, be kids. And I would highly recommend hopping over to this post to learn about how I’ve made fun Halloween traditions for our kids that include some treats without compromising my standards on GMO’s, processed food, food dyes, etc.

Halloween treats for toddlers versus tweens…

There is a really big difference here. When your little guys are tiny, they are not going to know any differently if they get a fun fruit parfait made of Halloween colors and a sticker, or they get a real cupcake. Keep them in that fruit parfait space as long as you can, but as your little guys turn into big kids, let’s turn it up a notch. Toddlers don’t understand that you can’t have cupcakes everyday of the year – and they will let you know that with their meltdown the next day when they can’t have another one. Big kids can comprehend this concept, and so letting them indulge in a fun treat like this on Halloween is so work the look on their face!

Gluten AND Dairy Free!

Woot! This cupcake recipe is one that I’ve been using for the girls’ birthdays for the last 2 years, and I’ve never blogged it! I did change up the flavors a bit to make them “fall flavored” with maple, but the texture and taste of these cupcakes is so out of this world, you’ll never go back. You can see how they turned out for my daughter’s Tinkerbell Party and Unicorn Party linked here. We also did Hatchimals Party for my youngest this August using it! You won’t believe the texture even though they are gluten free. It also just so happens that palm shortening makes THE best frosting. While I still love me some buttercream, you really won’t miss the dairy when you try this palm shortening based frosting. Filled with friendly fats, and a gorgeous “ghostly white” color, they make the perfect goulish look for your Halloween night!

Other ideas for dressing up your cupcakes for Halloween!

  • We LOVE these Halloween plant based natural food dyes – we made fun pumpkin shaped sugar cookies with the orange and black last year! You could color the frosting with the orange food dye, and then make the face with the black.
  • If you use that same Halloween plant based natural food dye, you can split your frosting into orange, purple, and black and make swirl frosting on the top. Just put the 3 colors into the piping bag as separately as you can, and then as they come out of the tip, they will swirl together! You can see how my daughter’s Unicorn cupcakes for her birthday turned out using this technique here.
  • You could make a “Candy Corn” frosting top using those same Halloween plant based natural food dyes. Just make divide the frosting into 3 bowls leaving one white, and coloring the other 2 with the orange and yellow. You can stack the frosting with 3 different piping bags to make a candy corn look.

Tips for the classroom {and for littles!}

  • I thought the full-sized cupcakes with the frosting done like it is makes a huge cupcake for littles, or for a classroom party. For little guys, or classroom treats, I would highly recommend doing these cupcakes into mini cupcakes using a mini muffin pan! You can get the same cool parchment paper wrappers in the mini size too. I think you will have to pull the baking time down – maybe check them around the 10-15 minute mark.
  • If you have really little guys at home, not only can you make them into mini cupcake form, you could also just spread the frosting and put the chocolate chips on top so the frosting isn’t piled so high. The big kids think that is pretty amazing, but little ones won’t know any differently!

Ingredient notes

  • I’m pretty sure most gluten free flour blends will work to swap for the Namaste Gluten Free Flour Blend – I hear the Trader Joe’s brand is very similar to it.
  • Be careful on the maple extracts – a lot of them have junky ingredients. The one linked here is fine, or just use vanilla extract if you can’t find a good one. The maple syrup in the cupcake will make it taste like maple too.
  • Butter can be swapped for the palm shortening in the frosting, but the frosting will not be as white to look like a ghost since butter is yellow. It does work though!

Print Recipe
5 from 14 votes

Gluten-Free Halloween Cupcakes

These gluten-free Halloween cupcakes will be the hit of Halloween night! Make them ghost cupcake treats or other Halloween characters with these fun ideas!
Prep Time10 mins
Cook Time20 mins
Total Time30 mins
Course: Dessert
Cuisine: American
Keyword: gluten-free cupcake recipe, gluten-free Halloween cupcakes, Halloween cupcakes
Servings: 12 cupcakes
Author: Renee - www.raisinggenerationnourished.com

Ingredients

FOR THE CUPCAKES ::

FOR THE FROSTING ::

Instructions

  • Preheat oven to 350 degrees and line cupcake pan with parchment paper cupcake liners. This recipe makes 12 cupcakes, but it does work doubled too, so you can double for 24.
  • In a 4 cup Pyrex liquid measuring bowl OR in a medium mixing bowl combine oil, maple syrup, sugar, and eggs, and beat for 1 minute.
  • Add the rest of the ingredients for the cupcakes and mix with beaters until combined.
  • Spoon the batter into cupcake liners, and bake for 20-22 minutes – the cupcake should “spring” back when you touch it, and a toothpick will come out clean. Check the cupcakes at the 18 minute mark just in case our ovens run differently.
  • Let the cupcakes cool completely before frosting. When you are ready to frost, blend the frosting ingredients in a small mixing bowl, and fill your piping bag, and frost your cupcakes. Use the mini chocolate chips for the ghost eyes and mouth!

More real food HALLOWEEN recipes you might like! ::


Healthy Kids and Teens Holiday Recipes Occasional Treats Real Food 101 Real Food Tips School Holidays

Paleo Cinnamon Snowflake Christmas Cookies Using Coconut Sugar :: Grain, Gluten, Dairy, & Egg Free

November 25, 2017

Celebrate the season without the sugar overload and make these festive and fun Paleo cinnamon snowflake cookies!

Product links in this post are affiliate links. It does not cost you anything and helps maintain the free information on this site, as well as answer the questions of “what brand do you use?” Please know I never personally recommend any product I wouldn’t use on my own family.

The first snow…

My little winter babes are still anticipating the first measurable snow approaching the first week of December, peeking their little nose at the windows each morning to see if today is the day! I seriously have no idea where they get it from {self proclaimed beach bum here…}, but growing up here my whole life, I do have to say that there is just something magical about that first snowfall!

Bringing a little snowfall to our kitchen!

So while we await fresh powder to play in outside, I decided to bring a little snowfall to the inside! These sweet little powdery snowflake cookies made the girls completely giddy, and I loved that my oldest could make the entire recipe on her own. Sure the littles in the house loved helping here and there. But there is just something about this age 8…bam! She is not one of the “littles” anymore…she is genuinely a huge help in the kitchen, and so mature it blows me away!

Ownership…

And while we are on that note…man, oh man. Do I ever get it. It takes a little extra time to let them help in the kitchen, doesn’t it? This “Type A” and “go go go” personality momma has really had to learn how to step back and let my kids do their thing. Especially this age. Ownership means the world to them. Being able to edify them in front of their family or peers that *they* made the cookies does amazing things for their confidence.

And that whole “life skills” thing is pretty important too. Believe me. Growing up in a microwave generation and having to teach myself to cook in my 20’s has given me a new appreciation for making sure this generation knows how to make themselves some food. Get your kiddos into the kitchen this holiday season and help them start mastering those kitchen skills – start somewhere!

The holiday sugar trap…

It’s a tough one, isn’t it? I have worked on this balance for years now, and feel like I’ve come up with some happy mediums so that we can both enjoy the fun of the holiday, but also stay healthy and well so that we can actually attend all of the parties and have some fun. Sugar does, after all, feed those sick bugs in our bodies, so party after party, and holiday event after event can really wreck havoc on little ones especially.

{You can read more tips on keeping kids healthy during the holiday season in this super important post!}

A game changing combo!

These cinnamon snowflake cookies are not only super adorable, but they make a much healthier choice for a sweet treat when your kiddos have been “sugar-ed out” and you still have some holiday parties to attend! The nut flour keeping the starches down, coupled with the lower glycemic coconut sugar, make for a winning combination to keep blood sugars at bay.

Ok, fine…coconut sugar…so, how does it taste???

So good! There is a warm, almost light molasses flavor to coconut sugar, so it really gives these cookies in particular a gingerbread cookie flavor with the added cinnamon. It is so festive! I’ve switched to coconut sugar almost exclusively in some of my baking and my family really enjoys the flavor.

Kid friendly serving sizes

Make ‘em small and super cute, dear momma! They won’t know any differently! Here are some super cute mini cookie cutters you can use to make at least 2 dozen cookies (I made over 30 with mine). So instead of having to break apart a huge cookie for your 4 year old, and they feel slighted for only getting half a cookie, they get to have a whole one! Or even 2!

A note on the powdered sugar…

If you have super little ones at home and no bigs…I’d just leave it off 😉 They really don’t know any differently, and the cookies taste amazing without it! If you have some older kiddos at home like I do…I’m telling ya…the illusion of these looking snow dusted with the powdered sugar is SO worth the look on their faces! Do it up! Grab an organic/non-GMO sourced powdered cane sugar, and let them shake it on. Just watch those sweet faces light up!

Ingredient notes

Five batches in, and I was able to at least narrow this one down to gluten, dairy, and egg free! I know, I know, my dear nut free friends! Sigh. I didn’t get to trying these with a seed meal – I really think a sunflower seed type deal just might work. Blend it up into a “flour” and give it a go! And please comment below if you tried it so others who need to be nut free may try. I feel like I worked out the rest of the common allergens like dairy, gluten, and egg though!

If you don’t have access to coconut sugar, then organic cane sugar will work fine. I also think that soaked, blended dates might work. I think honey or maple syrup will be too runny/sticky, but you could give it a try.

Print Recipe
5 from 24 votes

Paleo Cinnamon Snowflake Christmas Cookies Using Coconut Sugar

Celebrate the season without the sugar overload and make these festive and fun Paleo cinnamon snowflake cookies!
Prep Time10 mins
Cook Time15 mins
Total Time25 mins
Course: Dessert
Cuisine: American
Keyword: cinnamon sugar cookies, gluten-free sugar cookie recipe
Servings: 24 cookies
Author: Renee - www.raisinggenerationnourished.com

Ingredients

Instructions

  • Pre-heat the oven to 300 degrees.
  • Put all of the ingredients into a medium mixing bowl, and blend to combine. The dough should press together well. It shouldn’t be tacky or wet though. From here, you can either roll them right out, or refrigerate the dough until you are ready to roll it out. I have done both, and rolling out is easy both ways – I feel like the cut-outs came out of the cookie cutter a little easier when the dough was chilled.
  • To roll the dough out, you can either use parchment paper, or dust the counter with Cassava Flour. I have done both and they both work well. Roll out the dough, cut the snowflakes out, and place them on a Silpat or parchment paper lined baking sheet. I found that dipping my little cookie cutter into a bowl of olive oil made the cookies slide off the cutter easiest. Or dip in some cassava flour to flour it before cutting.
  • Bake the snowflakes at 300 degrees for 15 minutes. You can dust the cookies with the organic powdered cane sugar at this point. After they cool a couple minutes on the baking sheet, move them to a cooling rack to cool completely.

More real food Christmas ideas you might like!


Batch Up Meals Holiday Recipes Occasional Treats Real Food 101 Real Food Tips School Holidays Snack Ideas

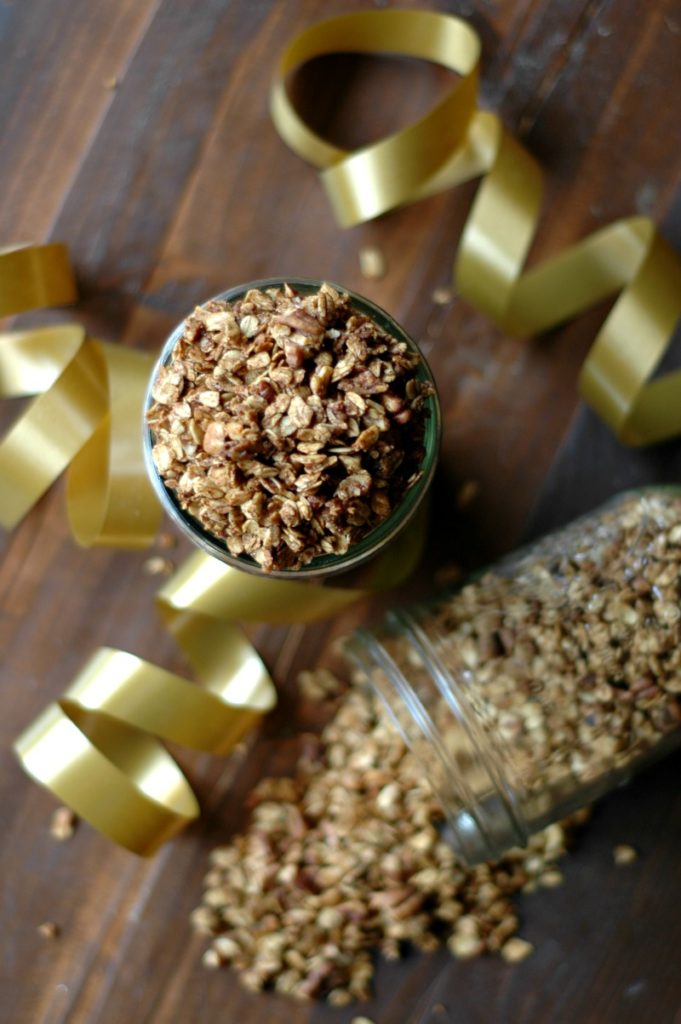
How To Make Sprouted Candied Nuts & Seeds :: Sprouted For Better Digestion & Nourishment :: Made With Real Food Sweeteners & No Junk!

October 28, 2017

Learn how to make candied nuts and seeds for the holidays the real food way! Sprouted for better digestion and using better sweeteners without the junk!

Product links in this post are affiliate links. It does not cost you anything and helps maintain the free information on this site, as well as answer the questions of “what brand do you use?” Please know I never personally recommend any product I wouldn’t use on my own family. 

Harvest parties, Thanksgiving, & Holidays….oh my!

The next few months are sure to bring on party after party and gatherings almost weekly! I wanted to share with you a staple party snack I keep in my back pocket (technically just stashed away in my cupboard!) all holiday season, to make the holidays a bit less stressful, and still yummy real food. Keeping a stash of candied crispy nuts in my pantry ensures that I always have something to pass around when invited to last minute events that don’t leave me with enough time to cook, or where I’m not expected to bring a large dish to pass.

An “evergreen” holiday treat for everyone!

Whether its a snack bowl out on trick-or-treat night, the appetizer table at Thanksgiving, or the big holiday party at home or the office, candied pecans, walnuts, almonds, or any type of mixed nuts or seeds are always a hit. And there are always those present at these events that will be thankful to have a healthier, more protein rich treat to snack on versus the starchy cookies and candies hanging around.

My special real food ingredients, and some notes on sprouting!

Because you really can make a few little swaps and techniques to make these holiday nuts easier on digestion, more nutritious, less processed – and still taste amazing!

  • Soaking/Sprouting :: I leave directions for both in the instructions. Soaking takes the phytic acid levels down so the nuts and seeds are easier on digestion. It takes just 7 hours of hands free time to soak (think over-night while you are sleeping!), so it really isn’t an inconvenience. If you have the time to take an extra day or 2, I recommend sprouting your nuts and seeds! It sounds intimidating, but it is really so simple. After soaking, you simply drain the water and let the nuts and seeds sit in the bowl until they start to sprout a little “tail” over the next 24-36 hours. It is a little extra time, yes, but super hands free, and so special! If you make big double and triple batches of these candied sprouted nuts, you can keep them stashed away for quick grab and go party snacks.
  • Dehydrating under 150 degrees :: Dehydrating versus baking or roasting maintains the integrity of the nut and seed oils. It is just a healthier way to consume them!
  • Coconut Sugar :: Instead of corn syrup or even “regular” white sugar, I always swap for coconut sugar. The glycemic index is lower which keeps blood sugars happier. It is an easy swap, and since coconut sugar has become more mainstream, you can find it even in regular grocery stores.
  • Molasses :: I once tried a candied almond recipe at a party that just really “wow-ed” me. I remembered thinking there was just something different about this recipe and ended up tracking down the guest that made them to ask what their secret was. It was brown sugar! Technically, brown sugar is just sugar mixed with a bit of molasses, so I’ve got the ratios down in my recipe to make a sort of “coconut sugar brown sugar,” and the warmth of the flavor will blow you away!

Special hints of flavor options

Don’t be afraid to mix things up a bit! Most people are pretty used to the typical sweet, candied nuts, but adding special aromas or spicy hits will make your recipe really special.

  • Pumpkin Pie Spice :: Not just for that latte or pie! This makes Halloween trick-or-treating parties so fun for snacking with your pumpkin spice lattes for the adults and warm apple cider for the kids!
  • Cayenne :: This is certainly optional when serving to little kids, but if you are attending an adult party, go for this one! Just a small pinch gives a flavorful heat that goes so well with the sweet and salty flecked candy shell.
  • Orange Zest :: My personal favorite! I think it just brings a happy, bright aroma to the bowl, and it leaves people asking “what is that in there?” – in a really good way! Serve with warm mugs of Winter Wassail – it compliments it so well!
  • Vanilla :: I have mixed vanilla bean to the coconut sugar mixture once before to serve with chilled mugs of real food eggnog, and it was SO good! Very special!
  • Cacao :: Dust in a few teaspoons of raw cacao for a chocolate flavor! So good! Serve with warm mugs of hot buttered raw cacao hot cocoa (recipe is in my cookbook, Nourished Beginnings!) – it compliments it so well!
  • Honey or Maple flavor :: You can swap out the coconut sugar for raw honey or pure maple syrup for a different sweet flavor too!
  • Cinnamon :: Swap the pumpkin pie spice for cinnamon if that is more your flavor preference!

Notes for nut free friends or party guests

My kiddos actually prefer candied seeds to nuts, so don’t be afraid to try out a seed mix even if you aren’t nut free! If you have party guests that have true nut allergies, just be sure you don’t dehydrate the seeds and nuts together in the same batch – do everything separate, and make sure the tools are all washed up real good in between. In fact some can’t even be in the same room as the nuts, so if you know this ahead of time, just stick to a seed mix and leave any nuts out. The seeds are just as festive and taste amazing.

I prefer a mix of sunflower and pumpkin seeds but there are so many things you can do. Adding chia seeds will make more “clusters” – almost like a candied seed “bark” and those just feel so special!

Notes for egg free friends or party guests

I would love to hear from my egg free readers how this works out, but I would imagine that a flax egg – or really just half of a flax egg – would work out just fine here. The egg white combines with the coconut sugar to create the candied coating. I have seen recipes where you combine water and the sugar and bring to a boil until a thick candy coating is made. Let us know in the comments if you have tried this – I would love to make this post a great resource for friends that need to make these allergy swaps.

A quick note about dehydrating/cook methods

Do not. I repeat do NOT, not make these just because you don’t have a dehydrator 🙂 YES dehydrating nuts and seeds below 150 degrees maintains the integrity of the nut oils and nutrients, but I would rather you make these in your oven than not make them at all, and buy crummy ingredient holiday nuts at the store. If you make them in the oven, just be sure to stir them around so they dry out evenly – it is more hands on than using a dehydrator, but it works.

If it happens to fit on your birthday or holiday wishlist, I get SO much use out of my dehydrator, and have had it for years. It is a great investment. If you want to make homemade granola for breakfast and snacks much easier with less hands on time, homemade jerky, and other dehydrated goods, you will not regret it. I have this “middle of the road” dehydrator, though I will definitely be spending the money when mine finally gives out to get a more quality dehydrator. Mine is 6 years old now and does not maintain the heated temperature as evenly (it’s tuckering out!), so I’ll be investing in a more quality dehydrator soon.

Print Recipe
5 from 17 votes

How To Make Sprouted Candied Nuts and Seeds

Learn how to make candied nuts and seeds for the holidays the real food way! Sprouted for better digestion and using better sweeteners without the junk!
Prep Time5 mins
Cook Time30 mins
Soak12 hrs
Total Time35 mins
Course: Snack
Cuisine: American
Keyword: candied nuts, sprouted nuts
Servings: 8 servings
Author: Renee - www.raisinggenerationnourished.com

Ingredients

  • 2 cups raw nuts and/or seeds of choice
  • 2 tsp sea salt for soaking
  • 1 egg white
  • 1/4 – 1/3 cup coconut sugar
  • 1 tsp blackstrap molasses
  • 2 tsp pumpkin pie spice See above section for different flavoring options to swap here from vanilla and cacao to cinnamon!
  • Zest of 1 orange Optional if you enjoy the citrus aroma and a hint of citrus to the nuts/seeds
  • Up to ¼ tsp cayenne pepper Optional only if you want some heat to your mixture – I’d leave this out if serving to kids – I make a separate batch with some heat just for the adults because it’s so yummy!
  • Sea salt to sprinkle over top to your preference

Instructions

  • Put the raw nuts/seeds into a medium mixing bowl with 2 tsp sea salt and fill the bowl with water to cover the nuts/seeds. Stir the mixture around to dissolve the sea salt, and then cover with a towel. Let the soaking nuts/seeds sit on the counter 7-12 hours to soak. This soaking process breaks down the phytic acid in the nuts/seeds making them easier on digestion. You could also sprout your nuts/seeds if you have the time to take that process further for more nutrient availability. After 12 hours of soaking, drain the water, cover with a towel, and let the nuts/seeds sit on the counter for 24-36 hours until you see a little sprout of a tail. Rinse and drain the nuts/seeds a couple times a day during this sprouting time.
  • After soaking (or sprouting) your nuts/seeds, drain the water. Whisk the egg white, coconut sugar, and pumpkin pie spice (and cayenne if using it) in a small mixing bowl, and then put the drained nuts/seeds in. Stir the nuts/seeds with the coconut sugar mixture to coat evenly.
  • Spread your coconut sugar coated nuts/seeds over a dehydrator tray (or baking sheet if using an oven). If you are dehydrating the nuts/seeds, you can dehydrate under 150 degrees to keep the nutrients and oils stable in the nuts/seeds. This will take around 12-24 hours depending how high you set your temp – I do about 135 degrees and it takes about 12 or so hours (this is the dehydrator I use.). If you are using an oven, you can bake at 250 degrees for about 30 minutes to an hour. Stir them around once or twice while baking to make sure they dry out all the way.
  • Store your crispy candied nuts and seeds in an airtight container in the pantry.

More real food recipes you might like ::


Holiday Recipes Occasional Treats Real Food 101 Real Food Tips School Holidays

Healthy Halloween Tips and Ideas :: Healthier trick-or-treating ideas {that won’t get you tee-peed!}, family Halloween traditions, & healthy classroom party ideas!

September 23, 2017

Celebrate Halloween and keep your “crunchy momma” status with these super fun, {not lame} healthy Halloween tips and ideas for home and school!

Product links in this post are affiliate links. It does not cost you anything and helps maintain the free information on this site, as well as answer the questions of “what brand do you use?” Please know I never personally recommend any product I wouldn’t use on my own family. 

I’m going to just cut to the chase, let the cat out of the bag…you get the idea…

It’s not my favorite holiday.

You know…Halloween. Sure, it’s super fun to dress up little kids like fuzzy ducks, silly clowns, and glittery butterflies, but really, I’m in this whole autumn thing for that Thanksgiving turkey!

And yet…

…the kids nearly jump out of their skin for this holiday, and so we roll with it. I’ve spent the greater part of the last 8 ½ years of this motherhood journey navigating just how to approach the sugar crazed holiday, and I feel like I’ve come up with a happy medium that works for our family.

My middle kiddo making pumpkin pasta before trick or treating!

Did you hear that key phrase?

I’ve found what works for *our* family. It won’t be the same for every family, but I’m hoping my list is super comprehensive and will at least give you a bit of empowerment to start making your *own* family traditions to make the holiday special for your kids, without compromising your real food standards.

Because that’s really what it’s all about, right?

The fun, right!?

Listen, I may be one of those ____(insert your choice of terms to describe health conscience moms…crunchy, holistic, green…) mommas, but I don’t want my kids to feel like the odd duck. Sure they may pack bone broth loaded soup for school lunches, but I also pack an occasional PBJ. And yes, for the most part treats are just saved for birthdays and holidays, but we have the occasional Friday night pizza or weekend celebratory cookies.

It’s called balance…

And that balance is crucial to making sure your kiddos don’t buck back against you when it comes to fun things like Halloween. Trust me…I’ve done the whole skipping trick or treating to avoid the candy thing. I thought since I would be having them dump the candy anyway, why bother!

Instead, what I had was a disappointed 6 year old who knew about trick or treating from her friends at school, and all she wanted to do was dress up and have some fun. Not every kid will come to this conclusion, but she would have been just as happy to dump the candy just for the chance to dress up and have some fun! Don’t take that away from them!

Our family Halloween traditions!

Again, every family is different, and there is no one right way to do this Halloween thing. I hope everyone reads that part carefully – my way isn’t the highway, but I’m hoping you can get a few ideas to help, and learn from my mistakes!

  1. We carve pumpkins, dress up, and do the trick-or-treating thing. My kids are still at the ages where this is super cool to them, and they don’t even care that the rule is dumping the candy in the trash afterward. They seriously just want to dress up and have fun!
  2. We swap their trick-or-treat candy for a special treat that they get to make with momma. We do something different every year, and the kids get to pick. We’ve made caramel corn, candy apples, tootsie rolls, and sugar cookies made into pumpkins (I use this recipe using a pumpkin cutter and then use naturally dyed orange sprinkles over white frosting!). They get to enjoy their special treat after trick-or-treating – period. Not the next day or the weekend after. Even if it’s a school night, they are staying up and having fun. Don’t be the party pooper mom. Yep I said it – and I get to say it cuz I’ve been there and it isn’t all it’s cracked up to be. Live a little 😉
  3. I hand out candy. Well, honey sticks to be exact. I went years without handing out candy because I just couldn’t stand the thought of handing out GMO filled candy to innocent little kids. I couldn’t afford the expensive organic chocolate candy for everyone, so I just didn’t hand anything out. I can’t remember where I got the honey stick idea, but we are going on our 3rd year of handing them out, and it is a compromise I feel good about. Kids get something sweet, and I feel good about the quality.
  4. As far as school Halloween parties go, our school doesn’t celebrate Halloween in the traditional way, so I have zero experience there. They do some crafts, and make applesauce! (The kids love this by the way – let them peel and chop, and then slow cooker or Instant pot the applesauce!) If you have kiddos at a school that does the whole Halloween party fiasco, please leave us some comments below on how you handle the school parties so we may learn from you!

I absolutely cherish this picture of my oldest making the caramel for caramel apples and her sisters watching! That is what this is all about! (Recipe for the caramel apples from Nourished Kitchen is below!)

A quick note on my thoughts about babies & toddlers…

Take those babies and toddlers to the pumpkin patch! Do fun arts and crafts with pumpkin seeds, orange paint, and pumpkin cutters in play-doh!

My philosophy on the babies and toddlers with candy is…do *you* want to explain to a 1 or 2 year old why we don’t have candy every day of the year? They just don’t have the capacity to reason why this isn’t a good idea like a 4 year old on up would. I kept my babies and toddlers with a fun snack of fruit salad with simple whipped cream, or simple fruit leathers (I love the idea of this winter squash fruit leather – perfect for toddlers!), or cut up fruit in a fun mini cookie cutter for Halloween shapes.

They don’t know any better, dear momma. You’ll be so glad you did the next day when you don’t have to explain why we don’t have chocolate everyday to a 2 year old who doesn’t know how to understand that. It just isn’t fair to them.

That said…when it comes to older siblings in the house, let them have some fun. I admit my third born had her first piece of candy much younger than my oldest who was at least 4 before she had hers. However,  I definitely didn’t feel like going through the meltdown process at ages 1 or 2 when she wanted *more*, so she was just in bed when my oldest kiddos had their special treat.

Again, this philosophy isn’t set in stone. It is my opinion, and my thought process. You do you dear momma, but at least this gives you some food for thought! 

Onto the ideas!

SO! I wanted to comprise a list of ideas that will help you through Halloween with your {ahem} crunchy momma label 🙂 Pick and choose what works for you, and pass by what doesn’t. Read through it with your older kids and make some new family traditions together!

Trick-Or-Treat Hand-Out Treats:

Let’s face it…an apple or box of raisins is just not something special to a kid over the age of 3! Lighten up and try some of these fun, safer ideas that will make the kids smile! Please note the prices per candy, and maybe you could do the more cost effective ones for the masses of trick-or-treaters, and save the pricier ones for those smaller, at home parties or classroom parties if candy is allowed.

{PLEASE keep in mind that Amazon prices can fluctuate. I broke the price down per candy for your convenience, and the price here reflects what Amazon had the price at during the time of this post publishing.}

Treat Alternatives:

Let’s face it…kids probably have enough pencils, and the gross plastic fake Halloween teeth will just get tossed in the garbage. Here are some fun, non candy ideas for the kids that stop by that can’t have candy!

{These aren’t really my thing, but I do think that for the little guys that come around, some parents might be thankful to get something like a sticker that isn’t full of sugar. I’m pretty sure you will want to have the candy from above on hand for older kids. PLEASE keep in mind that Amazon prices can fluctuate. I broke the price down per toy for your convenience, and the price here reflects what Amazon had the price at during the time of this post publishing}

  • Stickers (2 cents per sticker. Obviously, you can find stickers just about anywhere! Shop around! I thought these were cute for the Halloween holiday!)
  • Temporary Tattoos (6 cents per tattoo. Obviously, you can find temporary tattoos just about anywhere! Shop around! I thought these were cute for the Halloween holiday!)
  • Stampers (18 cents per stamper. Obviously, you can find stampers just about anywhere! Shop around! I thought these were cute for the Halloween holiday!)
  • Glow Sticks (6 cents per glow stick.)
  • Bouncy Balls (13 cents per bouncy ball)

Homemade Treats The Family Can Make Together:

Make sure you use the comments to tell us your family Halloween treat traditions! I would love to add to this list!

Honey Caramel Apples (This is the recipe we use every year!)

Honey Sweetened Caramel Corn

Gluten Free Halloween Ghost Cupcakes

Pumpkin Spice Latte {Because Mom & Dad need it! Leave the coffee out for the kiddie cups!}

Homemade Tootsie Rolls

Spider Cupcakes

Candy Corn Panna Cotta

Chocolate Dipped Mandarin Oranges

Paleo Ghost Truffles

Sweet, Spicy, & Salty Pumpkin Seeds

Dark Chocolate Nut Butter Cups

Fresh Figs With Cheese & Walnuts

Chocolate Covered Apples

Salted Caramel Apple Parfaits

Pumpkin Gummies

Cinnamon Maple Nut Butter Apples

Honey Nut Popcorn

Healthy Family Halloween Dinner Ideas {Kids will actually eat before trick-or-treating!}

Traditions That Will Make Halloween Super Special!

Make sure you use the comments to tell us your family traditions! I would love to add to this list!

  • Pumpkin carving contest
  • Play Halloween themed Pictionary
  • Pumpkin seed counting contest
  • Make your own personal pizzas (2 recipes above in the Halloween Dinner section!)
  • Watch a movie
  • Play board games
  • Play Halloween themed Charades
  • Have a scavenger hunt
  • Have a spa night

Fruit Based Treats For Classroom Parties (Or at home for those toddler treats!)

Applesauce Making (Have the kids peel & chop, then slow cooker or Instant pot it in class!)

Halloween Monster Mouths

Fruit Bat Snack Bags

Monster Fruit Cups

Pumpkin Spice Fruit Dip

Frozen Boo-Nana Pops (I’d use greek yogurt!)

Halloween Green Yogurt Fruit Dip & Spooky Fruit Snacks (I’d skip the nutella or make your own)

Healthy Halloween Orange Pumpkins


Ghost Berries (I’d use organic white chocolate or even dip in Greek yogurt and freeze.)

Orange Jack-O-Lantern Fruit Cups

Candy Corn Fruit Pops

Spiders On A Log

Fruit Gummy Worms

Treat Alternatives For Classroom Parties

Think games and crafts! The focus at classroom parties doesn’t always have to be on the food. If they kids are having fun, and get a break from normal classroom routine, that is all they care about.

Please note there are probably a zillion Halloween crafts and games! I tried searching for things that could be done in the classroom easily and affordably. If you are a teacher or parent that have some fun classroom craft ideas, please drop them in the comments below and I’ll add to the list as we need!

CRAFTS FOR THE CLASSROOM {OR LITTLE ONES AT HOME!}:

Halloween Spider Craft

Halloween Rock Monsters

Monster Corner Bookmarks

Pine Cone Spiders

Yarn Pumpkins

Pumpkin Apple Stamps

Paper Plate Mummy Lacing Craft

Craft Stick Spider Webs

Build A Monster (This link has a free printable!)

Paper Plate Black Cat

GAMES & ACTIVITIES FOR THE CLASSROOM:

  • Carve a pumpkin and have a estimating contest on the amount of pumpkin seeds
  • Roast the pumpkin seeds!
  • Peel & chop apples and slow cooker or Instant Pot applesauce right in class! If you have access to an oven at school like our school does, you can have older kids do a baked applesauce which will make the whole school smell amazing!
  • Make play-doh with a fun fall scent or slime in class
  • Scavenger Hunts
  • Science experiments
  • Bingo (this link has a free Bingo printable!)
  • (I had a harder time finding games! If you are a teacher with some fun Halloween games, please comment!)

SO! We want to hear from YOU!

Let’s make this the most comprehensive, “crunchy momma” guide to a {not lame} FUN Halloween! List out what you do in the comments! If you are a Switch Witch family, a big party family, or you do something totally different, we want to hear it!


Feeding Babies Healthy Kids and Teens Holiday Recipes Occasional Treats Products & Books We Love! Real Food 101 Real Food Tips School Holidays

Paleo Plátanos Calados :: Stewed Spiced Ripe Plantains

August 23, 2017

Plátanos Calados are a creamy and sweet fall spiced glazed plantain treat that everyone in the family will love!

Product links in this post are affiliate links. It does not cost you anything and helps maintain the free information on this site, as well as answer the questions of “what brand do you use?” Please know I never personally recommend any product I wouldn’t use on my own family. I received a promotional copy of Latin American Paleo Cooking for review purposes for this post.

September is approaching, and fall is right around the corner!

We are moving into full blown back to school mode! My older 2 girls are getting antsy to get back to their friends and the daily routine of the classroom, and my youngest is beyond ready for her preschool year! With the anticipation of getting back into the classroom, my oldest 2 were having a particularly “bored” day, and I decided to have a little “school” here at home…

A little taste of Latin American culture

My little Montessorians are used to studying world maps all the time in school, and they were thrilled at the chance to learn more about a unique part of the world we call Latin America! My dear friend, Amanda, from The Curious Coconut just happened to send us her brand new cookbook, Latin American Paleo Cooking that week, and it was the perfect opportunity for the girls to brush up on their map skills, as well as learn about a unique, and very special culture.

A whole new cookbook experience!

I was prepared for Latin American Paleo Cooking to have super fun, gorgeous recipes knowing Amanda (which it totally does!), but what I wasn’t anticipating was the added cultural learning I was going to glean from the cookbook – and that dear friends, is priceless.

My older girls poured over the delicious recipes “ooo-ing” and “ahhh-ing” over the stewed meats, pretty folded little empanadas, and of course luscious sweet treats. My oldest noticed the flags with each recipe indicating what country in Latin America the recipes were from, and was soon glued to the computer maps trying to find the countries. We talked about the people from these countries, their heritage, what the weather is like in these tropical regions, as well as what kind of food grows there. It was a great learning opportunity!

Latin American Paleo Cooking Features and Stats!

Here’s the low down on this amazing book!

  • The cookbook has over 80 traditional recipes made Paleo and as authentic as possible, with over 90% being AIP or easily adaptable
  • All recipes are gluten-free, dairy-free, nut-free; all but 1 are egg-free. 2 recipes use white rice BUT there are grain-free options for both of those.
  • The countries represented include: Puerto Rico, Cuba, Venezuela, Colombia, Peru, Argentina, El Salvador, Dominican Republic, and Brazil, each marked with that country’s flag for easy reference. Some recipes are so ubiquitous that they cannot be attributed to a single country, and are designated as pan-Latin.
  • Platos de la Familia (Family Dinners) includes recipes meant to feed a crowd, and many of these recipes are great for batch cooking.
  • Comida Fiesta! (Party Food!) includes Paleo versions of Latin recipes that people get ridiculously excited about, like pupusas, pandebono (“cheese” buns), empanadas, arepas, plantain sandwiches, and more.
  • Rapido y Facil (Quick and Easy) includes recipes that are, like the name says, quick and easy to prepare. Some are still great for batch cooking, too, extra bonus!
  • Accompañantes (Sides) includes many ways to enjoy tropical starches like yuca, malanga, boniato, and plantains PLUS both a starchy and non-starchy rice replacement AND starchy and non-starchy BEANS replacement!
  • Un Poco Dulce (A Little Sweet) is a short but delicious desserts chapter
  • Lo Esencials (The Essentials) includes cooking bases, sauces, marinades, condiments, broths, and more, which are used throughout the book and can be the launching point for readers to get creative with numerous uses! Of note is the QUESO BLANCO recipe that is unlike any other “cheese” recipe I have seen in the Paleo/AIP community. It melts and stretches like mozzarella!
  • While over 80 recipes are written, this book comes with numerous suggestions and options to create dozens of other recipes using different combinations of meats/fillings/breads/pastry shells/condiments/marinades. It is written to empower the reader to try new combinations!

Fall spices meet tropical fruit!

One of the recipes the girls kept coming back to was the stewed and spiced Plátanos Calados, meaning “drenched/soaked plantains.” This recipe originates in Colombia, and showcases sweet plantains glazed in warm and sweet spices we typically associate with the fall. Think pumpkin spice meets caramelized bananas…it is truly a match made in heaven.

A word about adventurous taste palates…and some veteran momma wisdom

Those of you who have been around here long enough know that I am a huge fan of exposing kids to the tastes of YOUR unique home. As far as our house goes at least, there is no such thing as “kid food” and “adult food” – all food is kid food. It’s family food. Starting these kiddos out young with the tastes and flavors of your home, and different cultures sets them up to be excited about trying new food. Those kids will never bat an eye at new things on their plate when they have been given the opportunity to have a wide variety of flavors and textures instead of being boxed into just “kid food.”

So while this recipe certainly is super fun (who doesn’t love sweet, creamy glazed fruit?!), there are other recipes in this book that I am absolutely planning on making that I have no idea what they will taste like! And you know what? The girls are biting at the bit for me to make something new! I promise you that getting little ones started out eating a wide variety of flavors, tastes, and textures will reward you with the same adventurous eaters I enjoy every day.

This picture right here below, is that of pure and utter foodie kid joy!

A quick note on some additions I made!

Amanda just knows me way to well! She mentioned to me that because I love “making every bite count” when it comes to feeding little kids, that possibly swapping some of the water for nutrient dense, fatty coconut milk might be a good idea to bump up the nutrition. I was all about that. So I swapped 1/3 cup of the water for coconut milk and it was delicious. I think you could even swap more, if not the whole 1 cup. We weren’t sure if the glaze would get too thick using all coconut milk but I think there is some room for more than the 1/3 cup that I did.

I also backed off the sweet a little bit. My kids’ palates aren’t real used to super sweet, and I had a feeling this would almost be more sweet than they would enjoy. They thoroughly enjoyed every bite of these Plátanos Calados with half the coconut sugar. The caramelized ripe plantains were more than enough sweet for them. If you have really little guys in the house, I would definitely recommend doing this. If you have older kiddos in the house used to sweeter desserts, the ¼ cup will definitely please them – I made a half batch just for myself with the full amount and was in absolute heaven eating it with my café con leche 😉

When you start thinking pumpkin spice this fall, put Plátanos Calados on the menu for a quick and delicious sweet treat!

Print Recipe
5 from 9 votes

Plátanos Calados :: Stewed Spiced Ripe Plantains

Plátanos Calados are a creamy and sweet fall spiced glazed plantain treat that everyone in the family will love!
Prep Time5 mins
Cook Time20 mins
Total Time25 mins
Course: Dessert
Cuisine: Latin American
Keyword: glazed plantains, glazed platain recipe, platanos calados
Servings: 2 -4 servings
Author: Reprinted with permission from Latin American Paleo Cooking by Amanda Torres with Milagros Torres, Page Street Publishing Co. 2017.

Ingredients

  • 1 cup 235 ml water
  • ¼ cup 60 g coconut sugaror grated panela sugar
  • 1 tsp 2 g ground cinnamon
  • ½ tsp aniseeds
  • ¼ tsp ground cloves
  • 1 tbsp 15 ml coconut oil
  • 2 large very ripe (mostly black) plantains, peeled and cut into 4 pieces

Instructions

  • In a small pot, combine all the ingredients, except the plantains, and stir well.
  • Add the plantains and bring to a boil, then lower the heat to medium, cover and cook for 15 to minutes, or until the sauce thickens and the plantains are cooked throughout and tender.
  • Serve with a generous portion of sauce and enjoy!
  • AIP compliant: Omit the aniseeds and optionally replace with 1/2 teaspoon of ground mace.


Holiday Recipes Occasional Treats Real Food 101 Real Food Tips School Holidays

Real Food Copycat Nestle® Toll House® Cookies :: Gluten and Dairy Free Too!

June 16, 2017

Remember Nestle® Toll House® Chocolate Chip Cookies from your childhood, but want to make them with better ingredient choices? I’ve got the answer!

Real Food Copycat Nestle® Toll House® Cookies :: Gluten and Dairy Free Too!Product links in this post are affiliate links. It does not cost you anything and helps maintain the free information on this site, as well as answer the questions of “what brand do you use?” Please know I never personally recommend any product I wouldn’t use on my own family.

We were known for them…

Growing up, our house was *known* for bringing the best chocolate chip cookies *ever* to whatever gathering we went to. I’m talking people were NOT happy if they were not brought. They were soft and sweet, and whether it was right out of the oven, out of her old Tupperware, or if we were sneaking them out of the freezer {ahem…}, they were seriously nothing short of amazing.

Product links in this post are affiliate links. It does not cost you anything and helps maintain the free information on this site, as well as answer the questions of “what brand do you use?” Please know I never personally recommend any product I wouldn’t use on my own family.My mom’s secret?

The recipe on the back of the Nestlé® Tollhouse® chocolate chips bag, with a couple tweaks that literally make them melt in your mouth.

Her secrets to making them soft and chewy instead of crispy were:

  • Swap the butter for vegetable shortening – in other words…Crisco® (I know, I know. Just hang tight with me real food police…I’ve got your back in a few paragraphs here…)
  • Half the salt. I’m not sure why this is – I didn’t half the salt in the recipe I made just out of curiosity and I still liked them. Could have been her preference!
  • Back off the cook time to about 8 minutes. Meaning leave them just slightly under-cooked. They finish cooking a couple minutes on the hot sheet pan and then on to the cooling rack to cool. The result is a middle that is soft and literally melts in your mouth!

Real Food Copycat Nestle® Toll House® Cookies :: Gluten and Dairy Free Too!The challenge…

Well her tweaks, along with most of the rest of the ingredients in the recipe have made it pretty hard to enjoy knowing what I know now. Know better, do better, right? I’ve tried literally dozens of “healthier” cookie versions but nothing reminded me of my childhood…until these!

Real Food Copycat Nestle® Toll House® Cookies :: Gluten and Dairy Free Too!What’s so bad about vegetable shortening?

Dear friends, something happened during my grandparent’s generation. Fat got a super bad rap. Everyone started swapping their butter for this new fangled cooking fat medium called vegetable shortening. It is usually made up of hydrogenated soy. It was easy to cook with, gave amazing results, and {the real kicker for this particular generation}…it was cheap.

In short, we have not only come to learn the damage that hydrogenated oils such as vegetable shortening does to our bodies causing free radicals (think cancer feeders), but that it also doesn’t do the body systems that actually need real fat any good. Everything from our brains, to our digestion, to our hormones, rely on real, unprocessed fat. These hydrogenated vegetable oils were also made cheap and fast using GMO crops which is leading to a host of digestive/genetic issues in the last couple generations of kids.

In the end, we have a couple generations in counting of kiddos that grew up without well fed hormones, brains, etc and we are still recovering from the mess. (Hence my mission at Raising Generation Nourished! To read more about healthy fats, how to make the switch to the good ones, and how to use them, you can pick up my cookbook, Nourished Beginnings! There is a whole section on fats, their use, which ones to avoid, and almost 100 recipes using real, healthy fats to cook with!)

Real Food Copycat Nestle® Toll House® Cookies :: Gluten and Dairy Free Too!Still a cookie…but with real ingredients.

Yes, dear friends these cookies still have sugar (albeit the non GMO variety!). And whether you want to admit it or not, sugar is still sugar. I‘m not glorifying these cookies by even letting them be called healthy. Because if you ate them everyday, you’d be overloading your body with sugar.

But for a weekend family reunion treat? A birthday sleepover midnight indulgence with friends? Absolutely!

Real Food Copycat Nestle® Toll House® Cookies :: Gluten and Dairy Free Too!Here are my Nestle® Tollhouse® Real Food Copycat Swaps!

  • Swap the vegetable shortening my mom used for Nutvia Organic palm shortening, which is coconut/palm oil based (No it doesn’t make it taste like coconut! And yes, please be careful on brands – this brand is sustainable, fair trade, etc). You could use butter if you want, which is what is on the original Nestle recipe. Your cookies will be crispier – and some people like that! Awesome! I was really going for the soft and chewy cookies my mom made when I was a kid, and palm shortening is the ticket!
  • Use an organic, non-GMO sugar, and back off the amount a bit. Honestly, when I make these again for just my kids, I will be backing off the sugar amounts even more. These were so sweet for my kids’ and my palates because we just don’t eat sugar anymore. They taste JUST like I remember them as a kid (even with the amount backed off a bit!), and I cringe that I thought that was ok! So I backed off the {organic/non GMO} sugar from ¾ cup to ½ cup and then made my own brown sugar. You can get organic brown sugar and use ½ – ¾ cup brown sugar. I never use brown sugar and it always ends up getting hard in the back of my pantry. Brown sugar is just sugar mixed with molasses (1 cup to 1 tablespoon ratio.). So instead of ¾ cup brown sugar, I used another ¾ cup sugar and around 1 tablespoon of molasses (This is why the sugar is 1 ¼ cup. ½ cup regular sugar plus the ¾ cup used for the brown sugar. Again, I think we could pop that sugar down to 1 cup total or even ¾ cup and my kids would still be very happy).
  • Because we are a gluten free home, I used the Namaste Gluten Free Flour Blend. It swapped for all purpose flour perfectly. (If you can tolerate gluten, I would try some Einkorn All Purpose Flour. I am not an experienced baker with it, but if there are friends here reading this that are, please let us know your experiences. I hear it leaves things “wetter”, or the flour isn’t as absorbent, so the amount may need to be adjusted up a bit?)
  • Swap the Nestle® chips for an organic brand. This is another one of those, “Well if sugar is still sugar, then why fuss about this ingredient? Well to be honest I don’t want to support companies that are still making products with GMO filled cane sugar and/or corn syrup, soy, and fillers. If you are dairy free, the Enjoy Life chocolate chips or Enjoy Life chocolate chunks are a good choice. I like using the Organic Meijer brand that our local Meijer grocer carries. If you are going to shop around, just really watch the ingredients (even in “health food” stores!). You can find them without the GMO’s, fillers, and corn syrup!

Real Food Copycat Nestle® Toll House® Cookies :: Gluten and Dairy Free Too!

Print Recipe
5 from 5 votes

Real Food Copycat Nestle® Toll House® Cookies

Remember Nestle® Toll House® Chocolate Chip Cookies from your childhood, but want to make them with better ingredient choices? I’ve got the answer!
Prep Time10 mins
Cook Time10 mins
Total Time20 mins
Course: Dessert
Cuisine: American
Keyword: copycat tollhouse recipe, dairy-free chocolate chip cookies, gluten-free chocolate chip cookies
Servings: 24 cookies
Author: Renee - www.raisinggenerationnourished.com

Ingredients

  • 1 cup organic & sustainable palm shortening
  • 1 ¼ cup organic pure cane sugar I will be trying 1 cup next batch - the 1 1/4 is still less than the original Nestle recipe, but quite sweet for our taste as we don't eat sugar much
  • 3-4 tsp molasses If going lower on the cane sugar, use more lik 2-3 tsp molasses
  • 1 tsp vanilla extract
  • 2 eggs
  • 2 ¼ cup Namaste Gluten Free Flour Blend I hear the Trader Joe’s GF flour blend is similar if you have that. I am not sure how other GF blends will behave, but it is worth trying! There are many great ones out there!
  • 1 tsp baking soda
  • 1 tsp sea salt
  • 1 10-12 oz package chocolate chips of choice If you are dairy free, the Enjoy Life Chocolate Chips or Enjoy Life Chocolate Chunks are a good choice. I like using the Organic Meijer brand that our local Miejer grocer carries. Just really watch the ingredients if you want to shop around. You can find them without the fillers and corn syrup!

Instructions

  • Preheat the oven to 375 degrees.
  • Use a hand blender to cream the palm shortening, sugar, molasses, and vanilla. Add the eggs and blend until creamy and smooth.
  • Add the flour, baking soda, sea salt, and chocolate chips, and stir with a spatula until mixed evenly.
  • Drop spoonfuls of batter on a Silpat or parchment paper lined baking sheet. You don’t need to roll these unless you want perfect circles – this is one thing I remember as a kid loving – my mom always let us drop the dough on the sheet and imperfectly shaped cookies feel the most homemade to me! Bake at 375 degrees for 8 minutes. Cool on the tray for 2 minutes and then transfer to a cooling rack to cool off the rest of the way (if they last that long!)

More real food recipes you might like ::

Holiday Recipes Occasional Treats Real Food 101 Real Food Tips School Holidays

Grain Free Chocolate Chip Cookies :: Date Sweetened & Paleo Friendly!

January 20, 2017

Lightening fast blender prep and the perfectly balanced chocolate chip cookie sweet treat for little ones!

Grain Free Chocolate Chip Cookies :: Date Sweetened & Paleo Friendly!Product links in this post are affiliate links. It does not cost you anything and helps maintain the free information on this site, as well as answer the questions of “what brand do you use?” Please know I never personally recommend any product I wouldn’t use on my own family.

Snow day!

We have had a bit of an up and down winter so far as huge snow blizzards followed by melting 40 degree rains sure have us confused about whether it is winter or spring! We’ll take all the snow days we can get off school though as we enjoy the beauty of the snow and where we live!

15538319_1297656526971874_8433198165783478272_n(1)Snowmen, blanket tents, movies…and *naturally sweetened* chocolate chip cookies!

Snow days call for these chocolate chip cookies every time! But I also don’t need 3 kiddos bouncing off my walls all afternoon. This cookie base is sweetened with dates instead of processed sugar, and it is loaded with friendly fats and protein to keep blood sugars stable. The kids are happy because they get a special treat, and momma is happy because the possibility of a nap still exists 😉

Grain Free Chocolate Chip Cookies :: Date Sweetened & Paleo Friendly!Spur of the moment fast prep!

Because the kids get a snow day, but momma probably still has work from home to get done! These cookies have a super quick blender dough, and they can be on the tray ready to bake before the oven preheats. And because the kiddos are home from school on that snow day anyway, it makes a great project for even the littlest of hands to make.

Grain Free Chocolate Chip Cookies :: Date Sweetened & Paleo Friendly!Some notes for my nut and egg free friends!

I have been making these cookies for years but have not tried subbing the eggs and nuts since we tolerate them fine and they provide great nutrition – I do think it can be done though if you have allergies and need to!

  • Nut free friends, I think you can sub another flour of your choosing. I would not use the full 2 cups called for with walnuts however as other flours are going to be dryer than oily nuts. Start with 1 cup of a flour of your choice and see how the dough feels.
  • Egg free friends, I am pretty sure 2 flax or chia eggs will work in this recipe. They might not puff up as much but it will provide a great bind and that baking powder will give a little rise to them.

{If you happen to try these cookies nut and/or egg free, please share with us in the comments what worked for you so that others that stop by and need an egg or nut free option may try!}

Grain Free Chocolate Chip Cookies :: Date Sweetened & Paleo Friendly!Freezer friendly tips

The grain free chocolate chip cookies as well as the uncooked dough freezes well too. They are perfect for last minute play dates, keeping at Grandma’s house so she can spoil the grandkids, or that pile of friends that end up at your house after school!

  • To freeze the dough, simply make up the dough, and roll it up into a log on some plastic wrap. Wrap the log of dough in the plastic wrap, and freeze. Then take the log of dough out, cut into cookie circles and pop them into the freezer bags. You can pull out however many cookies you want to bake when you want!
  • To freeze already baked cookies, bake off a batch or 2 of the cookies, let them cool, and then wrap them in plastic wrap. Put the wrapped cookies in a freezer bag. You can thaw at room temp or put frozen cookies onto a baking sheet into the oven – by the time the oven preheats to 350 the cookies should be thawed and warm.

Grain Free Chocolate Chip Cookies :: Date Sweetened & Paleo Friendly!Healthier chocolate chip ideas…and some chocolate chip swaps!

Our local grocer carries a great local brand organic chocolate chip we like to use for these (If you are Mid-West local with a Meijer near you, the Meijer True Goodness Organic Chocolate Chips in the baking isle is what I am talking about!). The Enjoy Life brand of chocolate chips or chocolate chunks {my fav!} is more widely available however, and is great, “healthier than Nestle” option too! I would also imagine that if you have a Whole Foods or Trader Joes near you (lucky you!) there is probably something available there. Just really watch the ingredient list on the back!

If you have really little guys in the house, or your kids don’t tolerate chocolate, you can use dried cranberries, raisins, chopped dried apricots, or dried blueberries.

Grain Free Chocolate Chip Cookies :: Date Sweetened & Paleo Friendly!

Print Recipe
5 from 2 votes

Grain Free Chocolate Chip Cookies

Lightening fast blender prep and the perfectly balanced chocolate chip cookie sweet treat for little ones!
Prep Time5 mins
Cook Time12 mins
Total Time17 mins
Course: Dessert
Cuisine: American
Keyword: grain free chocolate chip cookie recipe, grain free chocolate chip cookies, Paleo chocolate chip cookies
Servings: 18 cookies
Author: Renee - www.raisinggenerationnourished.com

Ingredients

  • 2 cups raw walnuts I think almonds or pecans would work here too. I like to use soaked/dehydrated walnuts for best digestion
  • 1 1/2 cups tapioca flour
  • 1/4 cup softened butter I think softened coconut oil would work
  • 2 eggs If you are egg free I do think 2 flax or chia eggs would work - the cookies might not puff up as much but they will have the bind
  • 5 dates pitted (If your kids are used to things sweeter I would add an extra 1-2 dates as these are on the mildly sweet side which my kids are used to)
  • 2 tsp aluminum free baking powder
  • 1 tsp vanilla extract
  • 1/2 cup chocolate chips I like to use the local organic brand our grocer carries or the Enjoy Life brand is great too

Instructions

  • Preheat the oven to 350 degrees.
  • Put the walnuts into a food processor and blend into a fine meal.
  • Add everything else EXCEPT the chocolate chips and blend until the dough is well combined.
  • Take the blade out and stir in the chocolate chips with a spatula.
  • Roll your cookies and flatten them on a Silpat or parchment paper lined baking sheet (Makes about 1 1/2 dozen large or 2 dozen small cookies) and bake at 350 degrees for 12-13 minutes. Cool a few minutes before handling.

More real food recipes you might like:

Feeding Babies Holiday Recipes Occasional Treats Real Food 101 Real Food Tips School Holidays

Cranberry Baked Pears :: Paleo, Refined Sugar Free, and Gluten Free!

December 9, 2016

Festive cranberry baked pears are the perfect kid pleasing yet healthy treat for the holidays!

Cranberry Baked Pears :: Paleo, Refined Sugar Free, and Gluten Free!It just keeps getting better and better.

I have always enjoyed the holiday season, but every December that has rolled around since having kids in the house, things just feel a little more magical.

The first snowfall, Christmas jammies, the childlike awe over lighting up a tree, and the anticipation of Christmas Day….it’s enough to make you feel like a kid again yourself, and it has been so good for me to see Christmas through the eyes of little kids again!

Cranberry Baked Pears :: Paleo, Refined Sugar Free, and Gluten Free!Cranberry baked pears have become one of those Christmas traditions that our kids have grown to excitedly anticipate each year!

When it’s hard to settle in on Christmas Eve in anticipation for the next day’s events, making baked pears has become something to give the girls something hands on to do to “hold them over” while they wait for the fun day to come!

Cranberry Baked Pears :: Paleo, Refined Sugar Free, and Gluten Free!The beauty is in the simple prep!

One of the biggest reasons I started making baked pears on Christmas Eve was because it was something the kids could do almost 100% on their own! When you have so many other things going on such as family gatherings, or Christmas Eve services, or your own family traditions, it is nice to have a simple kitchen project that won’t make a huge mess, and that won’t take up a lot of time.

Line the kids up assembly line style and let them do it all themselves! Serve them up on special plates, flip that Christmas movie on, and let them enjoy a special tradition they will look forward to every year.

Cranberry Baked Pears :: Paleo, Refined Sugar Free, and Gluten Free!Simple and delicious, cranberry baked pears are also healthy!

Because who wants their kids hopped up on a bunch of sugar before bed anyway?! My husband and I love spending the evening on Christmas Eve wrapping presents together with glasses of wine and a movie! Baking the pears brings out an amazing burst of sweetness to the fruit, and pairing it with a fat like butter coated nuts keeps blood sugars happy. So while it feels like an indulgent treat, it won’t send blood sugars out of control right before bed.

Cranberry Baked Pears :: Paleo, Refined Sugar Free, and Gluten Free!A quick note for my nut free friends and those with older babies!

If you are nut free, you can use crushed seeds, or a mix of seeds and coconut shreds, or simply leave that part out! A seed based granola would work well here too. You can still drizzle some melted butter over the pears for a little fat.

One Christmas I had a 9 month old in the house that wasn’t consuming nuts yet and she gobbled hers right up without the nuts. If you have babies you can leave the cranberries and honey out and just serve them a baked pear drizzled in butter – they’ll be in heaven!

Cranberry Baked Pears :: Paleo, Refined Sugar Free, and Gluten Free!I hope to hear from you if you give this tradition a try with your little ones!

You can tag me on Instagram or Facebook – I’d love to see those sweet faces with their special pretty treats!

Cranberry Baked Pears :: Paleo, Refined Sugar Free, and Gluten Free!

Print Recipe
5 from 10 votes

Cranberry Baked Pears

Festive cranberry baked pears are the perfect kid pleasing yet healthy treat for the holidays!
Prep Time10 mins
Cook Time20 mins
Total Time30 mins
Course: Dessert
Cuisine: American
Keyword: baked pear recipe, baked pears, cranberry baked pears
Servings: 8 servings
Author: Renee - www.raisinggenerationnourished.com

Ingredients

  • 4 pears
  • 1/2 cup fresh cranberries
  • 2 TB raw honey
  • 1/3 cup butter melted (If you are dairy free, I have used avocado oil which works well too! Coconut oil will work but will leave a coconut flavor behind if you don't mind that!)
  • 1/3 - 1/2 cup nuts of choice chopped (I used walnuts and pecans. I like to chop them by hand versus a food processor so they don't get too fine. If you are nut free you can use seeds, seeds and coconut shreds, or simply leave this part out!)
  • Cinnamon for sprinkling to taste

Instructions

  • Preheat your oven to 375 degrees.
  • Halve your pears and scoop the core out with a spoon leaving a little "bowl" for the cranberries. Arrange your pear halves on a baking sheet, flesh side up. (I like to slice the back of the pear on the rounded part of the skin so that the pear sits level and doesn't roll around on the pan.)
  • Fill the middle of each pear half with cranberries (you'll get 3 or 4 in there depending on the size of the cranberries and the "bowl" you shaped). Drizzle raw honey over the cranberries to fill the bowl in. You can fit about a teaspoon in each half for older kids and back off on the amount if you have really little ones with sensitive taste palates yet. The cranberries are really tart so the honey is needed - you can leave the cranberries out for the really little ones around 1 year old and just do the baked pears without any honey! My babies loved it!
  • Mix the melted butter and chopped nuts together in a small bowl, and the sprinkle over the tops of the pears. Finish with a sprinkling of cinnamon to your taste.
  • Bake the pears at 375 degrees for 20-25 minutes until the pears and cranberries are soft and the nuts are crispy.

More real food recipes you might like ::

Batch Up Meals Breakfast Ideas Holiday Recipes Real Food 101 Real Food Tips School Holidays Snack Ideas

Blender Batter Fresh Cranberry Breakfast Cookies :: Gluten Free, Refined Sugar Free, Paleo Friendly

December 2, 2016

The kids will enjoy the flavors of the holiday season with these fresh cranberry breakfast cookies, and mom will love that they are gluten and refined sugar free!

Blender Batter Fresh Cranberry Breakfast Cookies :: Gluten Free, Refined Sugar Free, Paleo Friendly

Product links in this post are affiliate links. It does not cost you anything and helps maintain the free information on this site, as well as answer the questions of “what brand do you use?” Please know I never personally recommend any product I wouldn’t use on my own family.

The week before Thanksgiving, my husband came home with 2 of the biggest bags of cranberries I had ever seen!

“They were on sale” he says, “Have fun with them!”

He knows me too well – challenge accepted!

I used one of the bags for fresh cranberry sauce for all of the Thanksgiving gatherings we had in the following week, and then I set to work figuring out what to do with the rest.

Blender Batter Fresh Cranberry Breakfast Cookies :: Gluten Free, Refined Sugar Free, Paleo Friendly

The last thing we needed in our house was another dessert after a week of pumpkin pie slices and Thanksgiving indulging, so I knew I wanted to make something practical.

Something that I could actually use (that was also quick prep!), and that I could feel good about giving the girls to eat. The holidays can be a tough time to keep things healthy. I want my kids to enjoy the holiday season, but I also want to keep them healthy and robust so they can enjoy it all too!

Blender Batter Fresh Cranberry Breakfast Cookies :: Gluten Free, Refined Sugar Free, Paleo Friendly

Sugar has a huge impact on the immune system.

It feeds the viruses and bacteria in the body, and causes inflammation which makes the body have to work harder while it’s trying to “put the flames out”. Keeping the sugar down gives your kids the upper hand at staying well – especially this time of year when we are more cooped up inside and the bugs are passed easily.

Blender Batter Fresh Cranberry Breakfast Cookies :: Gluten Free, Refined Sugar Free, Paleo Friendly

Keeping the sugar down doesn’t have to be a drag though!

Blending dates into the batter gives the cookies a natural fruit sweetness, while adding a vitamin and mineral punch to the cookie. 5 dates spread amongst almost 2 dozen cookies is pretty low sugar – and they are mildly sweet for young palates (you can add an extra date or 2 if you have older kids used to sweeter food to ease them in). And I cannot tell you how amazing these fresh cranberry breakfast cookies make the house smell!

Blender Batter Fresh Cranberry Breakfast Cookies :: Gluten Free, Refined Sugar Free, Paleo Friendly

Pack a nourishing punch in a fun, holiday season breakfast!

We still have a pretty long month of school this December, and I want my kids full and focused for their morning of school work. We do breakfast cookies on Fridays, and while they are always super fun mornings, I have big goals for my breakfast cookies. I want them packed with fat and protein to fill them up!

These breakfast cookies are loaded with fat and protein from 2 different kinds of nuts, coconut shreds, grassfed collagen, and butter. We usually have a side of hard boiled eggs and glasses of raw milk to go with our Friday breakfast cookies! So YES, dear friends, there is a “method to my madness” when choosing a variety of ingredients for my breakfast cookies. These aren’t just a treat – this is part of a meal!

Blender Batter Fresh Cranberry Breakfast Cookies :: Gluten Free, Refined Sugar Free, Paleo FriendlyEat some, freeze some!

These fresh cranberry breakfast cookies freeze up fantastic! I am planning on having them out on Christmas morning! While I love to make a big fancy breakfast on Christmas morning, my kids are just at an age where presents are more important than food! Having a plate of breakfast cookies out while they are opening gifts will keep the “hangries” away, and then you can have a nice brunch later in the morning.

Blender Batter Fresh Cranberry Breakfast Cookies :: Gluten Free, Refined Sugar Free, Paleo Friendly

Print Recipe
5 from 3 votes

Blender Batter Fresh Cranberry Breakfast Cookies

The kids will enjoy the flavors of the holiday season with these fresh cranberry breakfast cookies, and mom will love that they are gluten and refined sugar free!
Prep Time5 mins
Cook Time15 mins
Total Time20 mins
Course: Breakfast
Cuisine: American
Keyword: cranberry breakfast cookie recipe, cranberry breakfast cookies, gluten-free breakfast cookies
Servings: 12 cookies
Author: Renee - www.raisinggenerationnourished.com

Ingredients

  • 1 cup pecans
  • 1 cup walnuts I like to use soaked/dehydrated walnuts and pecans for best digestion
  • 1 1/2 cups tapioca flour
  • 1/3 cup grassfed collagen
  • 1/4 cup coconut shreds
  • 3 eggs If you are egg free, 3 flax eggs plus 1 TB apple cider vinegar will work as a replacement here for the binding and rising - they won't puff up quite as much as the eggs but they still work well!
  • 1/4 cup softened butter (If you are dairy free use softened coconut oil
  • 2 tsp aluminum free baking powder
  • 1 tsp almond extract vanilla extract works too
  • 5 dates pitted (I get medjool dates from Costco)
  • 1 cup fresh cranberries I get mine at Costco

Instructions

  • Pre-heat the oven to 350 degrees.
  • Put the pecans and walnuts in your food processor and blend until made into a fine meal.
  • Add the rest of the ingredients except the cranberries and blend to combine. It gets sticky, and you may have to scrape down the sides a couple times.
  • Add the fresh cranberries and pulse/blend until the cranberries are the size pieces you want. You can alternatively chop them separately if you wish and fold them in, but I have found the food processor to do a fine job and it's quick!
  • Scoop the batter onto silpat or parchment paper lined baking sheets, flattening them out a bit to the size cookie you want - the cookies will puff up but don't spread out much as they bake. Bake the cookies at 350 degrees for 16 minutes. Let the cookies cool 5 minutes before handling.

More real food recipes you might like ::

Holiday Recipes Occasional Treats School Holidays

“Busy Momma” Simple Gluten Free Pumpkin Pie

November 18, 2016

This gluten free, real food, easy pumpkin pie is something every busy momma will feel proud of!

"Busy Momma" Simple Gluten Free Pumpkin PieProduct links in this post are affiliate links. It does not cost you anything and helps maintain the free information on this site, as well as answer the questions of “what brand do you use?” Please know I never personally recommend any product I wouldn’t use on my own family.

The “icing on the cake”.

The “cherry on top”.

The pie!

"Busy Momma" Simple Gluten Free Pumpkin PieThanksgiving is truly one of my favorite holidays of the year because it just doesn’t get any better than juicy turkey, buttery potatoes, amazing veggie sides…and the most delicious finish! Pie!

I call this my “busy momma pumpkin pie” because for the last few years that is exactly been my title – Busy Momma!

"Busy Momma" Simple Gluten Free Pumpkin PieWith 3 little ones hanging around, my kitchen is already pretty busy, and I want to be able to enjoy my Thanksgiving.

For me, that means less time in the kitchen, and more time enjoying my family! So the name of my game is easy peasy pie crust that is no fuss and easily rolled out, because I am *not* a baker – it is just not my favorite thing to do!

"Busy Momma" Simple Gluten Free Pumpkin PieI also want a pie filling that takes minutes to make. YES I am totally giving you permission to use that can of pumpkin if you are in a season of “busy.” While I have definitely made my share of pies with homemade baked pumpkin, I have found the canned pumpkin tastes just as good and saves some time.

"Busy Momma" Simple Gluten Free Pumpkin PieThe best of both worlds, this easy pumpkin pie is fast but will help you create nostalgic memories of amazing real food on Thanksgiving Day for your kids.

I remember feeling lost when I had my first baby and the holidays rolled around. I knew I wanted to feed her differently than from a box, but had no idea where to start. Luckily she was just an infant that first holiday season, and I made a decision to figure it all out by the next year!

It has been so worth it. It has been a labor of love to learn how to cook from scratch. The look on my kids’ faces when I tell them Thanksgiving is next week…well that is just the icing on the cake…or the whipped cream on the pumpkin pie!

"Busy Momma" Simple Gluten Free Pumpkin PieThis easy pumpkin pie is everything you love about your favorite Thanksgiving dessert, without the junk!

No sweetened condensed milk here – and no fussing around with a homemade, DIY version of condensed milk (although those work wonderfully and are great! We are shooting for fast here though!). And I don’t know if you have ever looked at the ingredient list on those boxed pies from the freezer section at the grocery store, but a mile long list of preservatives, and fillers is not what I’m going for!

"Busy Momma" Simple Gluten Free Pumpkin PieHappy Thanksgiving to you, dear readers! I am truly thankful for you this season! Your community, questions, and conversation are a joy to me every day!

"Busy Momma" Simple Gluten Free Pumpkin Pie

Print Recipe
5 from 1 vote

"Busy Momma" Easy Peasy Gluten Free Pumpkin Pie

This gluten-free, real food, easy pumpkin pie is something every busy momma will feel proud of!
Prep Time30 mins
Cook Time1 hr
Total Time1 hr 30 mins
Course: Dessert
Cuisine: American
Keyword: gluten-free pie crust, gluten-free pumpkin pie, gluten-free pumpkin pie recipe
Servings: 8 servings
Author: Renee - www.raisinggenerationnourished.com

Ingredients

Instructions

  • Make the pie dough first. Put the flour, 2 TB of sugar, and butter into your food processor and pulse to combine evenly. Pour the water into the oil stream cup on the top of the food processor, and turn the processor on to blend in the slow stream of water. Keep the processor on until the dough gathers into a ball. It will take a good minute or 2. Wrap the dough in plastic wrap and refrigerate for 30 minutes.
  • Take the dough out of the fridge to warm up a bit while you make the pumpkin pie filling. Simply put the rest of the ingredients into a medium mixing bowl and blend to combine.
  • Use your warm hands to knead the dough a bit on a rice floured surface - the dough will become nice and soft as your hands warm it up. Using rice flour on your surface and rolling pin, roll the dough out to fit your pie plate, and fix the edges how you like.
  • Pour the pie filling into the uncooked pie crust, and bake at 350 degrees for 60 minutes. The middle of the pie should not stick to an inserted butter knife although a little bit is ok - it will finish cooking while it cools on the counter.
  • Let the pie cool to room temp on the counter and then refrigerate (this is a good one to make couple days in advance!). Serve slices of pie with homemade whipped cream.

More Thanksgiving posts you might like ::

Simple & Quick DIY Whipped Cream

Homemade GF Stuffing

Quick Cranberry Sauce

5 Minute GF Bone Broth Gravy

GF Cornbread

"Busy Momma" Simple Gluten Free Pumpkin Pie

Holiday Recipes Occasional Treats Real Food 101 Real Food Tips School Holidays

Make Your Own REAL FOOD Ice Cream Sundae Party!

June 1, 2016

A fun make your own ice cream sundae party without the artificial dyes and using all real food ingredients!

Make Your Own REAL FOOD Ice Cream Sundae Party! :: A fun make your own ice cream sundae party without the artificial dyes and using all real food ingredients!

My sweet side kick little momma turned 7 last week! Seven feels so much older to me for some reason! Chloe has the biggest, most caring heart of anyone I have ever met. Anyone that has crossed her path has experienced her kindness, and I am so proud to call her mine. Chloe is pretty much my right hand around here, taking on kitchen help when I need it, and tending to her sisters when my hands are busy – including the best diaper changer in town – she gets my 2 year old to lay still better than I do!

Make Your Own REAL FOOD Ice Cream Sundae Party! :: A fun make your own ice cream sundae party without the artificial dyes and using all real food ingredients!

This year Chloe asked for an ice cream sundae party! She wanted her and her friends to be able to make their own sundaes themselves, and I couldn’t have thought of a better idea.

Make Your Own REAL FOOD Ice Cream Sundae Party! :: A fun make your own ice cream sundae party without the artificial dyes and using all real food ingredients!

This was, honestly, hands down the easiest “prep ahead party” I have ever thrown.

I made the vanilla ice cream the week before the party and it hung out in the freezer until party day. I made the sauce toppings the night before in less than an hour including clean up, storing the sauce in the fridge over night.

Make Your Own REAL FOOD Ice Cream Sundae Party! :: A fun make your own ice cream sundae party without the artificial dyes and using all real food ingredients!

The only thing I had to do the day of the party was whip the whipped cream in just minutes, and open the dye free sprinkles we used! I had so many other topping ideas you could add in as well – chopped nuts and berries would be fun! I wanted cherries for the top but they just aren’t in season here yet!

Make Your Own REAL FOOD Ice Cream Sundae Party! :: A fun make your own ice cream sundae party without the artificial dyes and using all real food ingredients!

I scooped the ice cream into these adorable polka dot ice cream cups about an hour before the party and stored them on trays in the freezer. It was SO nice to just pull the trays out at the party and not have to spend time scooping for everyone. The girls all got to decorate their ice cream at the same time and it was a riot to see what they picked!

Make Your Own REAL FOOD Ice Cream Sundae Party! :: A fun make your own ice cream sundae party without the artificial dyes and using all real food ingredients!

Here are the recipes for the sauces we used. We had some leftovers which I used for various things. We used the leftover strawberry sauce for waffles the next day as well as leftover ice cream the next day. I froze the leftover chocolate sauce and caramel to use for sundaes later this summer – what a fun hot day treat!

Make Your Own REAL FOOD Ice Cream Sundae Party! :: A fun make your own ice cream sundae party without the artificial dyes and using all real food ingredients!

(Makes about 1 quart)
1 1/2 cups water
1 1/2 cups organic pure cane sugar
1 cup raw cacao
2 tsp vanilla extract
1/8 tsp sea salt
2 TB butter

Everything into a sauce pan and using a whisk stir over medium heat until everything melts and combines.
Bring to a simmer for 2 minutes and then take the sauce off the heat. Store in an airtight jar or container in the fridge until use. You can re-heat if you like your sauce warm. This also freezes well.

Make Your Own REAL FOOD Ice Cream Sundae Party! :: A fun make your own ice cream sundae party without the artificial dyes and using all real food ingredients!

(Makes about 1 quart)
2 cups organic cane sugar
3/4 cup softened butter
1 cup whole cream (I think coconut cream would work here)
1 tsp sea salt

Warm the sugar in a sauce pan until it melts – takes about 5 minutes. Stir off and on so it doesn’t burn.
When the sugar completely melts, stir in the butter to melt, and then slowly add in the cream stirring continuously.
Add the sea salt and bring the sauce to a simmer for a couple minutes while stirring. Take the sauce off the heat and store in an airtight jar or container until use – you can warm the sauce through again if you like it warm. The caramel is pretty thick when cold so you will at least want to bring it to room temp or somewhat warm before serving. This also freezes well for long term storage.

Make Your Own REAL FOOD Ice Cream Sundae Party! :: A fun make your own ice cream sundae party without the artificial dyes and using all real food ingredients!

(makes a little over a quart of sauce)
3 lbs fresh or frozen strawberries
1/3-1/2 cup organic pure cane sugar
1 TB arrowroot, GMO free cornstarch, or tapioca for thickening (you can leave this out if you wish)

Everything into a sauce pan and warm over medium heat squishing the strawberries with a potato masher or fork along the way.
Bring to a simmer and if you are using fresh fruit you may need to add a few splashes of water (frozen strawberries have enough moisture). Simmer about 5 minutes until the fruit breaks down.
Add the arrowroot to whisk in. Simmer another few minutes.
Take the sauce off the heat – at this point you can leave it as is, or puree through if you like a smooth sauce. Store the sauce in an airtight jar or container in the fridge until use. This also freezes well.

Make Your Own REAL FOOD Ice Cream Sundae Party! :: A fun make your own ice cream sundae party without the artificial dyes and using all real food ingredients!

Here is a handy list of items and recipes used for our ice cream sundae party!

Make Your Own REAL FOOD Ice Cream Sundae Party! :: A fun make your own ice cream sundae party without the artificial dyes and using all real food ingredients!

For more real food treat ideas, you can follow my Treat Ideas board on Pinterest!

More real food recipes you might like:
Strawberry Butterfly Birthday Cake

cake
Homemade Chocolate Ice Cream

Homemade Chocolate Ice Cream :: Refined Sugar Free with Dairy Free Option
Vanilla Bean Birthday Cake

Gluten Free Vanilla Bean Cake
Caramel Swirl Ice Cream

Caramel Swirl Ice Cream

Holiday Recipes Occasional Treats Real Food Tips School Holidays

Gluten Free Valentine’s Day Sugar Cookies With Naturally Dyed Frosting

February 6, 2016

Celebrate Valentine’s Day with these special sugar cookie hearts with naturally dyed frosting!

Gluten Free Valentine's Day Sugar Cookies With Naturally Dyed Frosting

Links in this post are affiliate links. It does not cost you anything and helps maintain the free information on this site, as well as answer the questions of “what brand do you use?” Please know I never personally recommend any product or service I wouldn’t use on my own family.

Happy Valentine’s week to you!

I did the volunteer thing for the classroom Valentine’s Day treat this year, so I figured what better way to get *all* these cookies done…than with a couple sweet little 6 year olds?!

Gluten Free Valentine's Day Sugar Cookies With Naturally Dyed Frosting

Little kids and cookie decorating!

Chloe got to invite a friend over to decorate these cute little hearts and these girls are just too fun. The giggles were endless, and the cookies turned out so great.

Gluten Free Valentine's Day Sugar Cookies With Naturally Dyed Frosting

This is my go-to gluten free sugar cookie cut out recipe – it is so easy to work with!

I am not much of a baker and don’t really like to mess around with fussy recipes. This dough is very forgiving and very nice to work with – especially for a gluten free dough. I found this little heart cookie cutter that is perfect for a class treat – not oversized and not too tiny.

Gluten Free Valentine's Day Sugar Cookies With Naturally Dyed Frosting

Natural *beautiful* color!

We used freeze dried raspberries for the great Valentine’s Day frosting color, and left a handful of them frosted white in case any of the little guys in class were afraid of pink 😉 Freeze dried strawberries would work for that pretty color if you want too!

Gluten Free Valentine's Day Sugar Cookies With Naturally Dyed Frosting

The frosting is just delicious!

Soft and sweet with amazing raspberry flavor – and that color! So pretty! Completely free of artificial dyes – because I don’t know about you, but if I were a school teacher I don’t think I would want my classroom all hopped up on Red 40 for the afternoon! I also think swapping the butter for cream cheese would make a delicious, tangy raspberry cream cheese frosting.

Gluten Free Valentine's Day Sugar Cookies With Naturally Dyed Frosting

And since my kitchen was full of little girls for the afternoon, we of course had to break out the sparkly sprinkles!

You can get naturally dyed sugar sprinkles and they are so fun to keep on hand for holidays! There are so many to choose from!

Gluten Free Valentine's Day Sugar Cookies With Naturally Dyed Frosting

Print Recipe
5 from 6 votes

Gluten Free Valentine's Day Sugar Cookie Hearts With Naturally Dyed Frosting

Celebrate Valentine’s Day with these special sugar cookie hearts with naturally dyed frosting!
Prep Time10 mins
Cook Time11 mins
Total Time21 mins
Course: Dessert
Cuisine: American
Keyword: gluten-free sugar cookie recipe, gluten-free sugar cookies, gluten-free Valentine's Day cookies
Servings: 24 cookies
Author: Renee - www.raisinggenerationnourished.com

Ingredients

FOR THE COOKIES:

  • 1 cup softened butter if you are dairy free, you can use palm shortening
  • 1 cup organic pure cane sugar could use sucanat but the color will come out darker
  • 1 egg if you are egg free you can use a flax egg
  • 1 tsp vanilla
  • ¼ tsp sea salt
  • 1 cup tapioca flour
  • ½ cup white rice flour
  • ½ cup sorghum flour
  • 1 tsp xanthan gum Do NOT leave this out – it helps the cookies rise. You will have a melted mess without it...I have the mess to prove it! It also makes rolling out the dough so much easier.

FOR THE RASPBERRY FROSTING

  • 3 TB blended freeze dried raspberries Just put them into a blender and blend into powder. I used about 3/4 of a 1.2oz bag of freeze dried raspberries. You can add the rest if you want a deeper color. I blended the whole bag and am keeping the leftover powder in an airtight container for another time.
  • 2 cups organic powdered cane sugar
  • 1/4 cup softened butter
  • 3-4 TB milk or coconut milk

Instructions

  • In a large mixing bowl, cream butter and sugar.
  • Add the egg, vanilla, and salt and blend.
  • Add the flours and xanthan gum. Mix until well combined.
  • Cover and refrigerate for 1 hour.
  • Take the dough out of the fridge, and let it come to room temp for about 30 minutes.
  • Lay out some parchment paper on the counter and flour it with white rice flour. Flour your hands and use the warmth of your hands to gently knead the dough, and then roll out the dough. (Use white rice flour on the rolling pin and parchment paper to keep the dough from sticking)
  • Cut out your hearts and bake on a silpat (or parchment paper) lined baking sheet at 350 degrees for 11 minutes.
  • Let the cookies cool completely before decorating. To make the frosting, just blend the frosting ingredients until smooth. You can add more milk if you wish for a thinner, more royal icing type of frosting.

For more real food treat ideas you can follow my Treat Ideas Board on Pinterest!

More real food recipes you might like:
Gluten Free Chocolate Chunk Blender Cookies

Gluten Free Chocolate Chunk Blender Cookies
Chocolate Cake (Can be made cupcakes too!)

COVER
Mint Chocolate Chip Ice Cream

overhead
DIY Whipped Cream

15262741314_779bb04eae_z

Lunch Ideas Nourishing Staples Real Food 101 Real Food Tips School Holidays school lunches

Egg Salad Pinwheels :: Perfect For Little Hands & An Easy Lunchbox Addition!

December 15, 2015

Simple and quick egg salad pinwheels perfect for little hands and easy lunchtime!

Egg Salad Pinwheels :: Perfect For Little Hands & An Easy Lunchbox Addition!Product links in this section are affiliate links. It does not cost you anything and helps maintain the free information on this site, as well as answer the questions of “what brand do you use?” Please know I never personally recommend any product I wouldn’t use on my own family.

“Gah! It’s 11:00 a.m. already?!”

I think I say that just about every day. I can aspire to have the most organized day, but there is absolutely nothing predictable about a morning with a 2 and 4 year old by my side, as well as getting a first grader off to school in the morning!

I rely on my freezer stash of simple soups like broccoli soup and tomato soup most days. It is a great way to get nourishing bone broth into the kids without having to think about what vegetable to make. Add a simple egg or tuna salad wrap and lunch is done…for my older kids.

Egg Salad Pinwheels :: Perfect For Little Hands & An Easy Lunchbox Addition!Wraps are tough for toddler hands!

I started making little Mexican pinwheel wraps for her when she turned 2 this year, and I noticed how easy they made lunchbox packing too, so they are becoming quite popular here with my older kids too!

Egg Salad Pinwheels :: Perfect For Little Hands & An Easy Lunchbox Addition!My first grader handles a wrap pretty good – but the days I have made it more of a pinwheel style she is quick to mention how much she loves her wraps that way and how much easier it is to eat too.

This is a pretty flexible recipe – if you have a favorite way of making egg salad go for it!

Egg Salad Pinwheels :: Perfect For Little Hands & An Easy Lunchbox Addition!

Print Recipe
5 from 1 vote

Egg Salad Pinwheels

Simple and quick egg salad pinwheels perfect for little hands and easy lunchtime!
Prep Time5 mins
Cook Time10 mins
Total Time15 mins
Course: Main Course
Cuisine: American
Keyword: egg salad pinwheels, egg salad recipe
Servings: 4 servings
Author: Renee Kohley - www.raisinggenerationnourished.com

Ingredients

  • 6 pastured eggs hard boiled and peeled
  • 1/3 to 1/2 cup mayonnaise Homemade preferable to avoid rancid oils. This homemade, egg free mayo recipe blends up in less than 5 minutes! Super quick!
  • 2 tsp mustard
  • 5 stalks of green onion sliced
  • 1/4 red bell pepper diced
  • 1 clove garlic minced
  • Sea salt and pepper to taste
  • 3-4 to rtillas of choice I like to use the Food For Life Rice Wraps and the Sami's Bakery Millet Lavish. They should be in the freezer section of most health food stores - sometimes our regular grocery store even carries the rice wraps.

Instructions

  • Put the hard boiled eggs in a small mixing bowl, and using the back of a fork smash the eggs into small pieces.
  • Add the rest of the ingredients except the tortillas and use the fork to combine well until smooth. Make sure to taste it for salt and pepper.
  • Spread some of the egg salad mixture onto the entire surface of one tortilla, roll up *tightly* and then cut into 1 inch sections. Continue with the rest of the egg salad onto the other tortillas - I usually get about 3 or 4 out of this amount of egg salad.
  • **Gluten Free tortilla rolling tip! Yes I will be the first to admit gluten free tortillas can be...dry! My solution to getting the perfect roll on a GF tortilla is to get it a bit wet and then warm them up to steam them - they get soft and pliable and then you can put your egg salad on and roll them right up. Just do one at a time and you'll be fine!

For more lunch ideas you can follow my Lunch Ideas board on Pinterest!

More real food recipes you might like:
Tuna Salad For All Ages!

plate
Fresh Tomato Soup

14343512918_9451ba85c1_z
Nourishing Broccoli Soup


6 School Lunch Ideas Besides PB & J

6 School Lunch Ideas *Besides* Peanut Butter & Jelly :: Plus a PlanetBox Review!

Holiday Recipes Occasional Treats Real Food Tips School Holidays

Gluten Free Sugar Cookie Cut-Outs :: Plus Natural Decorating Ideas and Tips On Making Cookies With Kids!

December 11, 2015

Easy to work with gluten free cut out cookie dough will have soft and sweet sugar cookies ready in no time perfect for decorating!

Gluten Free Sugar Cookie Cut-Outs :: Plus Natural Decorating Ideas and Tips On Making Cookies With Kids!Links in this post are affiliate links. It does not cost you anything and helps maintain the free information on this site, as well as answer the questions of “what brand do you use?” Please know I never personally recommend any product or service I wouldn’t use on my own family.

What a fun time of the year to get in the kitchen and do something fun with the kids!

I have such fond memories of decorating sugar cookies as a family when I grew up, and years ago when I had my first toddler in the house just learning about the wonder of the season, I just knew I wanted to give her those same memories.

Gluten Free Sugar Cookie Cut-Outs :: Plus Natural Decorating Ideas and Tips On Making Cookies With Kids!This is the cut out cookie recipe I have been making for the last few holiday seasons. I really love how easy the dough is to work with – remember I am *not* a baker and it is not my favorite kitchen thing to do (well other than the memories!). The hint of vanilla with just a slight warm cinnamon really makes these cookies so special.

Gluten Free Sugar Cookie Cut-Outs :: Plus Natural Decorating Ideas and Tips On Making Cookies With Kids!Tips For Making & Decorating Cut Out Cookies With Kids

1. Take it one step at a time. In fact I highly recommend with really little ones not to do everything all in one day. Since the dough has to chill, and cookies have to cool before decorating, there is a lot of nice time to break up so the kids don’t feel like they are waiting “forever”. This year I made the dough with all 3 girls, and then at my 2 year old’s nap time we rolled out the chilled dough to bake with my 4 and 6 year olds. I then put the cookies into the freezer until the following weekend when we had enough time to frost them. They definitely can be done all in one day – just have some other things planned during the dough chilling and cookie cooling wait times such as decorating Christmas cards for grandparents, watching a holiday movie, or other holiday kitchen recipes!

Gluten Free Sugar Cookie Cut-Outs :: Plus Natural Decorating Ideas and Tips On Making Cookies With Kids!2. Show them how to do the task first. Whether pouring flour, cracking an egg, using a cookie cutter, or frosting a cookie, show them an example first. This is specifically helpful with the decorating. While I want them to decorate them how they wish, I like to show them how much frosting is appropriate for spreading 😉

Gluten Free Sugar Cookie Cut-Outs :: Plus Natural Decorating Ideas and Tips On Making Cookies With Kids!3. Use small amounts of dough for the ones that want to try rolling it out. Listen, I am just as much of a perfectionist as anyone else – it can be hard for me to stay back and let them learn how to roll dough out nicely! I have learned that letting the dough warm up so it feels a little more pliable like a play-doh but not so warm that it squishes, and using smaller amounts makes it easier for them to roll it out neatly. This is the first year that I didn’t have to help my oldest at all – and she is 6 and works in the kitchen a lot with me. Be patient but it does come – and they will forever remember you trusting them enough to let them do it.

Gluten Free Sugar Cookie Cut-Outs :: Plus Natural Decorating Ideas and Tips On Making Cookies With Kids!4. Set out easy to manage decorating ingredients. If the sprinkles, for instance, come in a big bottle with no shaker top, either put them in a old shaker container, or put a small amount on a plate or bowl that they can pinch and sprinkle onto the cookies. If using dried fruit or chopped nuts use little bowls that they can scoop from. My 4 and 6 year olds manage a regular butter knife for spreading just fine, but as toddlers we used these smaller spreading knives.

Gluten Free Sugar Cookie Cut-Outs :: Plus Natural Decorating Ideas and Tips On Making Cookies With Kids!5. Realize attention span grows with age 🙂 This is the first year my girls did all the decorating themselves. As toddlers the attention lasts about 1 or 2 cookies in before they want to eat one and are done. Embrace that age and just roll with it! Eventually they will turn 6 and you will have no cookies to decorate for yourself! Even at age 2 or 3 those memories are beginning to build and they will cherish that you spent time with them to do something so fun.

Gluten Free Sugar Cookie Cut-Outs :: Plus Natural Decorating Ideas and Tips On Making Cookies With Kids!Ok! So onto the cookies! Be sure to scroll through the natural decorating ideas at the bottom of the recipe!

Gluten Free Sugar Cookie Cut-Outs :: Plus Natural Decorating Ideas and Tips On Making Cookies With Kids!

Print Recipe
5 from 1 vote

Gluten Free Sugar Cookie Cut-Outs

Easy to work with gluten free cut out cookie dough will have soft and sweet sugar cookies ready in no time perfect for decorating!
Prep Time10 mins
Cook Time15 mins
Total Time25 mins
Course: Dessert
Cuisine: American
Keyword: gluten-free cut out cookie recipe, gluten-free cut out cookies, gluten-free sugar cookies
Servings: 24 cookies
Author: Renee - www.raisinggenerationnourished.com

Ingredients

FOR THE COOKIES ::

  • 1 cup softened butter if you are dairy free, you can use palm shortening
  • 1 cup organic pure cane sugar could use sucanat but the color will come out darker
  • 1 egg if you are egg free you can use a gelatin egg or flax egg
  • 1 tsp vanilla
  • ¼ tsp cinnamon
  • ¼ tsp sea salt
  • 1 cup tapioca flour
  • ½ cup white rice flour
  • ½ cup sorghum flour
  • 1 tsp xanthan gum Do not leave this out – it helps the cookies rise. You will have a melted mess without it...I have the mess to prove it! It also makes rolling out the dough so much easier.

FOR THE FROSTING ::

  • 1 cup organic powdered cane sugar
  • 2 TB softened butter
  • 1-2 TB milk or coconut milk

Instructions

  • In a large mixing bowl, cream butter and sugar.
  • Add the egg, vanilla, cinnamon, and salt, and blend.
  • Add the flours and xanthan gum. Mix until well combined.
  • Cover and refrigerate for 1 hour.
  • Take the dough out of the fridge, and let it come to room temp for about 30 minutes.
  • Lay out some parchment paper on the counter and flour it with white rice flour. Flour your hands and use the warmth of your hands to gently knead the dough, and then roll out the dough. (Use white rice flour on the rolling pin and parchment paper to keep the dough from sticking)
  • Cut out your shapes and bake on a silpat (or parchment paper) lined baking sheet at 350 degrees for 13-15 minutes.
  • Let the cookies cool completely before decorating. To make the frosting, just blend the frosting ingredients until smooth. You can add more milk if you wish for a thinner, more royal icing type of frosting.

Notes

UPDATE DECEMBER 2020 :: If you cannot have butter, organic palm shortening works fantastic as well for both cookie and frosting!

And then of course there is the decorating! Here are some ideas and tips!

Gluten Free Sugar Cookie Cut-Outs :: Plus Natural Decorating Ideas and Tips On Making Cookies With Kids!

  • I’ve been using these naturally dyed sugar sprinkles for the last few years and I just love how easy they are. We make a the simple white frosting and the sprinkles brighten them right up!
  • That same brand has not only the naturally dyed sugar sprinkles, but snowflakes, “jimmies” shapes, and I also found this brand of natural colored confetti sprinkles!
  • UPDATE DECEMBER 2020 :: there are SO, so many naturally dyed sprinkle options now! I keep this brand in my cupboard for so many things – it is such a great deal! I found THIS brand and I adore the snowflake sprinkles and the holiday color sprinkles!
  • When I had really little ones – as in I only had toddlers in the house, we used dried fruit and/or crumbled nuts for decorating. You can even just bake raisins, apricots, or cranberries right into the cookie and skip the frosting all together if you want – which is what I often did for my toddlers. They are just happy to get a cookie – they won’t even miss the frosting 🙂
  • I like these naturally colored, organic candy canes – you can crush them up and sprinkle on top!
  • Shave some fair trade dark chocolate to sprinkle on top, or use these allergen friendly mini chocolate chips.
  • This is a great DIY natural food dye you can make up ahead of time if you have the time – I have tried all the colors and they really work well!
  • UPDATE DECEMBER 2020 :: there are SO many more great natural dyes that are much more affordable than back when this was written! This brand and this brand work so well!

Gluten Free Sugar Cookie Cut-Outs :: Plus Natural Decorating Ideas and Tips On Making Cookies With Kids!If you tolerate gluten, you must check out these great sugar cookies from my friend Kristin at Live Simply  using Einkorn wheat flour!

To find more real food treat ideas, you can follow my Treat Ideas Board on Pintrest!

More real food recipes you might like:
GF Gingerbread Cookies

16021352542_143d16d6bc_b
GF Thumbprint Cookies

16062988741_b9d9c0b98d_b
Simple & Quick Eggnog

15722389498_35237928d9_b
Winter Wassail

15820664020_37d1e32411_b