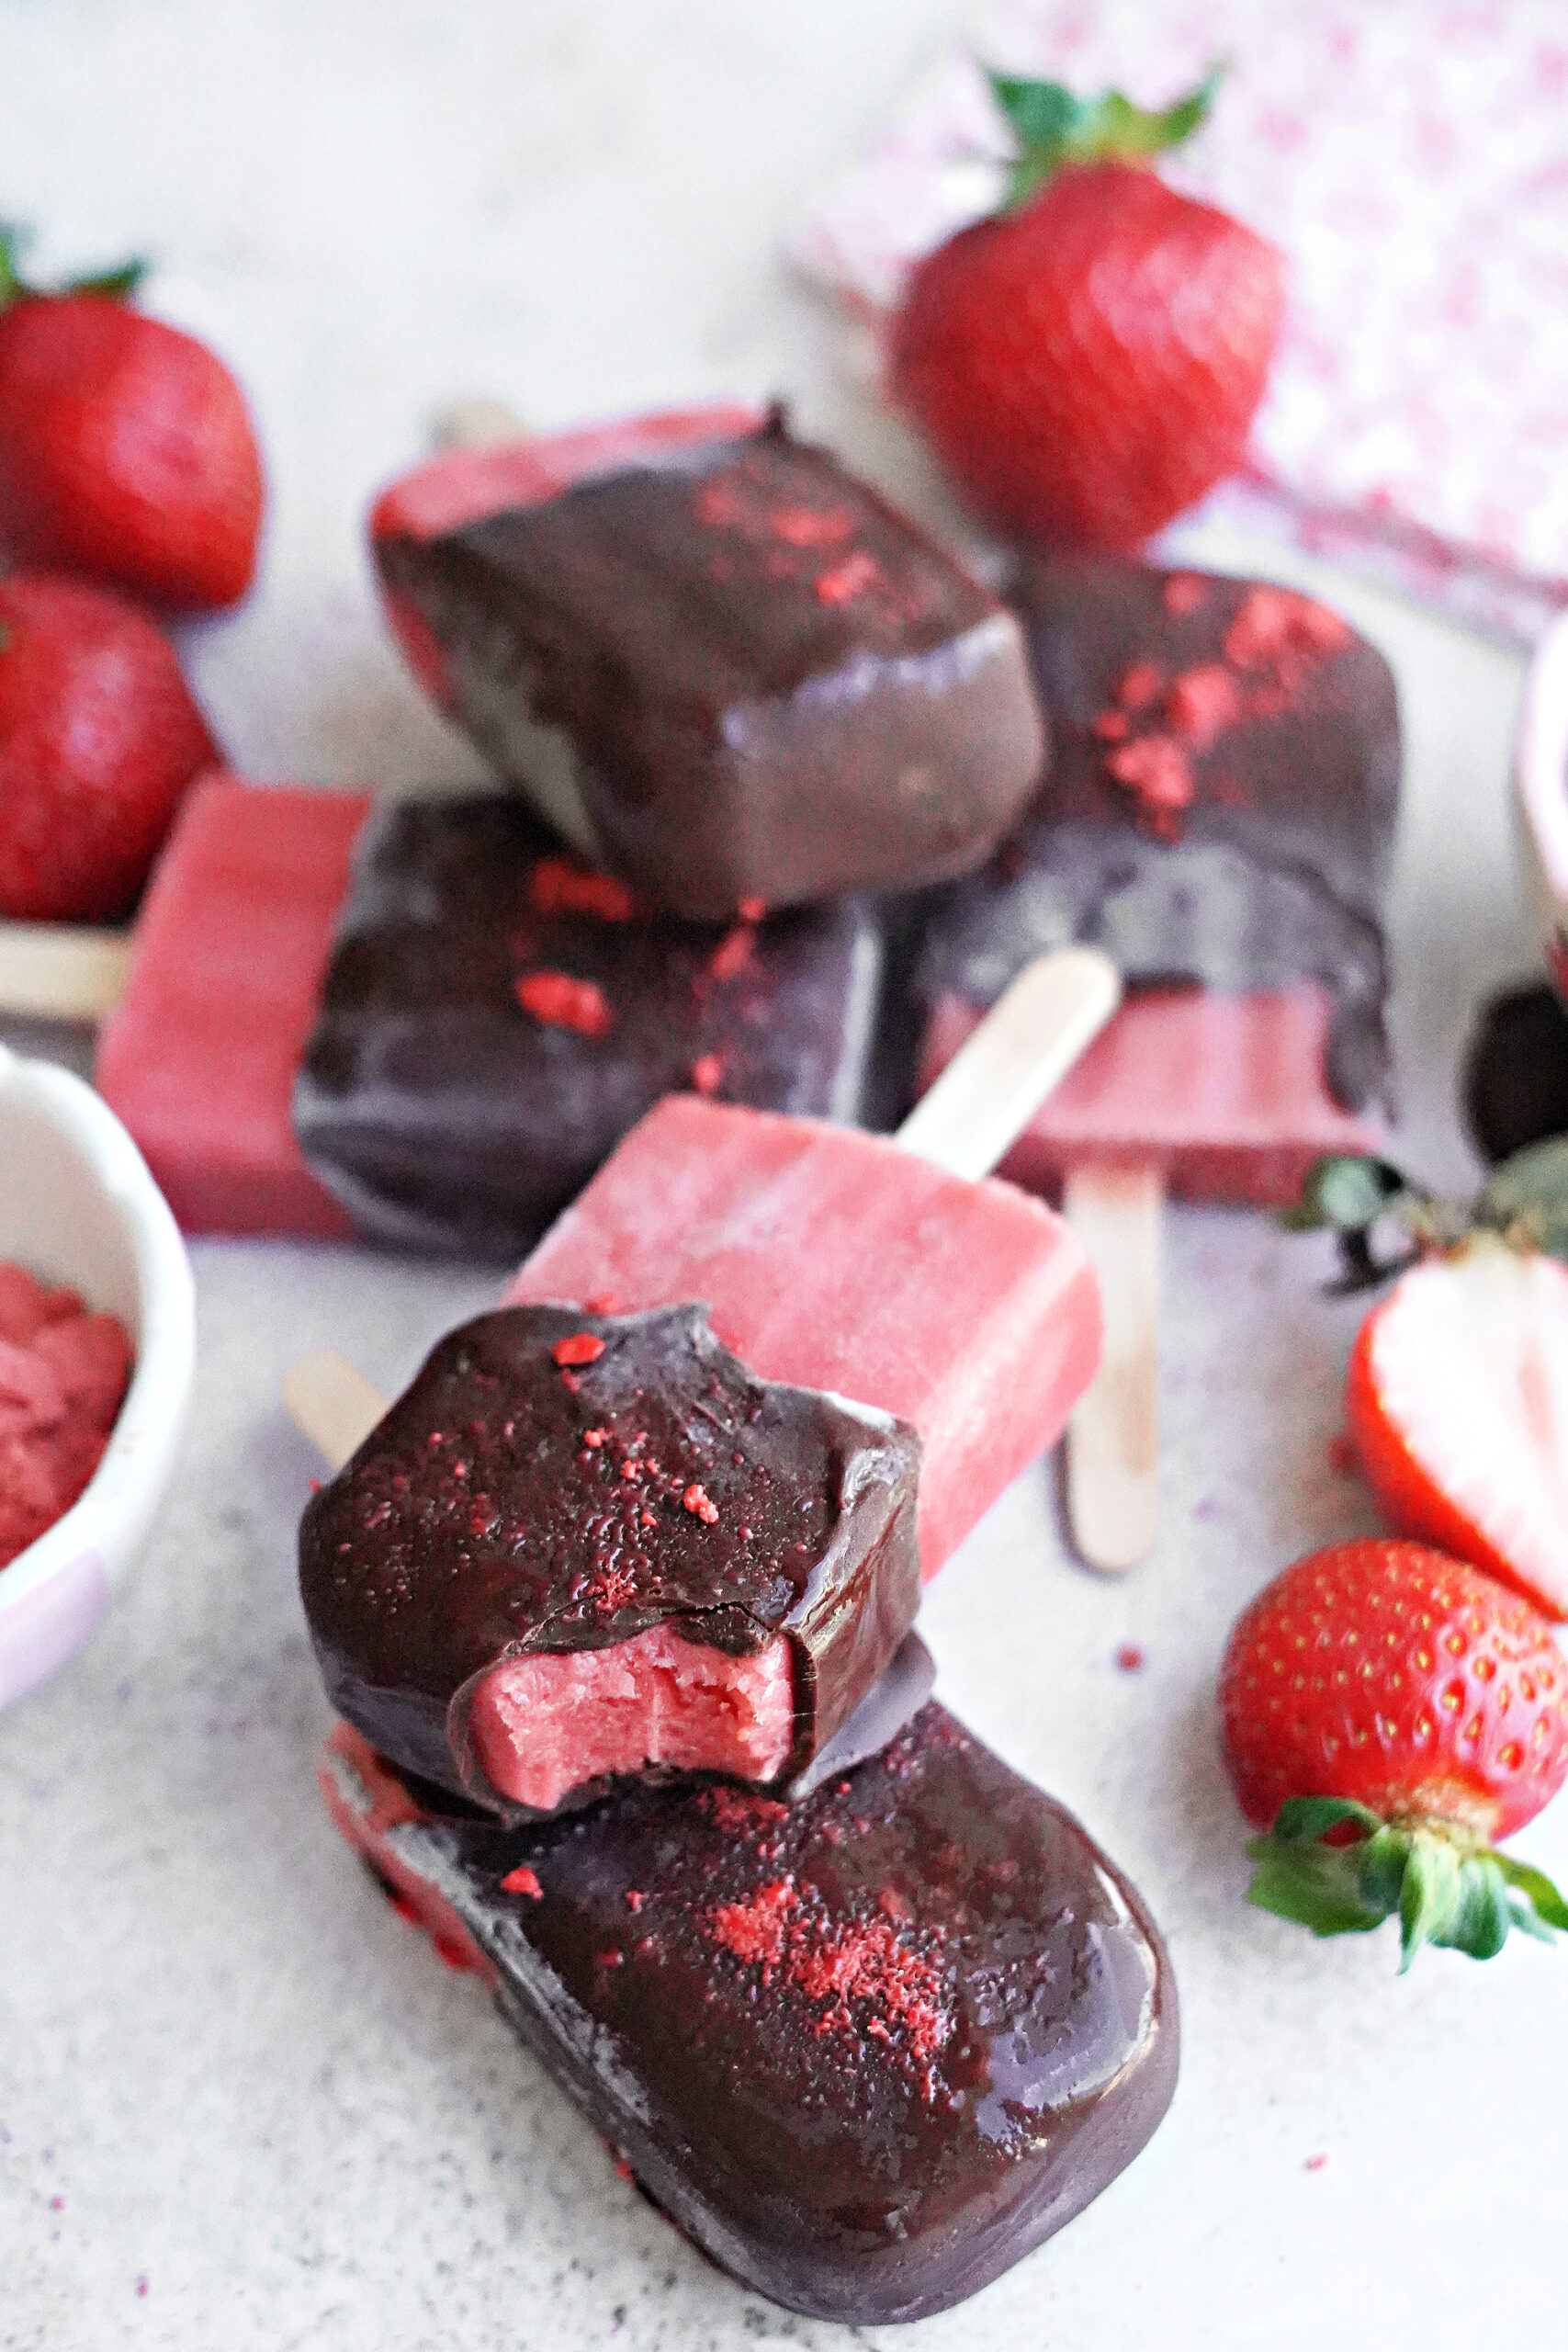
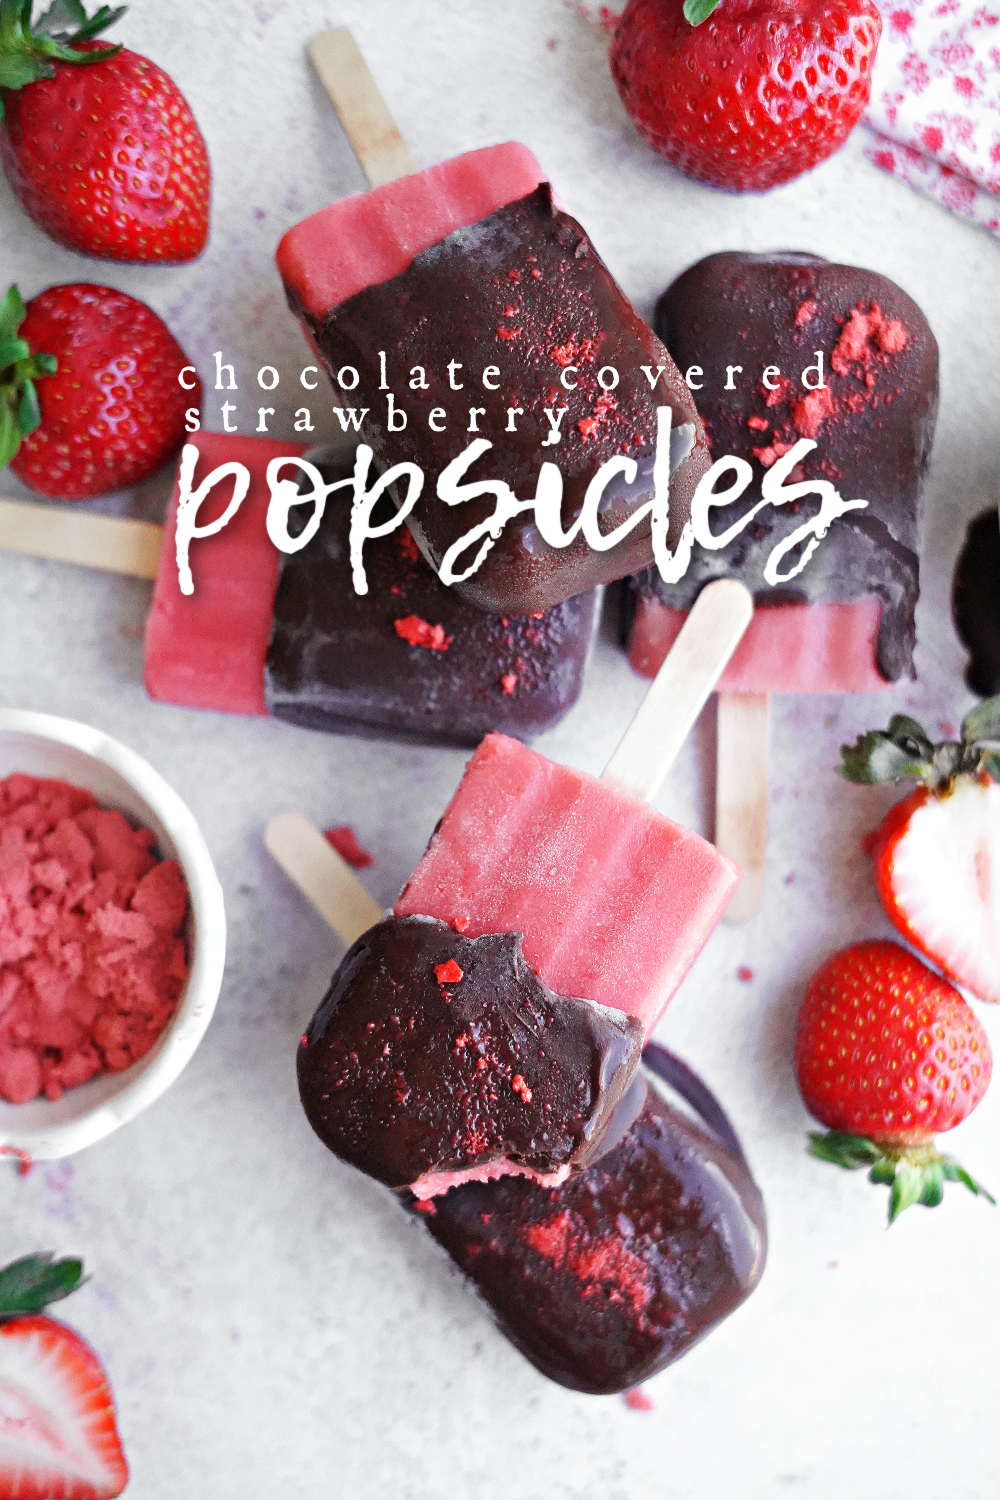
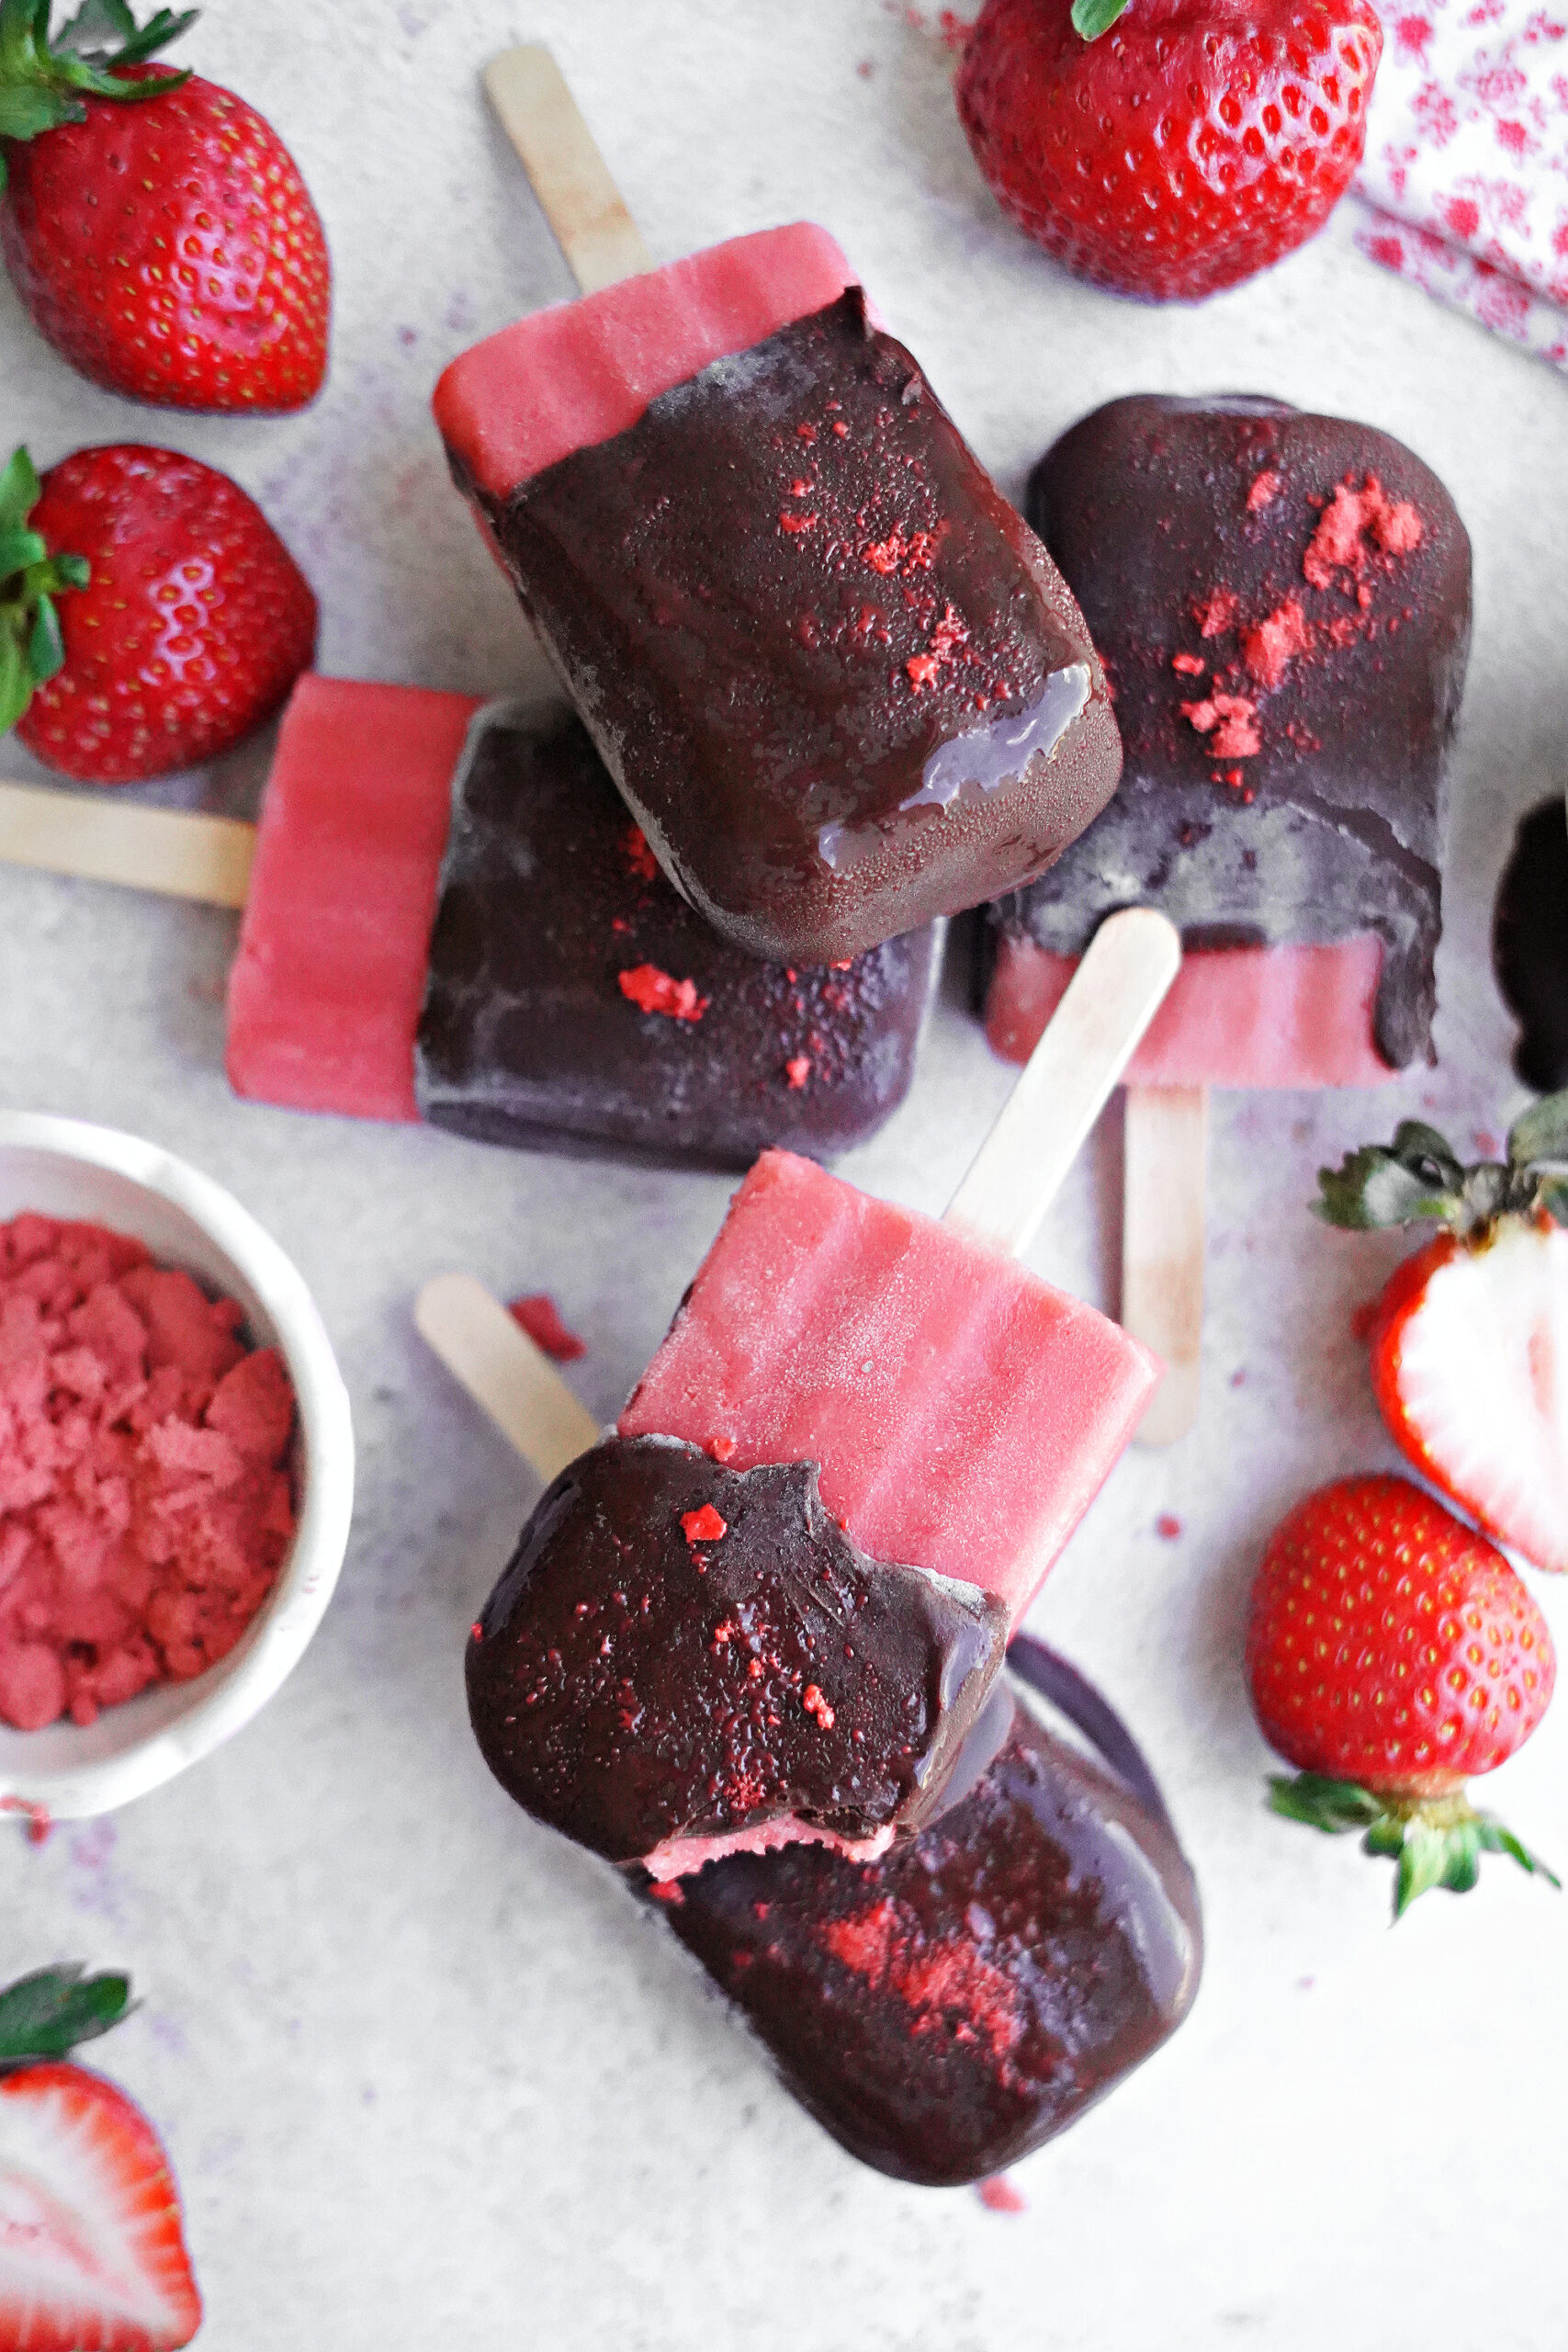
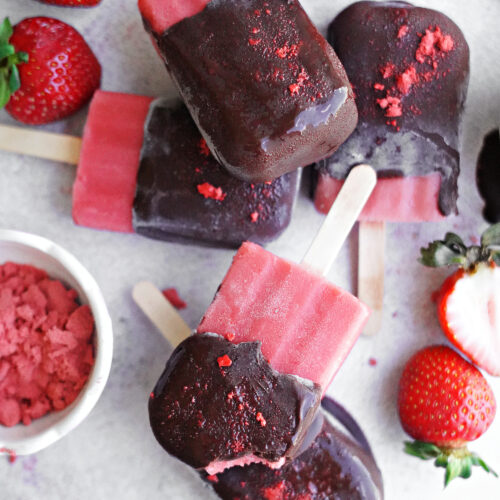
Classic chocolate covered strawberry flavors in a refreshing summertime popsicle using all real food ingredients!
Product links in this post are affiliate links. It does not cost you anything and helps maintain the free information on this site! Please know I would never personally recommend any product I wouldn’t use on my own family.
Hardcore summer breaking…
…and loving every minute of it. The older my kiddos get, the more I’m aware that college aged young adult season is right around the corner. So, any summer fun we can sneak in becomes moments that I am savoring as much as I can!

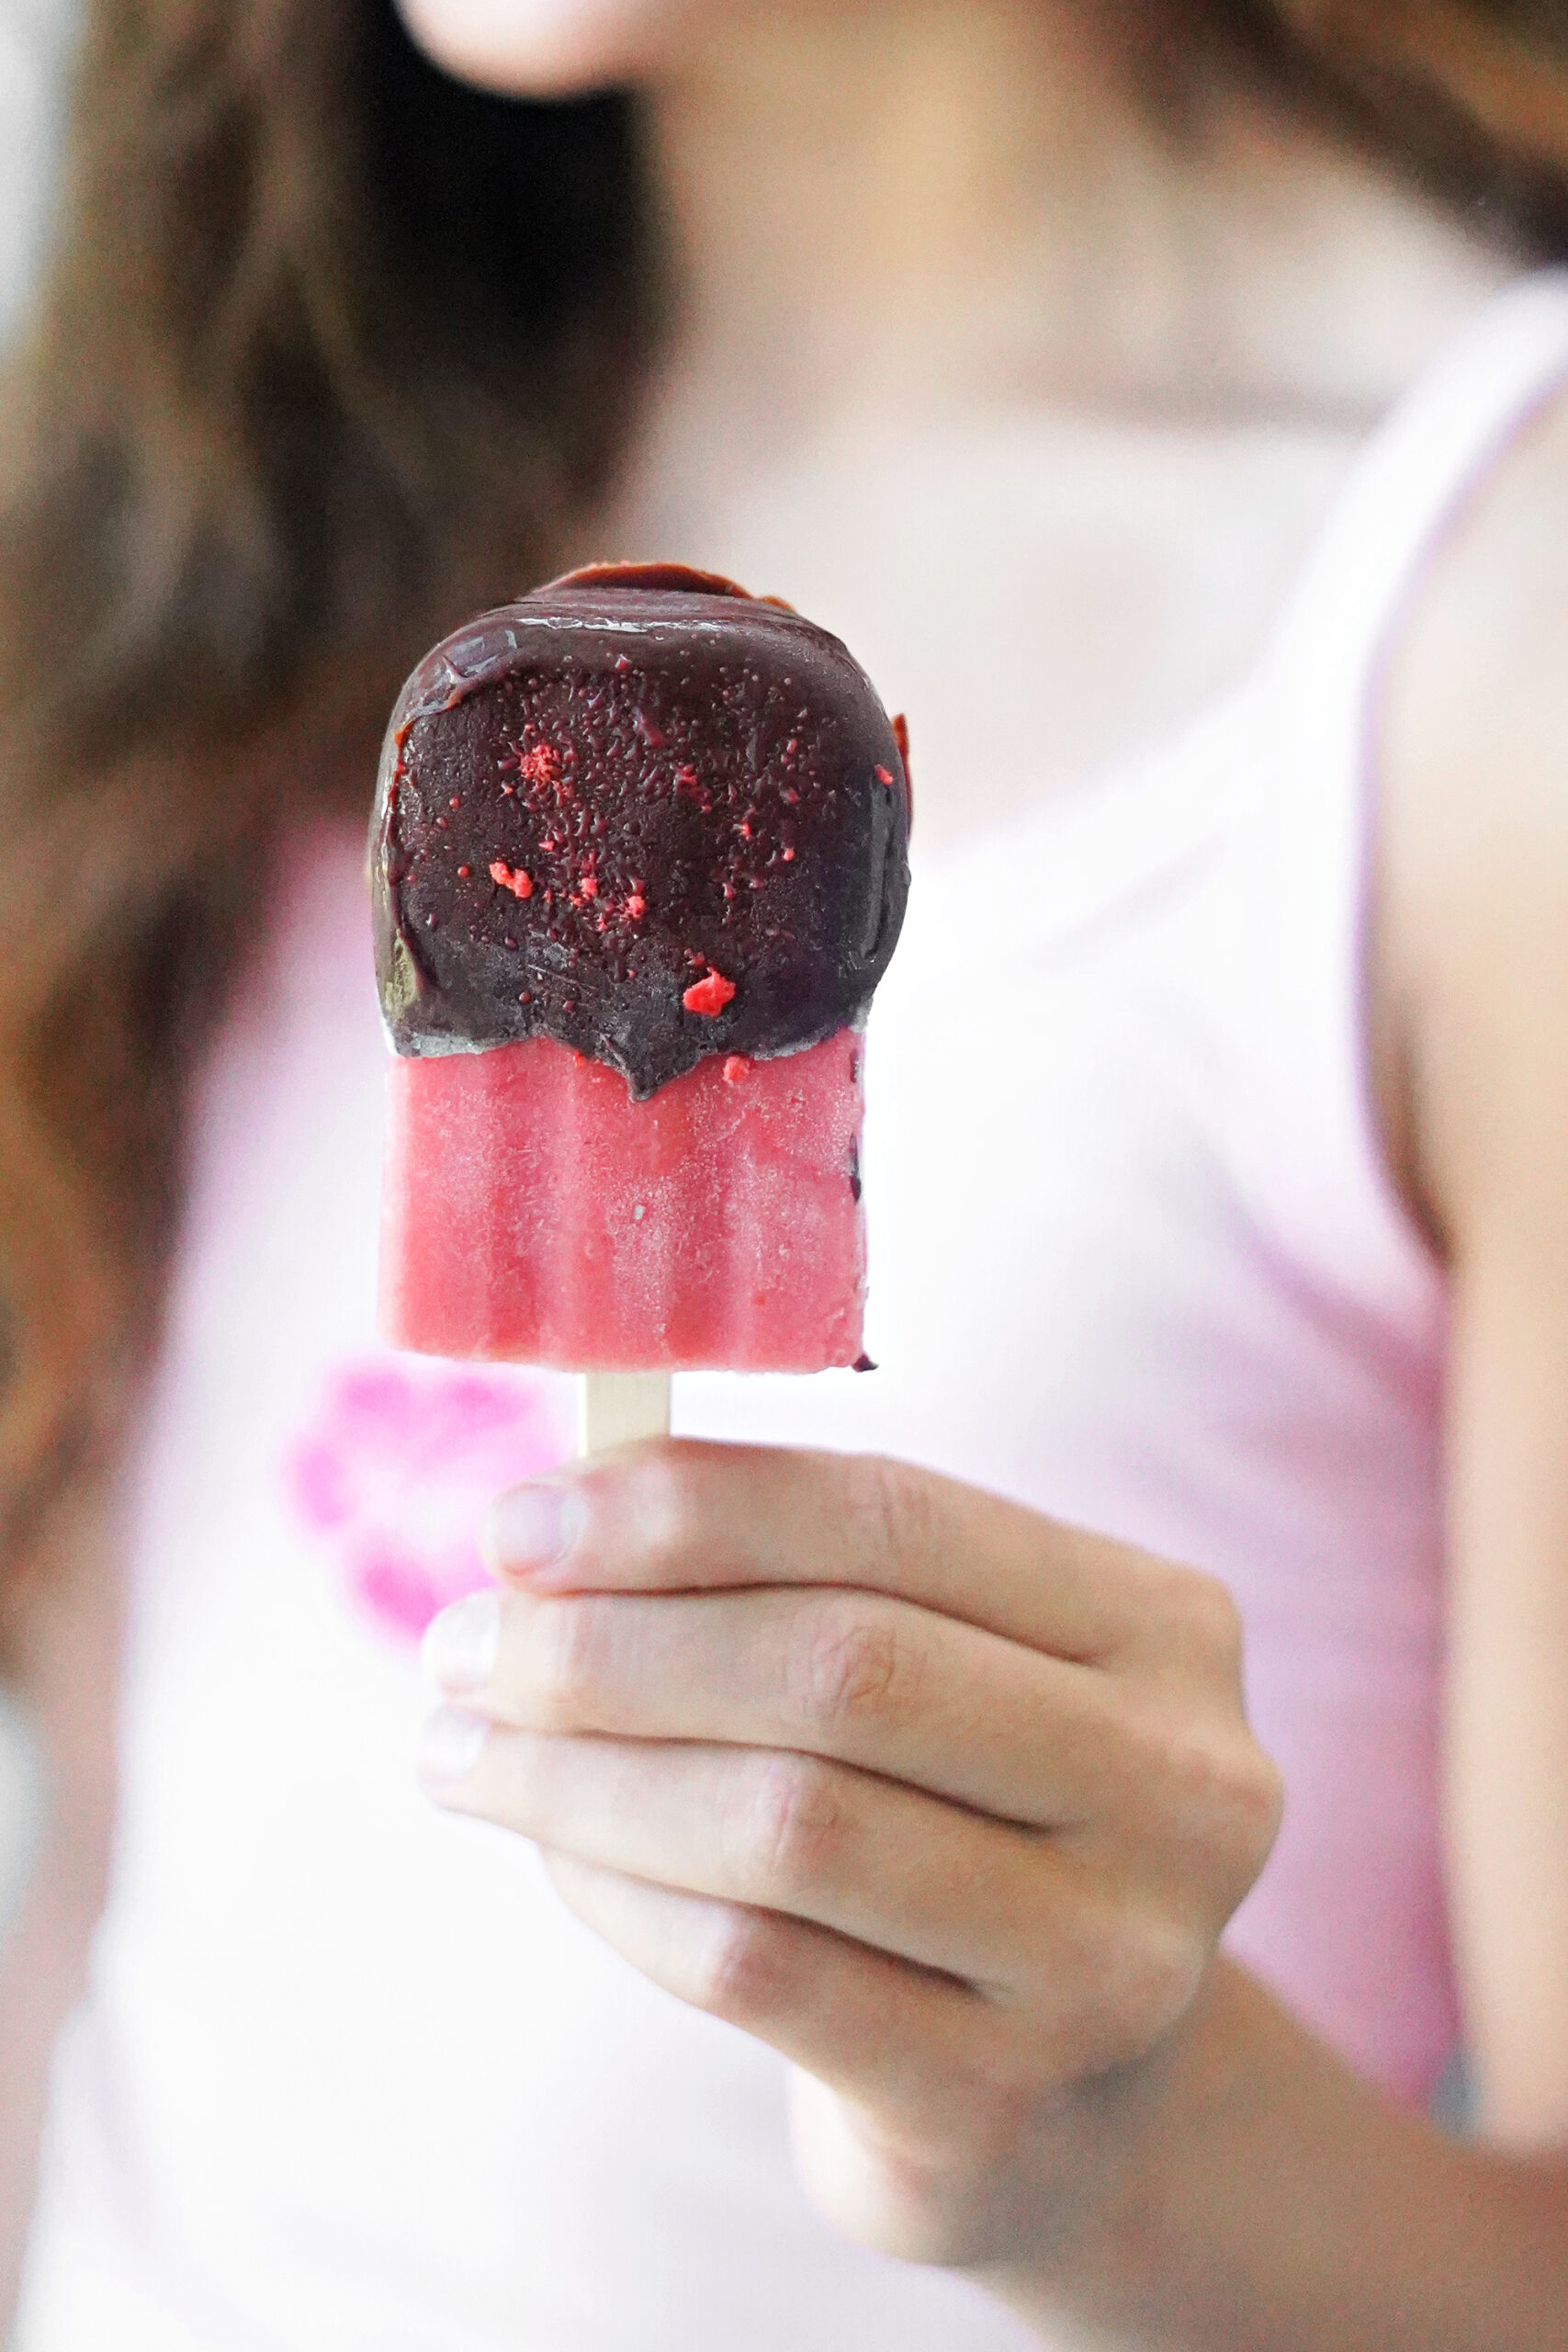
A little Jonny Pops® Copycat!
A few weeks ago, my girls saw an ad for a super fun chocolate strawberry popsicle that the brand Jonny Pops® made. I don’t mind a good Jonny Pop® on occasion since they are pretty good about using decent ingredients and natural dyes. I wasn’t super thrilled with the price considering I’m used to the Jonny Pops® pricing I can get at Costco, though. So, we decided it would be pretty easy to make our own instead!
Super easy prep, and just as pretty!
These pretty popsicles may look fancy, but all you’ll need is a blender to get started! If you don’t have a popsicle mold, you can use paper cups. If you are new to making popsicles, you are in for a treat! And you’ll probably find that getting a simple popsicle mold is a game changer. Popsicle flavor ideas are endless, and make for such a fun summer project for the kids even on a weekly basis with the amount of summer fruit available.
The ingredient line up!
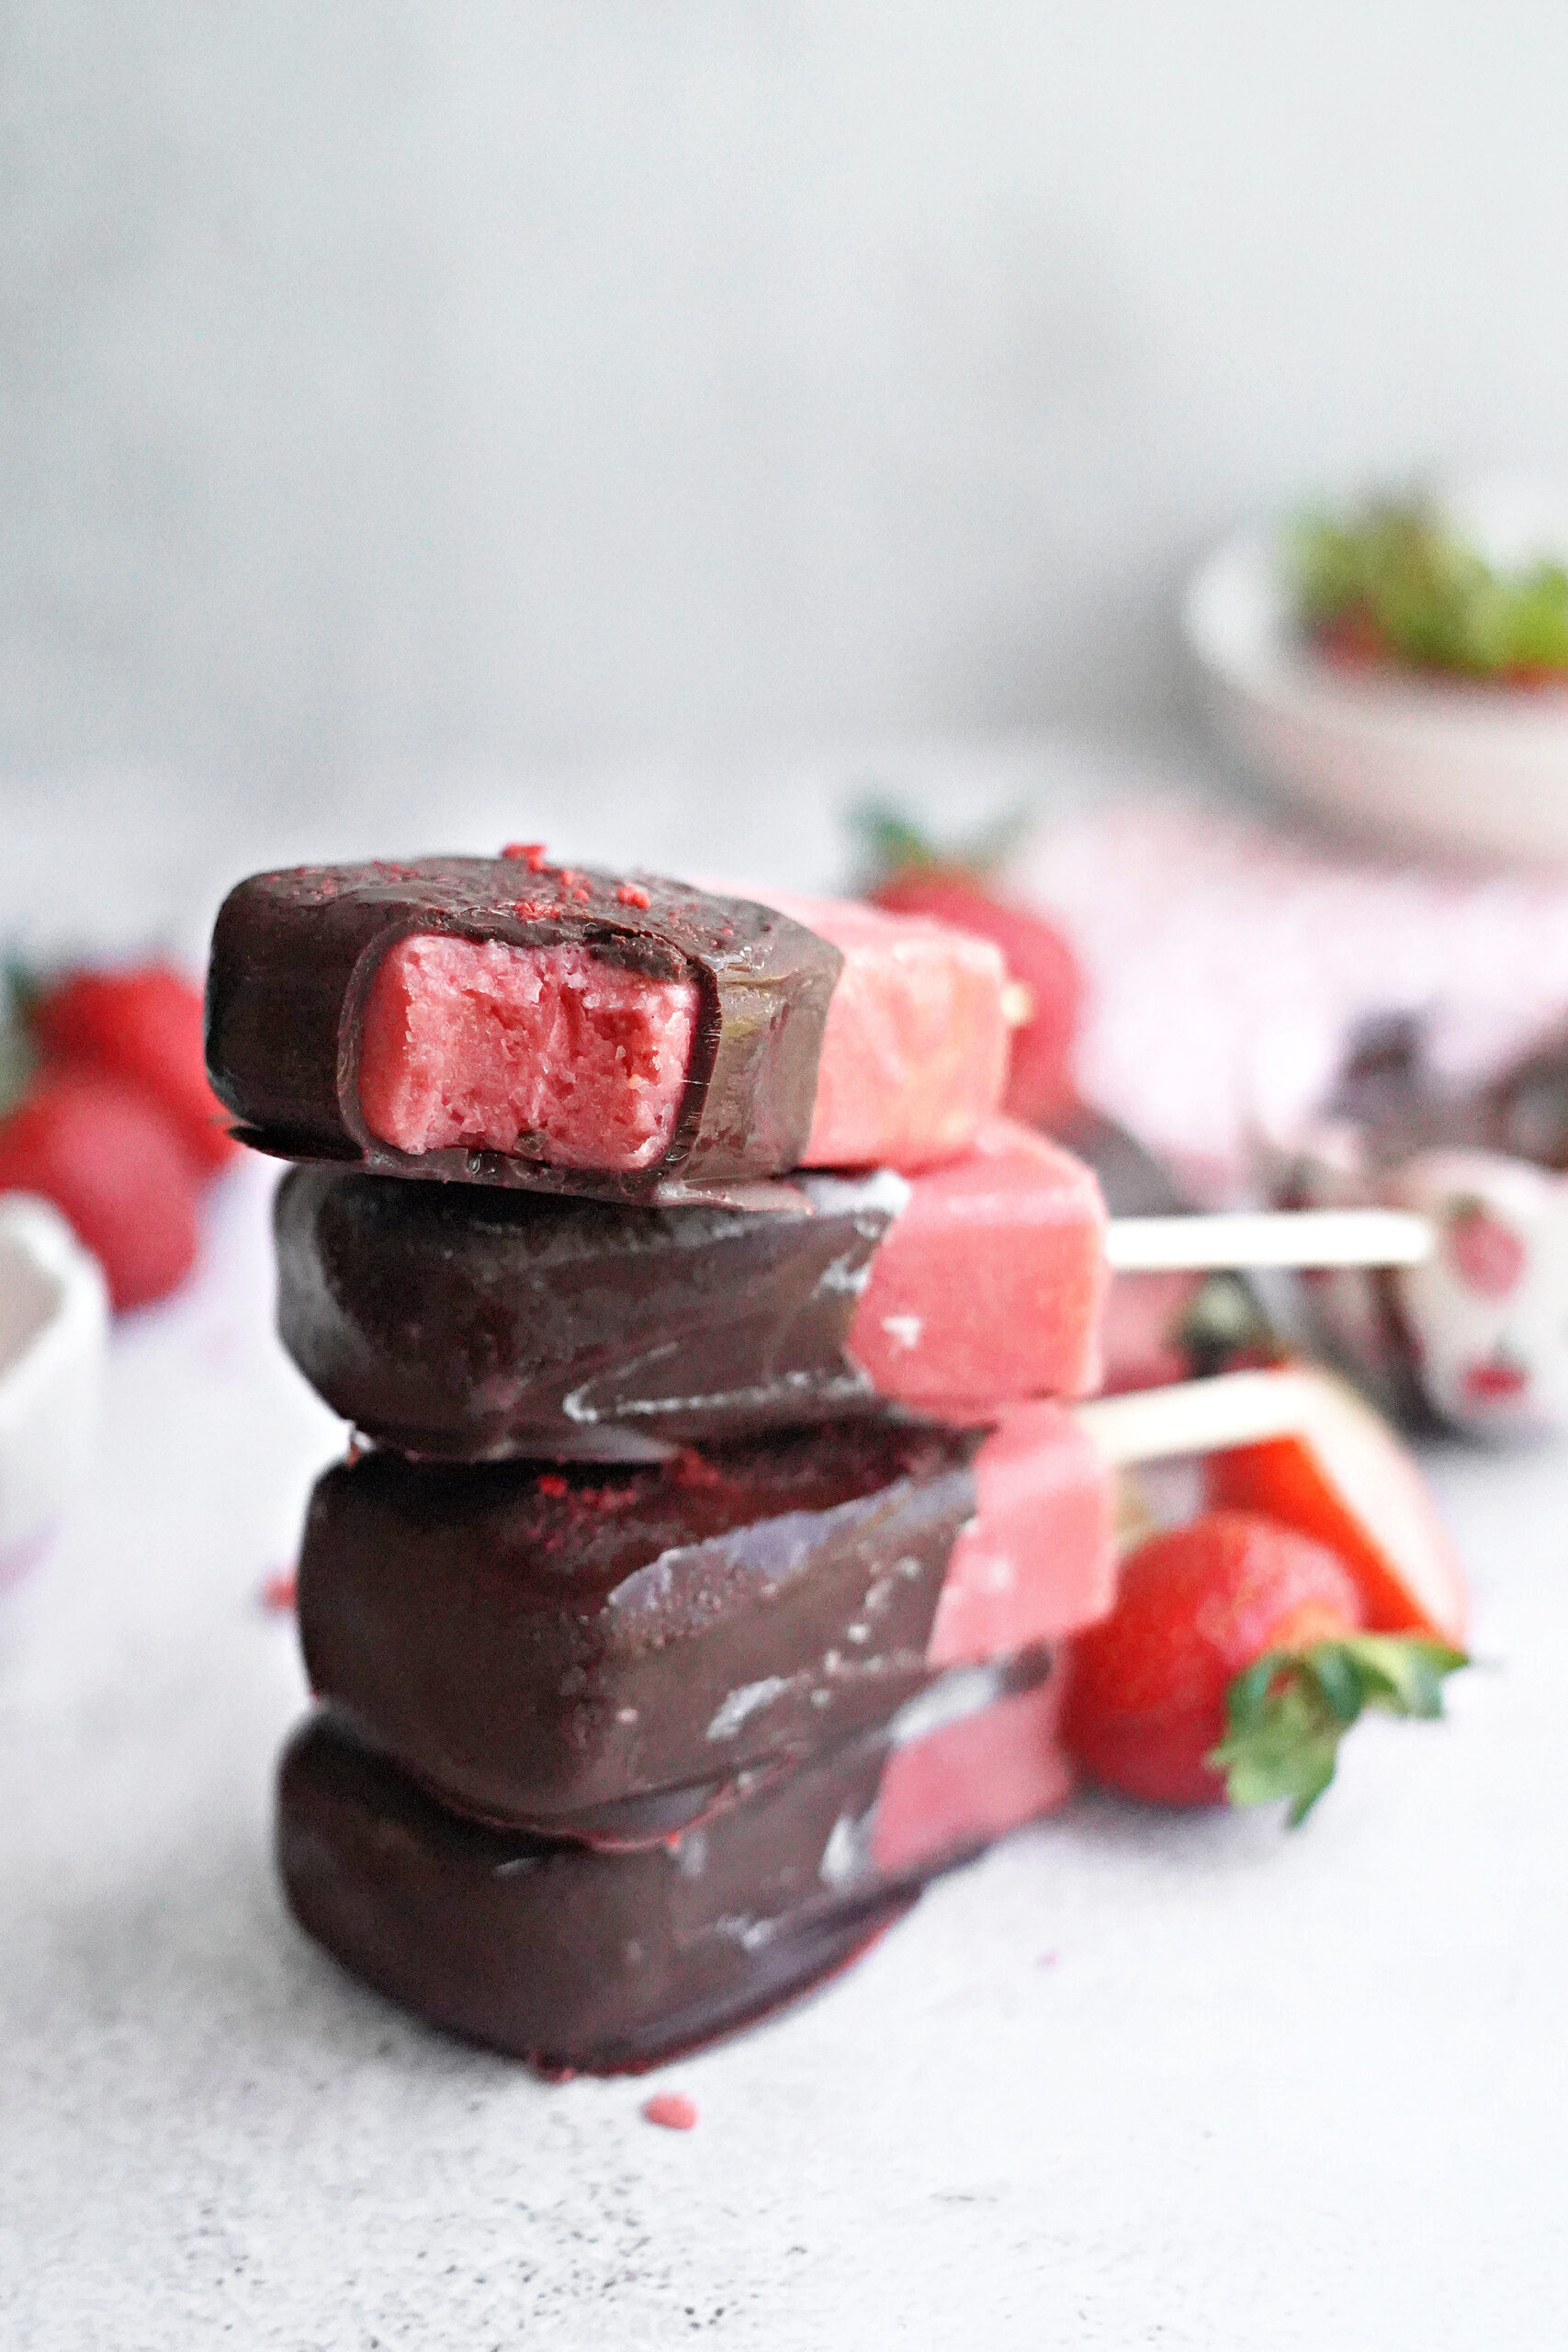
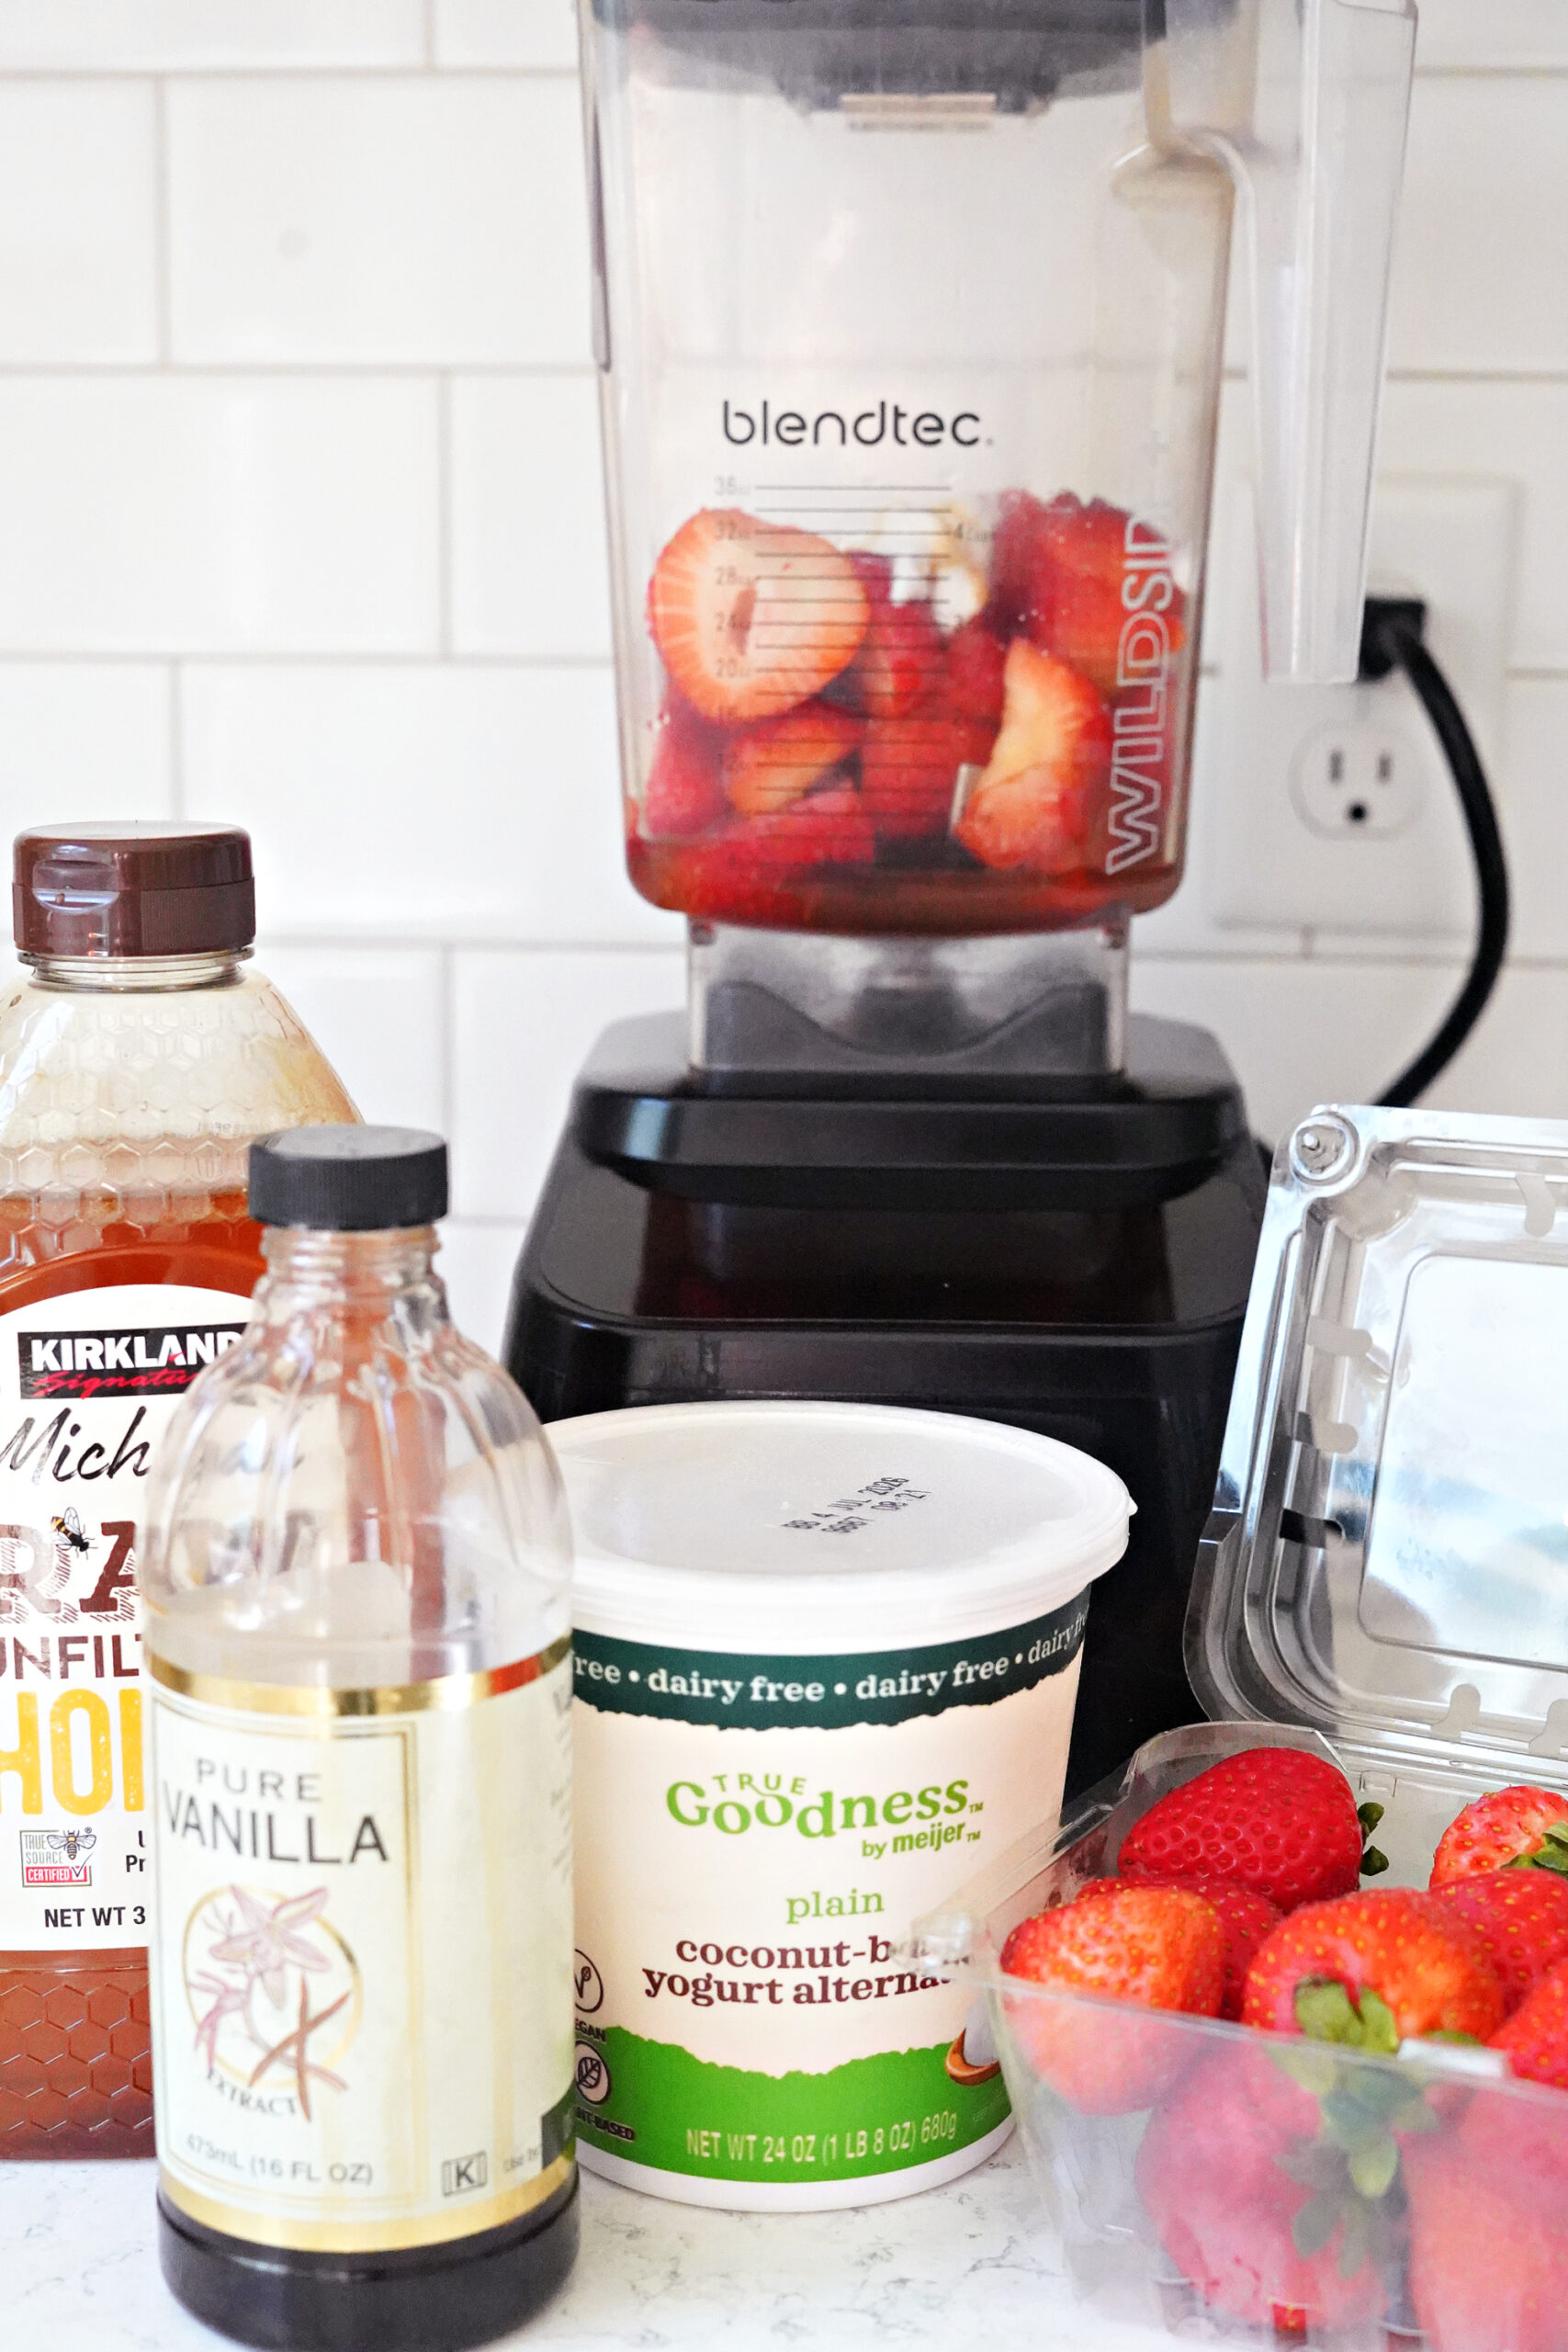
Even the Jonny Pops at the store have pretty simple ingredients. I followed their ingredient list, swapping the plain sugar for honey, and the cream for yogurt. I also left out the “natural flavors” ingredient, because strawberries, yogurt, honey, and vanilla make for a pretty flavorful popsicle! And dipping it in your favorite dark chocolate is even better!
The Method :: Making the strawberry popsicle mixture
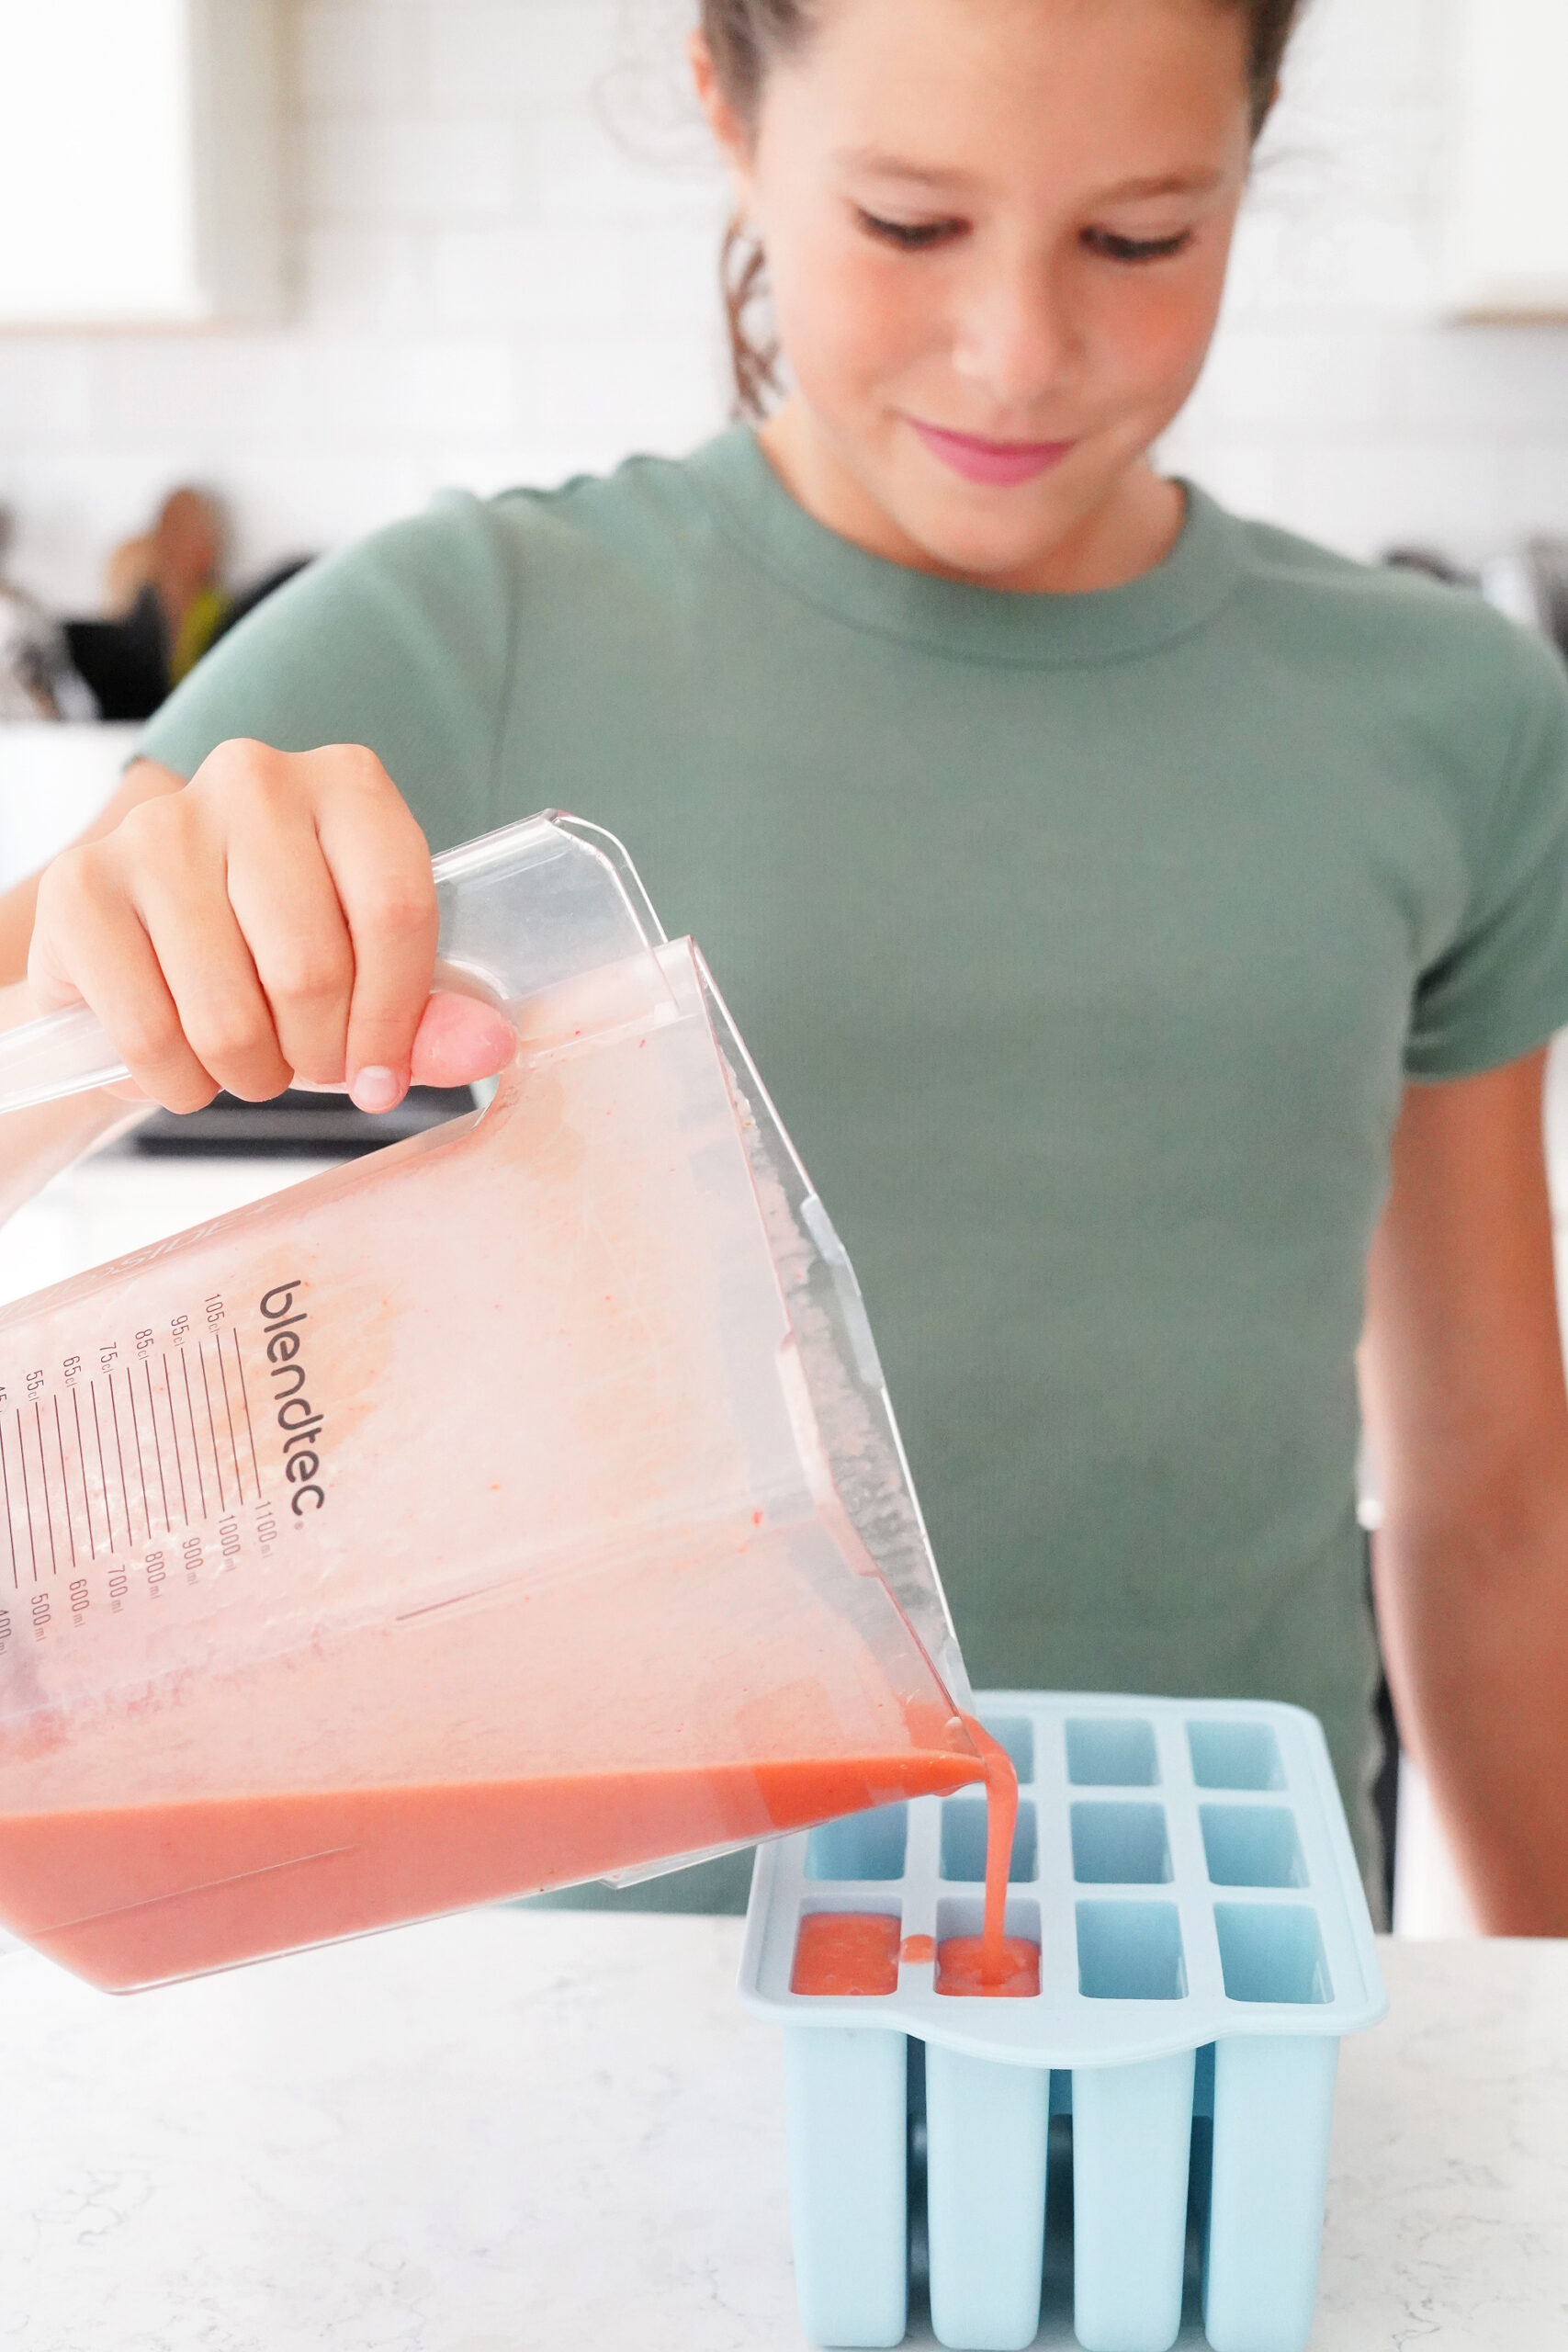
Get your popsicles started by blending the strawberry popsicle mixture. You can use a blender or food processor. The popsicle mixture can be poured into your popsicle mold right from the blender cup!
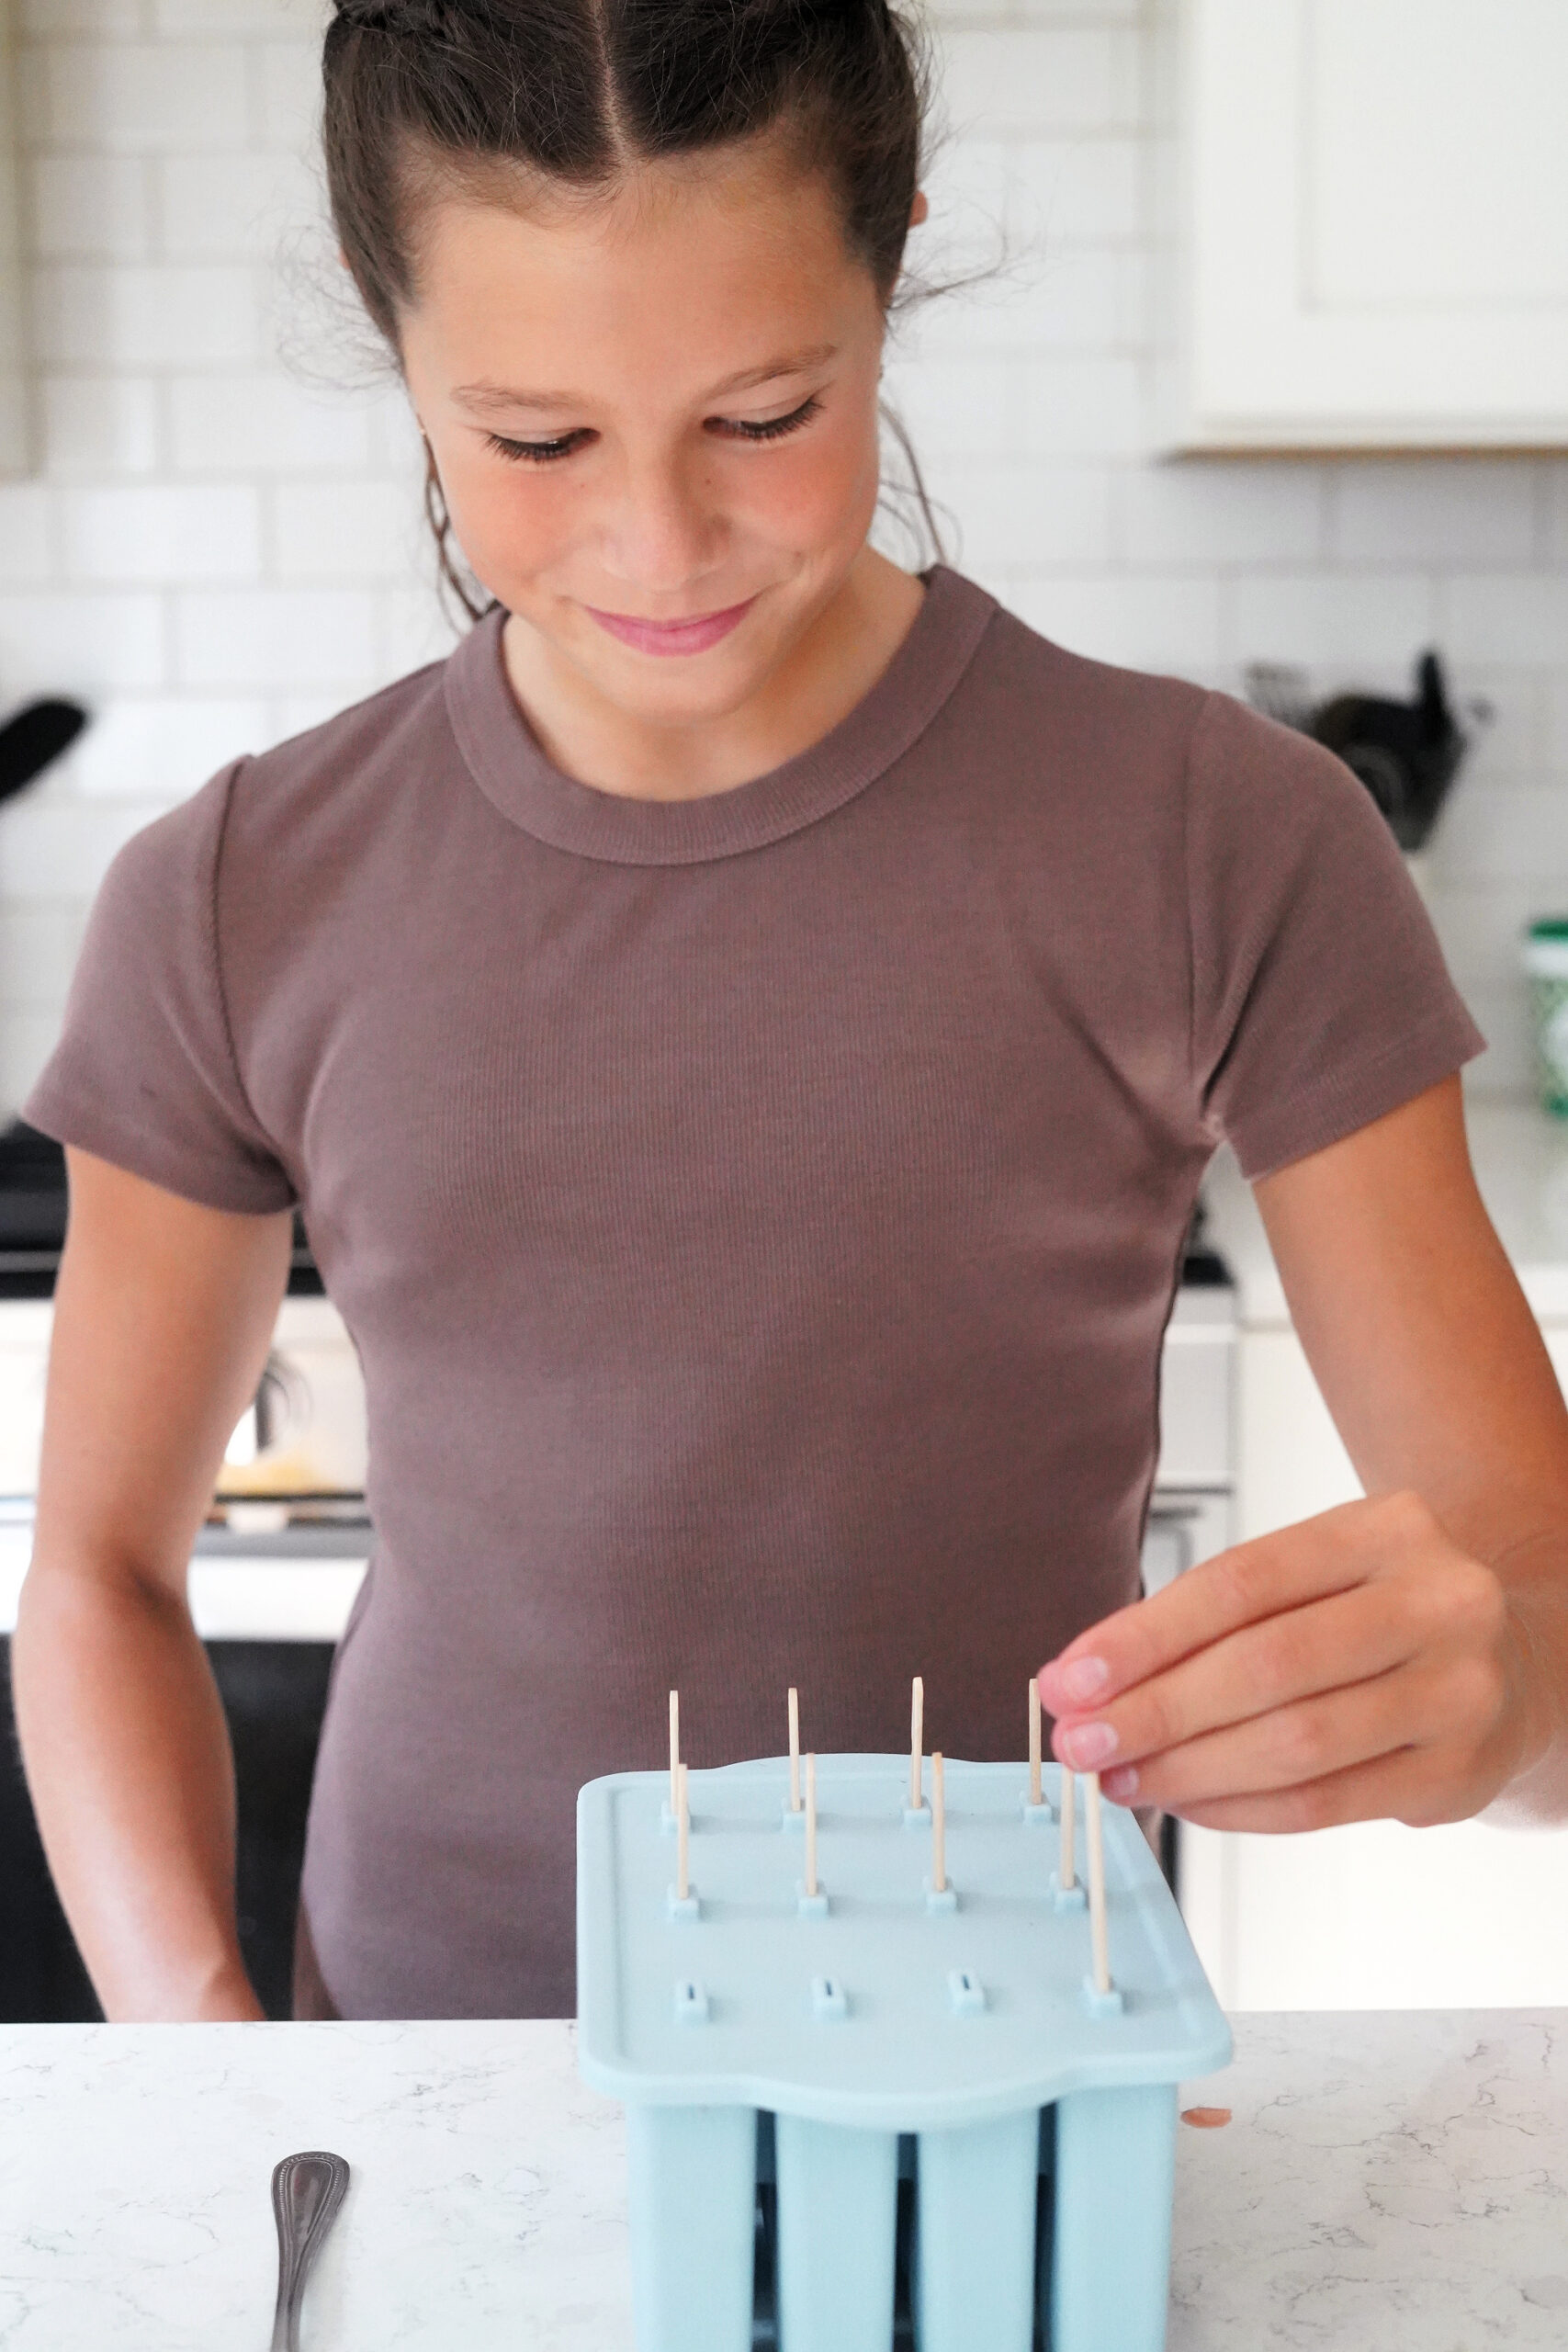
Tell me about the popsicle mold!
These silicone popsicle molds are a game changer if you like to make your own popsicles in the summer. The popsicles just peel right out without having to warm up the popsicle molds! Once your pour the popsicle mixture into the mold, add the popsicle sticks and freeze the strawberry popsicles for at least 4 hours before dipping them in the chocolate.
Onto the chocolate!
Grab up your favorite chocolate or chocolate chips and melt it with some coconut oil. The coconut oil helps the chocolate harden nicely, and gives the chocolate a pretty sheen after it hardens.
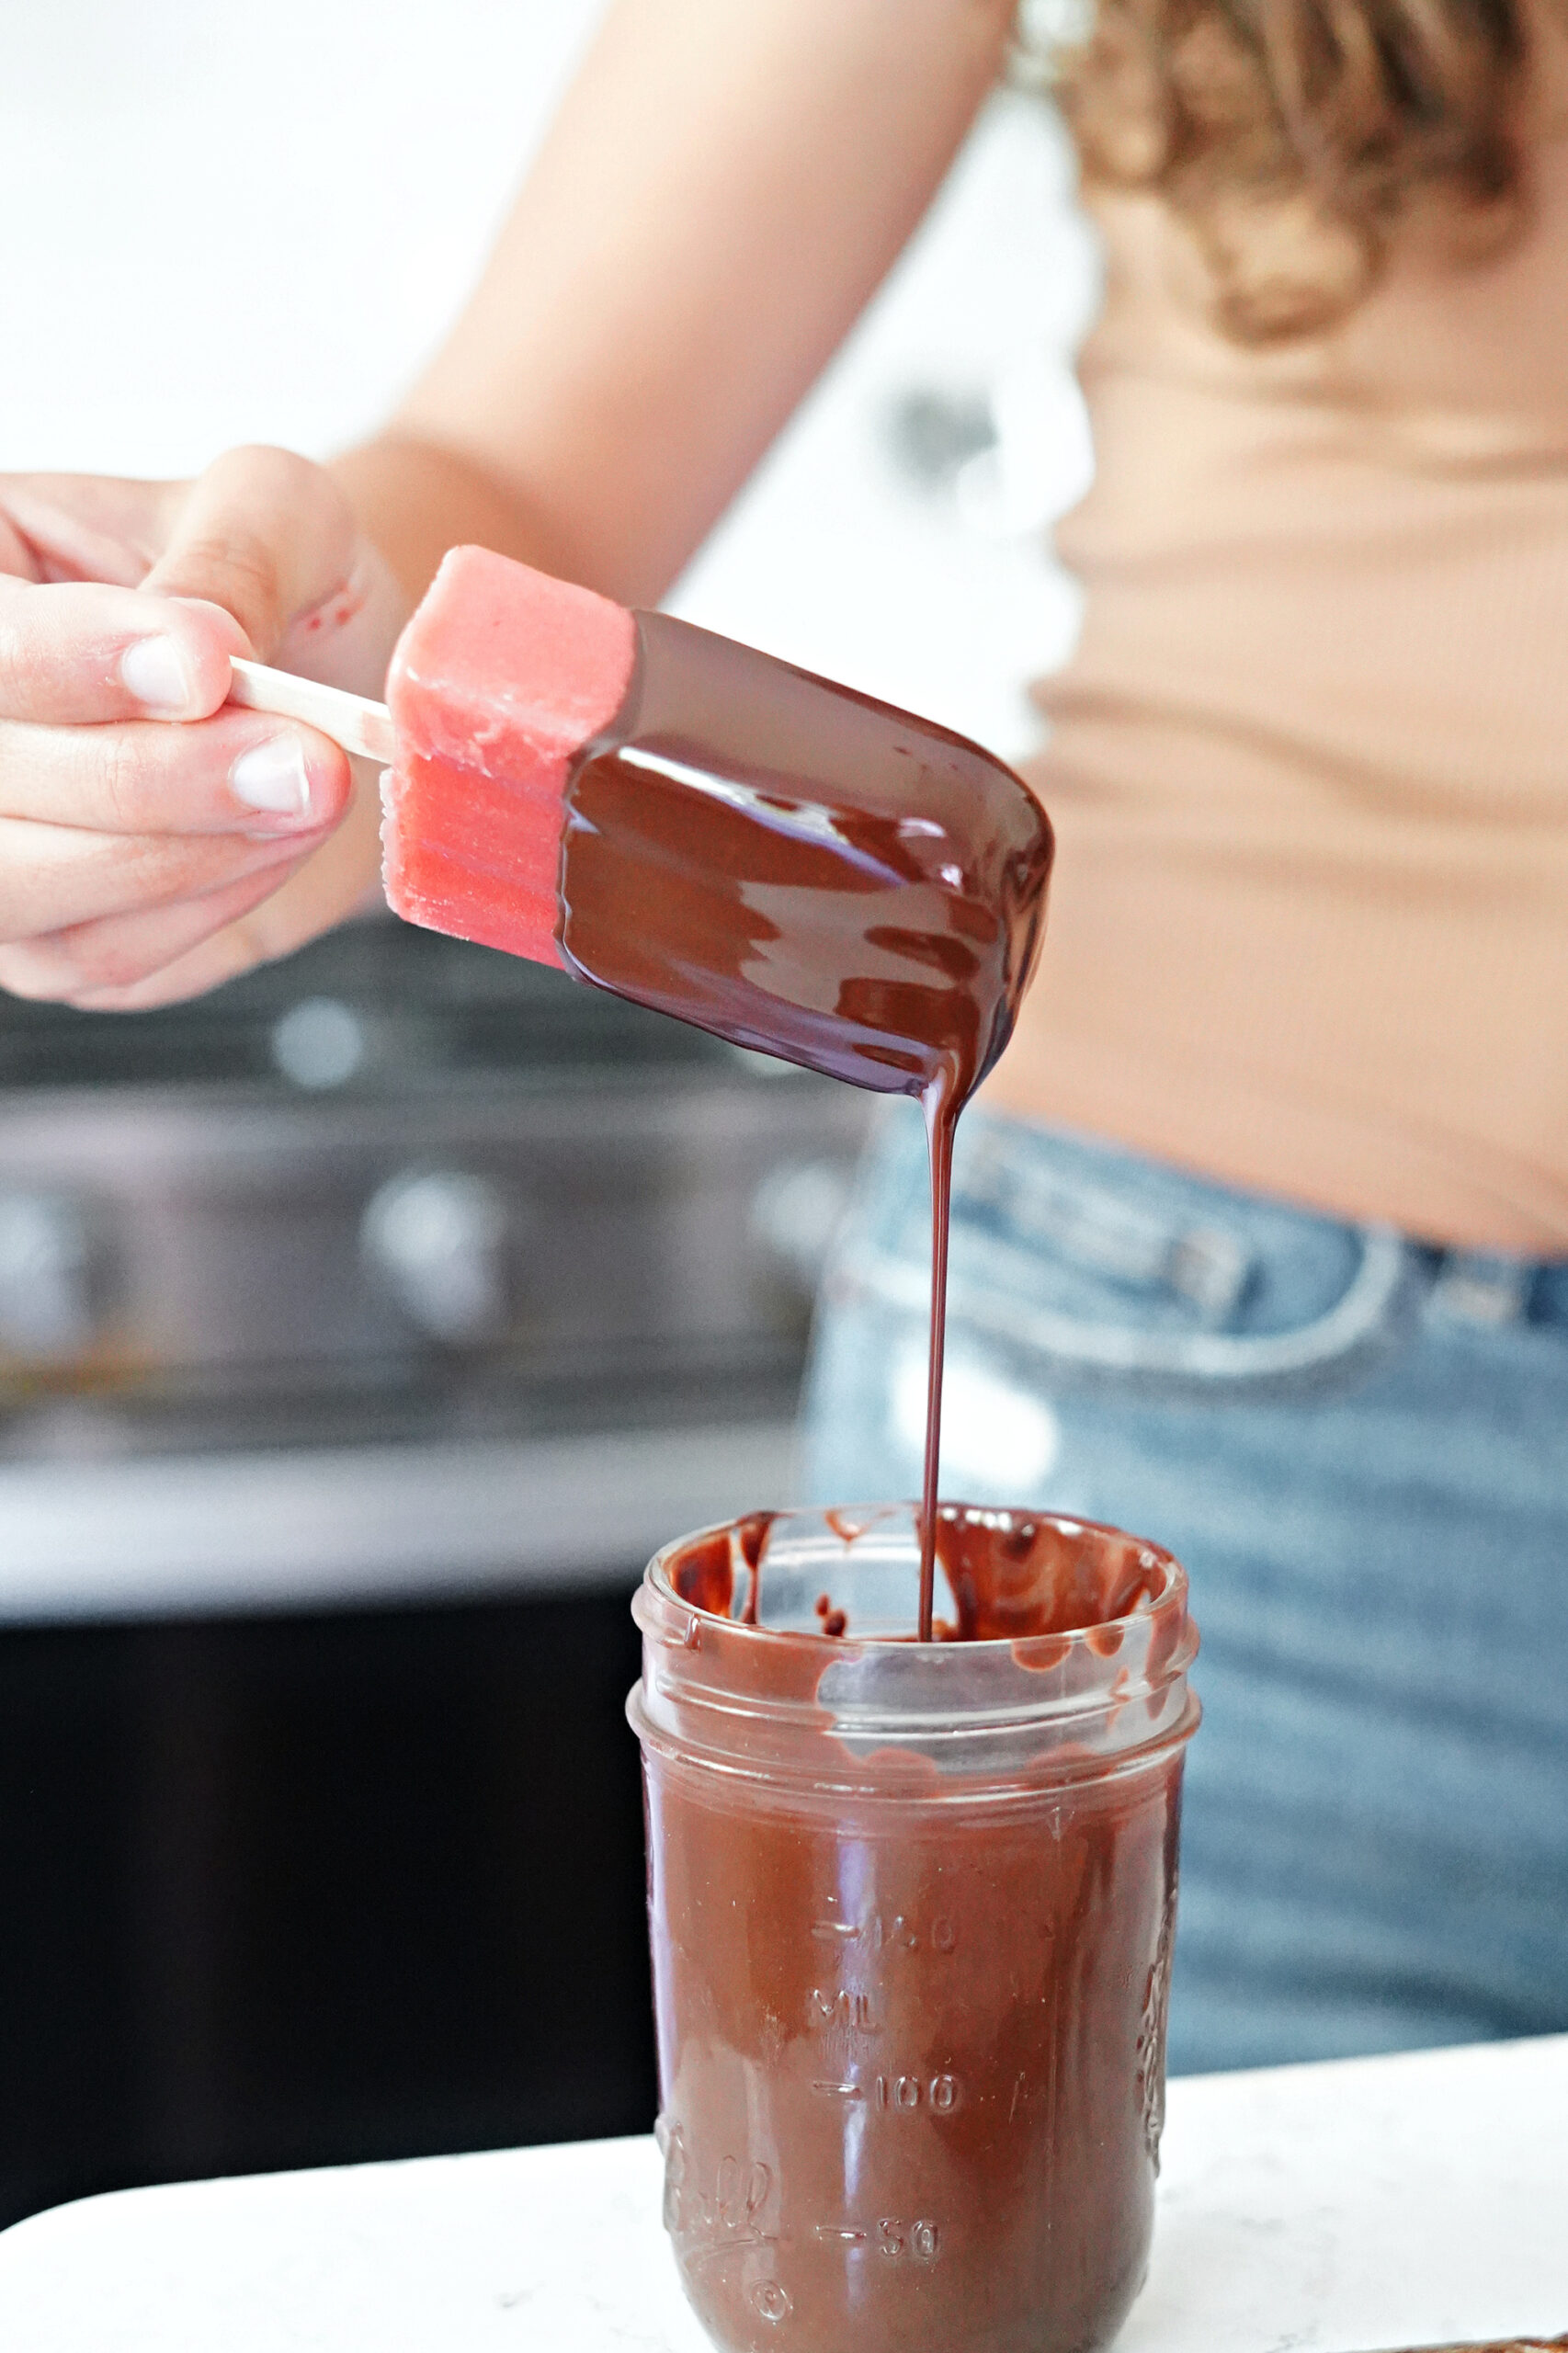
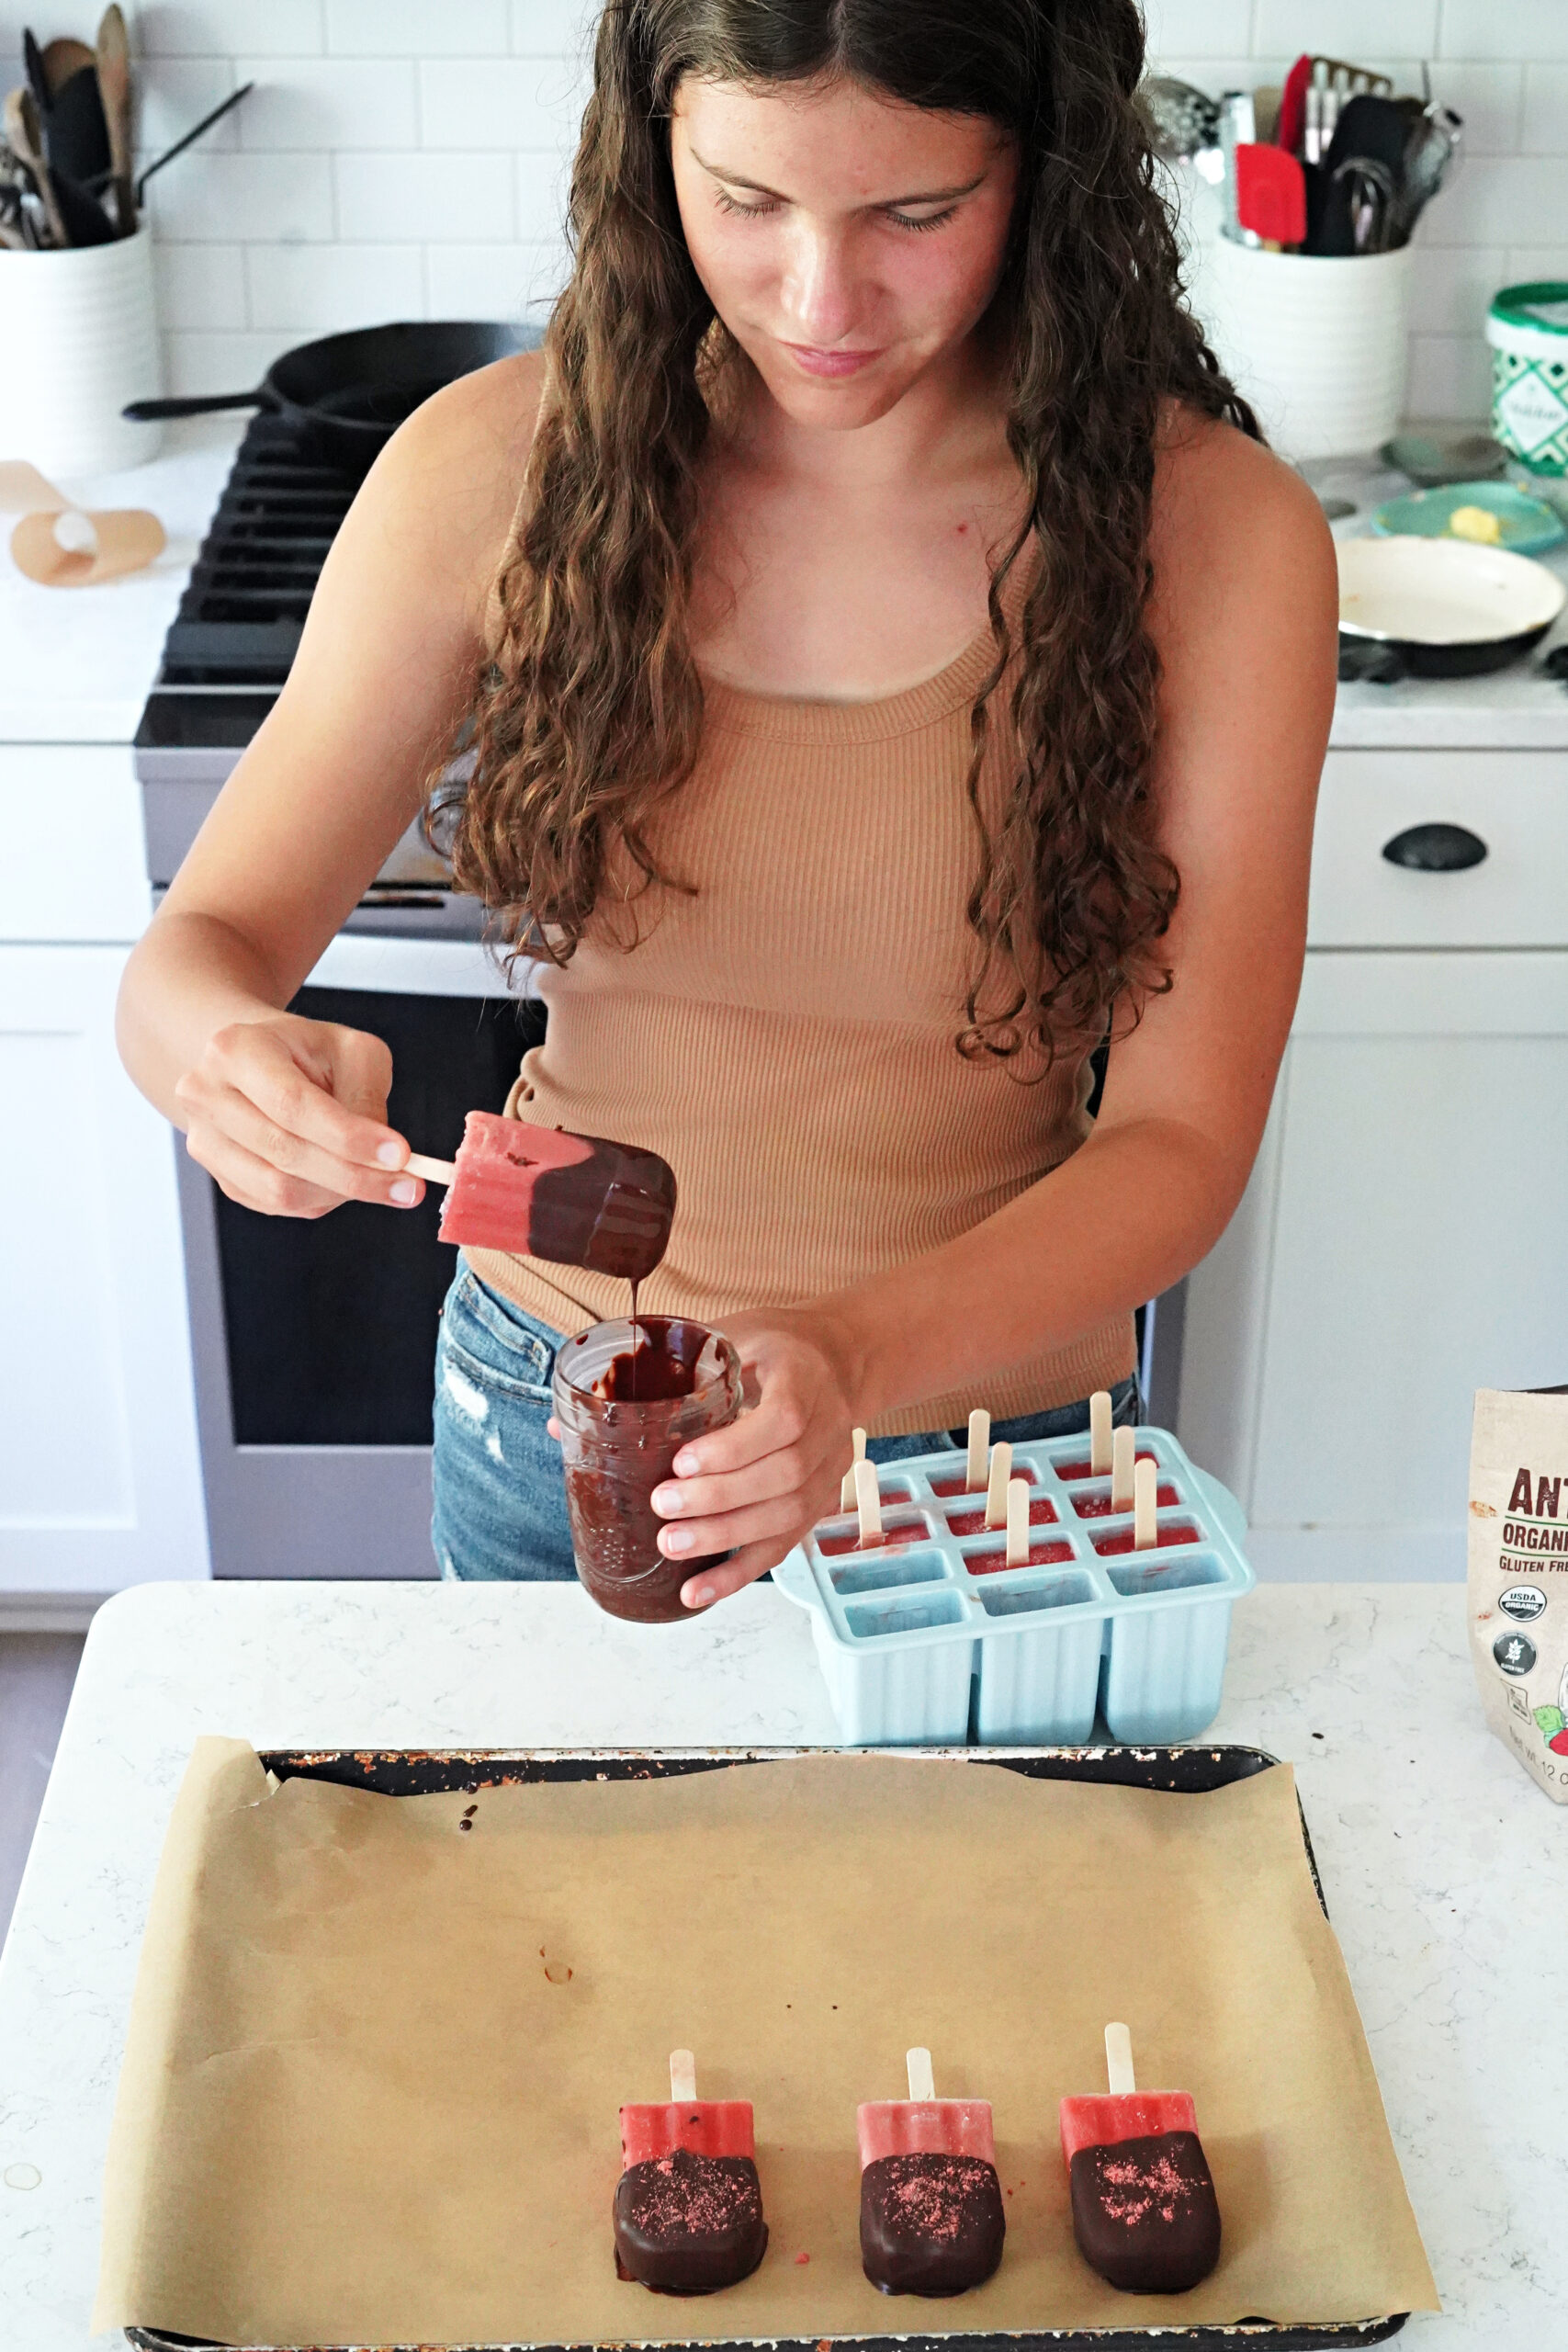
Tips for dipping the strawberry popsicles in the chocolate
Before dipping the strawberry popsicles, line a sheet pan with parchment paper. This will give you a non-stick surface to place the popsicles once they are dipped. I have found the chocolate dipping to be the easiest in a tall cup, versus trying to dip in the sauce pan. If you want to use the crushed freeze dried strawberries on the top of the chocolate, sprinkle it on before the chocolate hardens.
Storing the chocolate covered strawberry popsicles
I like to keep homemade popsicles in a large freezer bag in my freezer door so that the girls can grab and go just as easily as store bought popsicles. You can individually wrap them in plastic wrap or beeswax wrap if you want as well.
Summer fruit flavor variations!
One of the best parts about making your own popsicles is coming up with flavor combos that you like! And, getting to use the in season (budget saving!) fruit that is available where you live. If you live somewhere tropical and can get pineapples, mango, and passionfruit easily, I think all of those would be amazing dipped in chocolate! Here in Michigan, we are in the middle of strawberry season, and have cherries, blueberries, and raspberries coming soon! Any of those will work well in this recipe too.

Chocolate Covered Strawberry Popsicles
Ingredients
For the Strawberry Popsicles:
- 4 cups fresh strawberries de-stemmed
- 1/2 cup yogurt, Greek yogurt, or yogurt alternative
- 1/4 – 1/3 cup raw honey to taste See Notes
- 2 tsp vanilla extract
- 1/4 tsp sea salt
For the Chocolate Shell:
- 1 cup dark chocolate chips or chopped dark chocolate bar
- 2 tbsp coconut oil melted
- Optional crushed or blended freeze dried strawberries to sprinkle on the chocolate shell
Instructions
Make & Freeze the Strawberry Popsicles:
- Blend the strawberry popsicle ingredients in a blender until smooth.
- Pour the strawberry popsicle mixture into a popsicle mold, add the popsicle sticks, and freeze for at least 4 hours until solid.
Add the Chocolate Shell to the Popsicles:
- Line a sheet pan with unbleached parchment paper, so you can put popsicles on a non-stick surface after dipping them in the melted chocolate.
- Once the strawberry popsicles are frozen, melt the chocolate chips and coconut oil together in a small sauce pan. Use low heat to melt slowly, stirring continually to ensure the chocolate doesn't scorch.
- Dip the frozen popsicles in the melted chocolate and place them on the lined sheet pan. If using the freeze dried strawberries, sprinkle that on the melted chocolate before it hardens. (See Notes for tips on the chocolate dipping!)
- Once all of the popsicles are dipped, place the sheet pan into the freezer for a good 10 minutes to re-freeze everything before enjoying them.
Notes
- I do think that frozen strawberries will work if you do not have fresh. It might blend and pour easier if you let the strawberries thaw first though.
- These silicone popsicle molds are a game changer if you like to make your own popsicles in the summer. The popsicles just peel right out without having to warm up the popsicle molds!
- I found the chocolate dipping to be the easiest in a tall cup, versus trying to dip in the sauce pan, as pictured above.